Account Reconciliation Overview
Any General Ledger account can be configured to be listed on the Account Reconciliation list within
EBMS. Regular reconciliation of balance sheet accounts (assets & liabilities)
are very important to insure the integrity of your financial statements.
Account
Reconciliation Webinar
Reconciling
GL Accounts ERP Support Training
Complete the following steps to reconcile accounts:
Run the system utilities to verify that all EBMS totals are
validated by selecting option from the main EBMS menu. Review
[Main]
Utilities > Maintenance Utility for details on running this
utility and correcting any errors.
Go to
from the main EBMS menu to open the following Account
Reconciliation dialog as shown below
:
Show all the accounts that you wish to reconcile: Only the general
ledger accounts that have the Reconcile
option enabled will show on the Account
Reconciliation list as shown above. Review the Chart
of Accounts > Changing Account Information section for more
details on changing the Reconcile
option.
Click on the Post All Transactions
button to post all financial transactions. Review the Transactions
> Transactions Overview section for more details on posting
transactions.
Identify the account Classification
as shown in the reconciliation list shown above and following the
instructions within the appropriate classification.
NOTE: Verify that the account Classification
is correct if the balance does not reconcile in any of the steps below.
Review Account Classification including
Cash Flow, Reconcile, and 1099 format settings section for more classification
details.
Note that only the balance sheet accounts (assets, liability, and capital)
are listed below.
Account Classifications
The classification list below includes some of the following tags to
assist with reconciliation.
(Combine) vs (Separate): Some classifications are easier
to reconcile if you combine all the financial accounts with the same classification.
For example, EBMS allows the user to create multiple accounts receivable
accounts (AR) within the general ledger. The easiest way to
reconcile AR is to evaluate the totals of all AR accounts as a unit and
then evaluate individual accounts as a second step. Classification reconciliations
with the (Separate) tab may not benefit from a group evaluation.
Accounts Payable: (Combine)
Review the Reconcile A/P Balance section
within AP Transactions >
Accounts Payable Transactions for reconciliation details, balance
information, reports, and other details.
Accounts Receivable: (Combine)
Review the Reconcile A/R Balance section
within [Sales]
General Ledger Transactions > Accounts Receivable Transactions
for reconciliation details, balance information, reports, and other details.
Allowance for Uncontrollable A/R:
These accounts are not managed by the software and should be adjusted
by an accountant or financial staff. Launch the
report by selecting from the
main EBMS menu to summarized transactions by date.
Bank Account and Credit Card Account:
(Separate)
A bank account record should be reconciled regularly with the bank’s
statement. Review the Reconciling
a Bank Account section for specific details on reconciling a bank
account.
Capital Investments and Capital Withdrawals:
(Separate)
These accounts are not managed by the software and should be adjusted
by an accountant or financial consultant. Launch the
report by selecting from the
main EBMS menu to summarized transactions by date.
Cash: (Separate)
Review the Customer
Payments > Cash Accounts, Deposits, and Reconciling Cash section
within the Sales documentation for specific details on reconciling a cash
account.
Costs in Excess of Billings asset account, Billings in Excess of Costs
liability account, and the Work in Process Variance accounts (Combine)
All work in process (WIP) accounts should balance between all WIP accounts.
All WIP financial accounts should only contain transactions created by
the work in process utility. These accounts should not contain any transactions
created by any other source. EBMS will create transactions for either
the Job Complete transactions
or the Percent Complete WIP method.
Review Work in Process
> Processing Work in Process for details on these transactions.
Launch the report from
the menu to list all work
in process transactions.
Match the Year and Month report prompts to the reconcilable
period.

Compare the Billings in Excess and
the Costs in Excess totals to the general ledger balances.
Note that the Work in Process utility must be run after a job is completed
to update any work in process transactions.
Customer Down Payments (Combine)
Transactions are created to this account when a down payment is applied
to a sales order. Note that a payment may be recorded in EBMS as a down
payment if a payment was made to a sales invoice and then unprocessed
to a sales order. See the Customer
Payments > Down Payments section of the sales documentation for
details on this process.
Launch the report from the menu to list the customer down payment amounts.
Set the Down Payments
as of date on the report prompts to equal the end of the period that
is being reconciled. Enable the Show
G/L Reconciliation prompt and click Print
Preview to view the report as shown below:
Compare the Down Payments
total to the Balance of the G/L Account
as shown above.
Customer Gift Cards (Separate)
This liability account is used to record the value of gift cards
sold to customer until they are redeemed. Review the Payment
Card Processing > Gift Cards > Gift Card Overview section of
the sales documentation for gift card details.
- Compare the gift card liabilities from your gift card merchant
account with the balance on this liability account.
Customer Retainage (Combine)
Transactions are created for this account in the customer retainage
within the EBMS job costing tool. See Retainage
> Entering Customer Retainage of the job costing documentation
for details on this process.
Launch the report from the
menu.
Set the Calendar Month
and Fiscal Period on the report
prompts to equal the end of the period that is being reconciled.
Compare the Total Retainage
to the financial account Balance
as shown above.
Depreciable assets, Accumulated Depreciation,
Non-depreciable Asset, Intangible Asset, and Accumulated
Amortization (Separate)
The following steps are only needed if the EBMS deprecation (fixed asset)
module is present. Contact the accountant or financial staff that is responsible
for fixed assets and depreciation to reconcile these accounts.
Launch the from the main EBMS menu. Review the Account
Reconciliation > Verifying General Ledger Balances Utility
section for more details.
Verify that the Month
and Fiscal Year setting on
the utility matches the end of the last open fiscal period
.
The Accumulated Depreciation
and the Depreciable Assets
balances on the left column of the utility reflects the total of all
the depreciation financial accounts. If the either balance needs to
be adjusted be one of the following:
Verify that all deprecation asset accounts in the general
ledger are classified as Depreciable
Asset or Accumulated Depreciation.
Use a journal entry to adjust these depreciation balances.
Review the Journals >
Creating Journal Entries documentation.
If either Depreciable Items
balance on the right column is incorrect then run the following report
within :
Launch the Accumulated
Depreciation Reconciliation reports to list the detailed
Accumulated Depreciation
detail as shown below:
Compare the report Subtotal
for each GL Account Balance
with the total of all the assets within each account group. The
Accumulated Balance must
equal the GL account balance, the annual accumulated amount should
equal the depreciation credits for the same year, and the Previous Years amount should
equal the balance for the beginning of the year.
Launch the Depreciation
Reconciliation reports to list the detailed Accumulated
Depreciation detail as shown below:
Compare the report Subtotal
for each GL Account Balance
with the total of all the assets within each account group. The
Current Balance must equal
the GL account balance, the annual asset amount should equal the
amount of any assets purchased the same year, and the Previous
Years amount should equal the asset value balance for the
beginning of the year. The Difference
should always be zero. If not as shown in the 2nd asset GL group
above, an adjustment must be made.
Inventory and Other Inventory (Combine)
Review the for instructions
to properly manage both perpetual track count inventory and other inventory.
Investments (Separate)
Total value of the investment
- Compare the total value of the investment with the balance of each
asset account. Use a separate software to manage investment
accounts since EBMS does not contain an investment module. Launch
the by selecting from the main EBMS menu to summarized transactions
by date.
Loan Receivable (Separate)
Total value of the loans offered to others
- Compare the total principle amount of the loans given to individuals
or companies with the balance of each loan asset account. EBMS does
not contain a loan management module to amortize or process loans.
Launch the report by
selecting from the main
EBMS menu to summarized transactions by date.
Loans Payable (Separate)
Total value of loans borrowed from a financial institution
- Compare the total principle amount of all loans from financial
institutions, individuals, or companies with the balance of each loan
liability account. All loan payments should debit both the loan payment
account for the principle amount and an interest expense for the interest
payment. Launch the
report by selecting from
the main EBMS menu to summarized loan transactions by date.
Other Deferred Income: (Separate)
This account classification should be used only for unmanaged prepaid
sales. Any down payments managed by EBMS should use the Customer
Down Payment classification. Launch the
report by selecting from the
main EBMS menu to summarized transactions by date.
Other Payables: (Separate)
This account classification should be used only for payables besides
accounts payable, tax payables, loans payables, and any other payables
managed by EBMS. The Other Payable
classification requires manual reconciliation since EBMS does not reconcile
these accounts. Review the Accounts
Payable and Tax Payable
classification for reconciliation details for standard payable accounts.
Launch the report by selecting
from the main EBMS menu to
summarized transactions by date.
Other Prepaid Expenses:
This account classification should be used only for unmanaged prepaid
expenses. Any vendor down payments or prepaid expenses managed by EBMS
should use the Vendor Down Payment
classification. Launch the
report by selecting from the
main EBMS menu to summarized transactions by date.
Other Receivable: (Separate)
This account classification should be used only for receivables besides
accounts receivables, loans receivables, and any other receivables managed
by EBMS. The Other Receivables
classification requires manual reconciliation since EBMS does not reconcile
these accounts. Review the Accounts
Receivable and Loans Receivable
classifications for reconciliation details for standard payable accounts.
Launch the report by selecting
from the main EBMS menu to
summarized transactions by date.
Payroll Payable: (Combine)
The payroll payable account is somewhat simple to reconcile.
The EBMS financial system should only have a single account classified
as Payroll Payable. Open the
general ledger account as shown below:
The YTD Balance should
equal zero for the current payroll month as well as any future months.
Since the payroll payable account holds the labor that has been performed
and not paid, the Payroll Payable
balance should be zero when the payroll is completed processed. Verify
that no detail lines have been processed for any open pay periods
if this value is not zero. Review the Processing
Payroll > Process Detail Lines Before Payroll is Processed
section of the labor documentation for more details on processing
detail lines or the payroll payable account.
Review payroll payable transaction report options by selecting from the main report menu.
Payroll Tax/Deduction (Separate)
The important step of reconciling individual payroll tax and deduction
liability accounts depends on the payment pay frequency. Reconcile tax
and deduction accounts frequently because of the volume of transactions
that are posted to these accounts. Review [Labor]
Taxes and Deductions > Adding New Taxes and Deductions for setup
instructions. See reconciliation instructions below:
- Launch the report by selecting
from the main EBMS menu.
Note the Debit,
and Credit summary values
as well as a running Balance
amount for each Date as shown
below:
- An alterative way to review monthly values as well as a convenient
way to drill down on each total is to open a liability tax or deduction
account from the
list as shown below:
- The Credit column records
the amount of tax deducted. Since the tax shown above is paid at the
end of each quarter, the January debit amount equals the beginning
balance, and the April payment equals the YTD balance at the end of
March. Use the
reports to list the detailed transactions for a specific month.
Retained Earnings (Separate)
This important setting is used to record the accumulated net income
that is retained by the company. This cooperate term should be used to
classify the account that reflects the net income/loss for the current
fiscal year. The Retained Earnings
account is used within EBMS to record the accumulated net income of a
sole proprietor, the temporary account for a partnership, or the retained
earnings for a corporation. Multiple Retained
Earnings accounts may be used to record funds within a nonprofit
organization. Review the Financials
> Fund Accounts > Creating Fund Accounts section for details
on funds.
Open a financial account classified as Retained
Earnings within the Financials
> Chart of Accounts list launched from the EBMS menu.
Click on the Income / Expense
tab as shown below:
Each income and expense account that has the current retained
earnings account set in the Advanced
tab will be shown on this list. Note that the chart of accounts within
most companies have a single account classified as Retained
Earnings so all P&L accounts would be listed on this account.
Review the advanced tab section of the Chart
of Accounts > Changing Account Information documentation for
details on viewing or changing the Retained Earnings Account setting
within an income or expense account.
Note that the Net Profit /
Loss amount at year end will be added to the beginning balance
of the following year. Use the P&L statement reports (
from the main EBMS menu) to view the net profit and loss for past
years.
Sales Tax: (Separate)
EBMS contains many powerful tools to automate the sales tax calculation
as well as organize the liability accounts to record the amount of sales
tax collected and payments. Review the Sales
Tax > Establishing Sales Tax Rates section of the sales documentation
for instructions to setup and view liability accounts.
The liability accounts classified as Sales
Tax should be reconciled each time a sales tax payment is made.
Review the Sales
Tax > Paying Sales Tax section of the sales documentation for details.
Salesperson Commission (Separate)
Unpaid salesperson commission is recorded in a liability account by
the commission module until the salesperson is paid. Review the Sales
Person Commission > Sales Person Commission Overview section of
the sales documentation for details.
Vendor Down Payments (Combine)
Transactions are created to this account when a down payment is applied
to a purchase order. Note that a payment may be recorded in EBMS as a
down payment if a payment was made to an expense invoice and then unprocessed
to a purchase order. See Vendor
Payments > Invoice or Purchase Order Down Payments for details
on this process.
Launch the report from the menu to list the down payment amounts.
Enable the Show G/L Reconciliation
prompt and click Print Preview
to view the report as shown below:
Compare the Paid total
to the asset account Balance
as shown above.
Vendor Retainage: (Separate)
Unlike customer retainage, vendor retainage is not managed by the EBMS
job costing system. These accounts should be adjusted by an accountant
or financial staff.
Review the Account Classification
including Cash Flow, Reconcile, and 1099 format settings section for
instructions to review the account Classification
options.
The Account Reconciliation list
is also a convenient way to review account balances. Click on the Post All Transactions button in
the lower left hand corner to update balances since transactions do not
show on the reconciliation tabs until they have been posted to the general
ledger.
Steps for Reconciling an Account
Select an account and click on the
Properties button in the lower
right hand corner to open the following dialog.
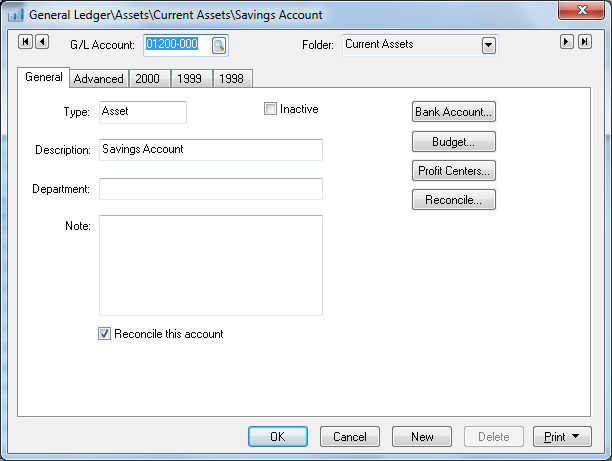
The Reconcile this account option
must be enabled to include an account on the Account
Reconciliation list.
Click on the Reconcile button
to open the Account Reconciliation
dialog from the Account Reconciliation
list, as shown below:
NOTE:
The last two tab labels will change depending on what type of account
is being reconciled. The naming of the two tabs is based on the account
classification.
See the following for a breakdown of how the
tabs are named based on account classification.
Bank Accounts
will call the tabs Deposits
and Checks.
Cash Accounts
will call the tabs Cash In
and Cash Out.
Sales Tax
Accounts will call the tabs Payments
and Collected.
Payroll Taxes
Payable Accounts will call the tabs Payments
and Withheld.
Accounts with no classification will call the tabs
Debit and Credit.
Statement settings
Set the account Ending Date to reflect the date that
you wish to reconcile.
For example, if you are reconciling a bank account, enter the bank
statement date in the Statement Ending Date field. All transactions
with a date more recent than the Account Ending
Date will be hidden and not be displayed in either tab. If
you wish to display all transactions, set the date to the last date
of the fiscal year. The Account Balance
total reflects the general ledger balance as of the reconciliation
date.
The Beginning Balance should
be copied from the previous reconciliation. Right click on the
Beginning Balance entry and disable the
Read Only option to enter a beginning balance
amount.

Enter the Account Ending
Balance as of the ending date entered above.
For example, if you are reconciling a cash account, enter the total
monies that you have collected but not deposited including cash, personal
checks and credit card payments. To reconcile a payroll tax withheld
general ledger account, enter zero into the statement entry field.
The Account Ending Balance in most situations will not match the Statement
Ending Balance since some transactions may be outstanding. The main
purpose of this window is to reconcile the general ledger balance
with the statement balance by identifying all outstanding transactions.
Go to the second tab (Cash
In, in the example above) and notice the list of debit transactions.
To sort the list of transactions by date, first drag the scroll bar
to the top and click on the Date
column heading. Click on the heading a second time if the dates are
listed in descending order.
The first column on the list is labeled Status. This is a check-mark
column that identifies the transactions that are NOT outstanding
with a check mark.
The total on the bottom right side of the tab
is the sum of all the outstanding transactions. As the transactions
are checked on, the Outstanding Total decreases.
Use the Unselect All and the Select
All buttons to mark the entire list.
Go to the third tab (Cash
Out in the example above) and notice the list of checks. Transactions
need to be switched in the Status
column the same way as the previous tab. As transactions are checked,
the totals on the bottom of the window will be changed.
Explanation of Figures
This amount must be zero indicating that the account reconciles before
processing can be completed. The Process
button will be disabled until the account is reconciled.
A transaction can be voided with the Void
button. Not all transactions can be voided from this window. Typically,
only checks and deposits can be voided.
The Process button will remove
all the marked transactions. The process performs the following items:
Removes all transactions turned ON, leaving only the
outstanding transactions.
The User, Date,
and Time information in the
Last Reconcile area of the
Controls tab is updated.
Click the Source button to view
the source of a transaction. The system will display the source of the
transaction by opening the invoice, journal, payment, or other appropriate
window.
Click the Adjustments button
to insert adjustment transactions directly into the tab. Review General
Adjustments for more details on general adjustments.
The Print button works like
other print buttons and can have reports linked to it to select or reports
can be added by selecting Add Report.
The Wizard button will list
the available wizards for this window and account. See the Reconciling
Checking Account section for more details.