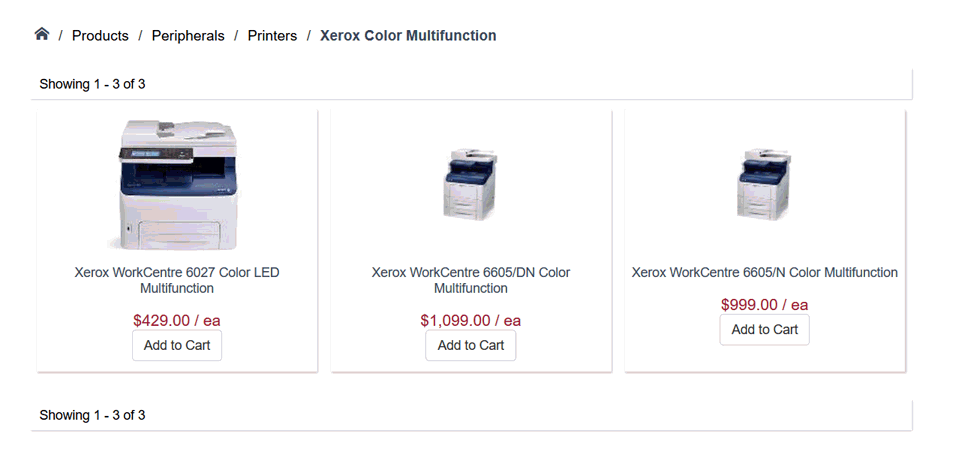
This section will explain the steps required to add products to the e-commerce website. Three items in a sub folder group are shown below:
Complete the following steps to add product information within a folder. Review the Creating Website Content > Creating Inventory Groups section for details on creating product groups before individual items are inserted within the groups.
Open an inventory item record.

Open the website tab of the inventory item as shown
below:
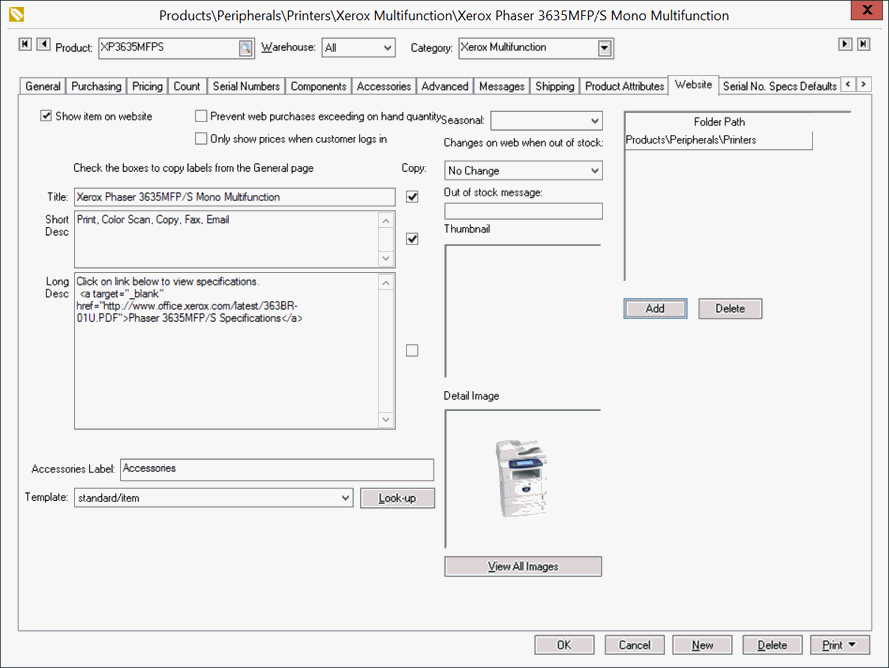
Enable the Show item on website to display the item on the web. Disable this option to remove the item from the site.
Enable the Only show prices when customer logs in option only if the price and add to cart is hidden unless a customer logs into the site before placing the order. This option hides the price of all customers that browse the site without logging into the site with a user name and password. This option can be ignored if the user is forced to log into the website. Review the Configuring the Shopping Cart > Customer Accounts section for more details on customer login options.
Enable the Prevent web purchases exceeding on hand quantity setting to limit the number of purchases to the number of items available. This available count can be viewed from the Count tab > Summary > Available on each item. If the web customer tries to purchase more than is available, the website will display a message and only allow the user to purchase the available amount. Review the Manage Available Inventory section for more details.
The Seasonal setting is used to remove the Add to Cart button and replace it with a message. This option can be used to display items that are seasonal but only allow the user to purchase the products between two dates. This option can also be used to always restrict items from being sold on the e-commerce shopping cart. Review the Seasonal Items section for more details on this option.
The Changes on web
when out of stock option controls the affect of the inventory
item on the website when the inventory stock is low. This option should
be set to No Change on all
service and no count items since this option is based on the inventory
stock. Review the Manage
Available Inventory section for more details.
Tip: Use the filter down method to change the these settings for an
entire group of items. Review the Standard
Features > Change Defaults, Filter Down, and Globally Change Data
section within the main EBMS manual for more details on setting the
defaults for items or changing a range of items at the same time.
Items can be shown in multiple product groups by adding Folder Path locations. Select Add and choose an additional folder group location to display the item.
Enter the product label into the Title entry. The system will use the first description on the General tab if the title entry is blank.
Enter an optional Short Description of the item. The system will show the 2nd description line found within the General tab if the Short Description is blank. The Short Description is the text shown under the title in the website example shown below. This text should not be lengthy.
Enter an optional Long
Description. The system will use the 3rd line of description
within the General tab if
the Long Description is blank.
The long description is displayed within the item details page of
the product.
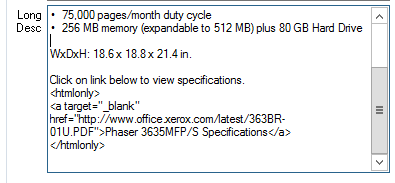
Pure html can be added to the Short
Description and Long Description
by including the html between the <htmlonly> and </htmlonly>tags.
Set the template option to /standard/item unless the item is a serialized item, or has components. Review the Template Settings section of this manual for more details on other item templates.
Insert up to twelve Detail Images of the product into the Detail Image block. The Thumbnail image will be created from the detail image if the Thumbnail setting is blank. Review Creating Website Content > Importing and Exporting for more details on inserting the Thumbnail or Detail Image graphics.
Review the Advanced Features > Displaying Component Options on the Web section for more details on the Component settings. Click OK to save the settings for the inventory item.
Repeat steps for each inventory item that you wish to display on the website.
The following details web page is displayed if the user clicks on the item Details link on the list.
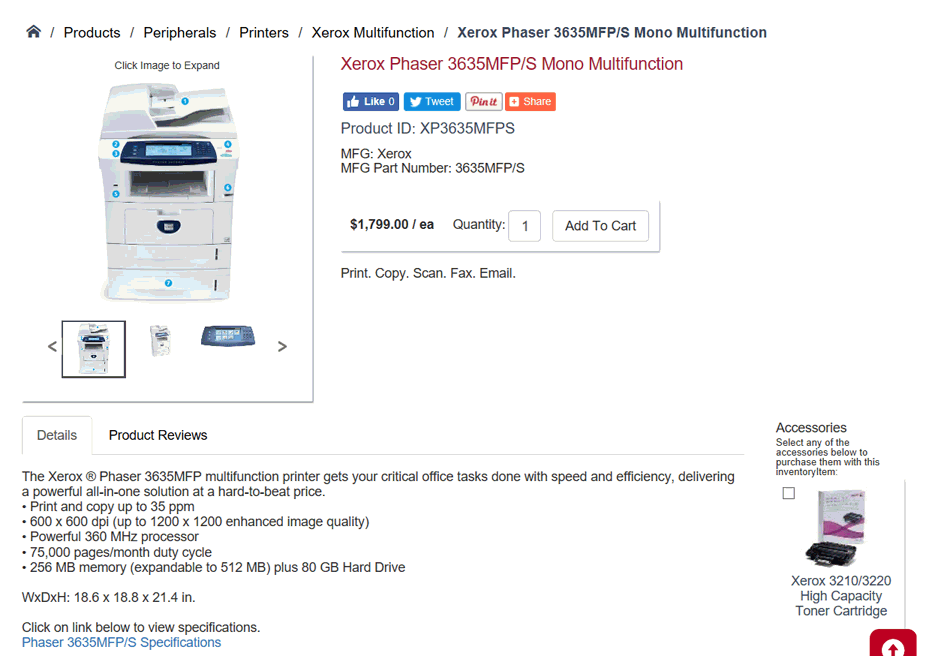
The product Image(s) are displayed on the upper left side of the detail template. These image(s) can be displayed in it;s actual size by clicking on the Enlarge Photo link below the image.
The product's inventory ID and product Title is displayed on the upper right corner of the detail template. The manufacturer - MFG is displayed below the item Title.
Hyper-links can be associated with both the product ID and the MFG code. Complete the following steps to associate website URL addresses to either the product or the manufacturer:
Open the inventory item record by selecting Inventory > Product Catalog from the main EBMS menu.
Click on the General
tab. as shown below:
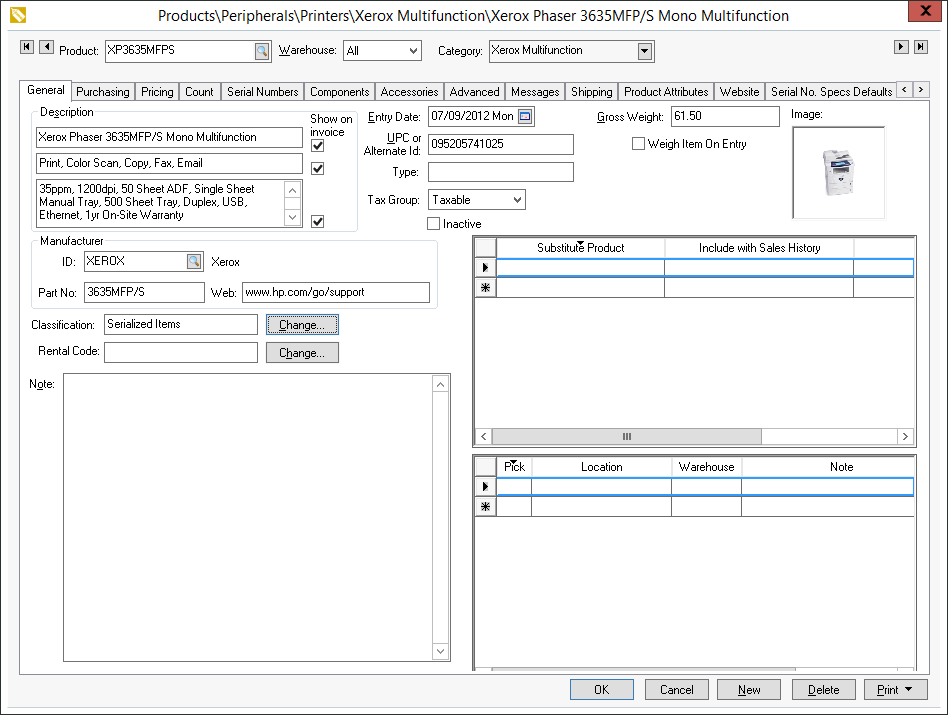
The Web setting will be linked to the hyper-link associated with the product ID.
Right click on the Manufacturer
ID and select Lookup
from the context menu to open the following dialog:
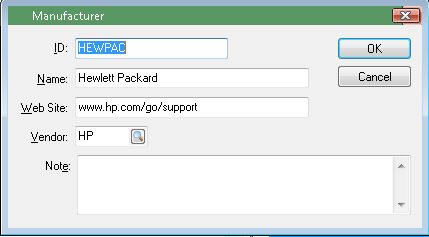
Enter the manufacturer's Web Site URL to associate a hyper-link to the MFG code on the website. The Manufacturer information can be hidden from the website in Sales > Website > Inventory Settings tab. Review the Getting Started section for more details.
Return to the web page as shown below:

The pricing, unit of measure, and Add to Cart button will appear on the right side of the item template. The pricing and Add to Cart button can be suppressed using one of the following methods:
Open the inventory record and click on the Website tab. Enable the Only show prices when customer logs in option to suppress the price until a customer logs in. Review the Configuring the Shopping Cart > Customer Accounts section for more details on the customer login process.
Set the Seasonal Item setting of the item to suppress the Add to Cart button. Review the Seasonal Items section for more details on this option.
The Short Description will appear under the price to the right of the image.
The Long Description is displayed below the image and other information. Review the Advanced Features > Links and Associations section for more details on creating links within a description.
Accessories can be displayed at the lower part of the page. Review the Displaying Accessories section for details.
Product Reviews can be attached to each item. See Product Reviews for more information.
Review the Configuring the Shopping Cart > Shopping Cart section for more details on the Add to Cart buttons.