The rental service codes contain the pricing and rental description and are used within the rental contract. A separate rental service code should be created for each rental service that is offered. For example, a rental service code should be created for each type of trailer that is rented because of varied pricing. But a single code may be created for a 20 foot trailer rental even though the company may be renting 6 different but similar 20 foot trailers.
Complete the following steps to create a service rental code item:
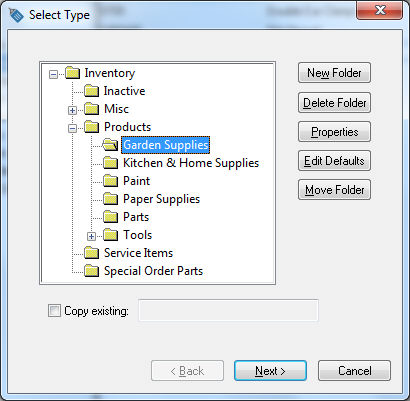
Open the inventory item list by selecting
from the main Inventory menu.Select
Highlight
the folder in which you want to place the new inventory item and click
Next. Create subfolders for
groups of equipment as shown above. These groups will enhance the
ability of the user to find equipment quickly within the rental contract.
Review Inventory
Categories for Rental Items for more details on changing the defaults
for these sub-categories.
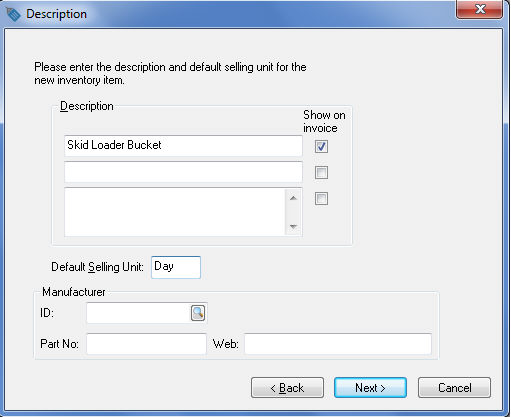
Enter
a Description of the rental
item. The Default Selling Unit
must default to Day. Review
the Tracking Counts >
Unit of Measure section of the Inventory manual for more details
on the Default Selling Unit.
Click the Next button to continue
to the Information page.
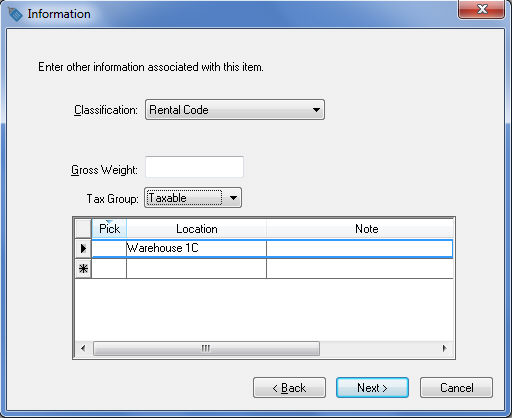
All rental service items must have the Classification set to Rental Code.
Ignore the Gross Weight entry for rental service codes.
You may wish to enter the location of the rental item. This optional field can be useful to identify the location of the rental item within a warehouse or store.
Select Taxable from the drop down menu
if the rental service is subject to sales tax. Click the Next
button to continue.
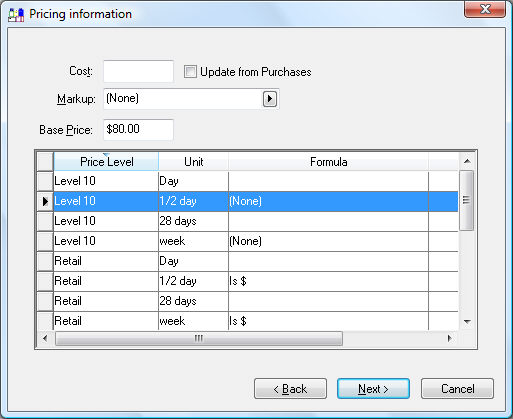
The Cost entry can be blank unless a cost is desired for gross profit calculations or calculating commissions.
Disable the Update from Purchases option since rental services are not purchased.
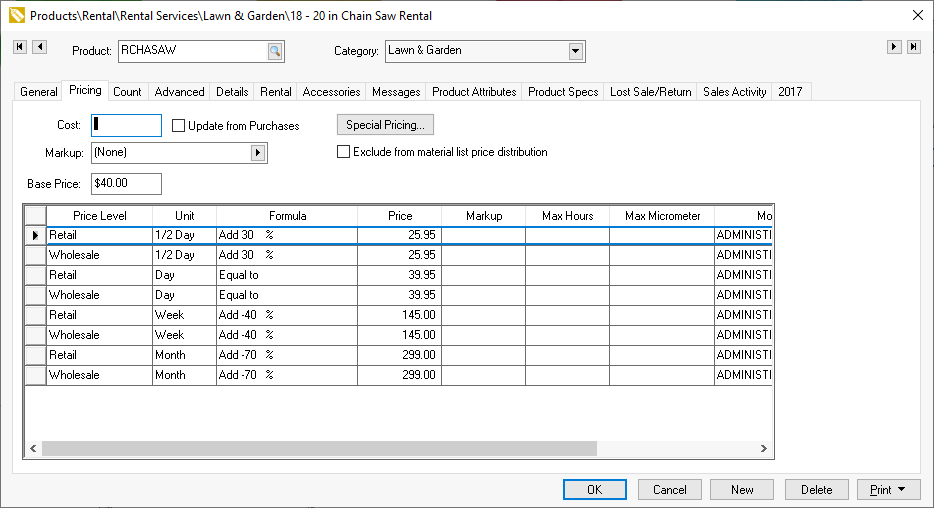
Set the Margin/Markup setting to (None) so the Base Price can be set manually.
Enter the
rental price for a day rental into the Base
Price entry since the main unit of measure is Day.
Continue with this section for more pricing instructions. Click the
Next button to continue.
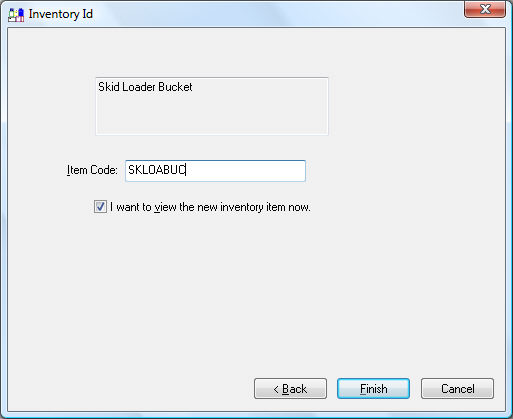
Enter the Item Code for the rental service item. Enable the I want to view the new inventory item now option to view the item record when the wizard is completed. Click Finish to create the new rental service.
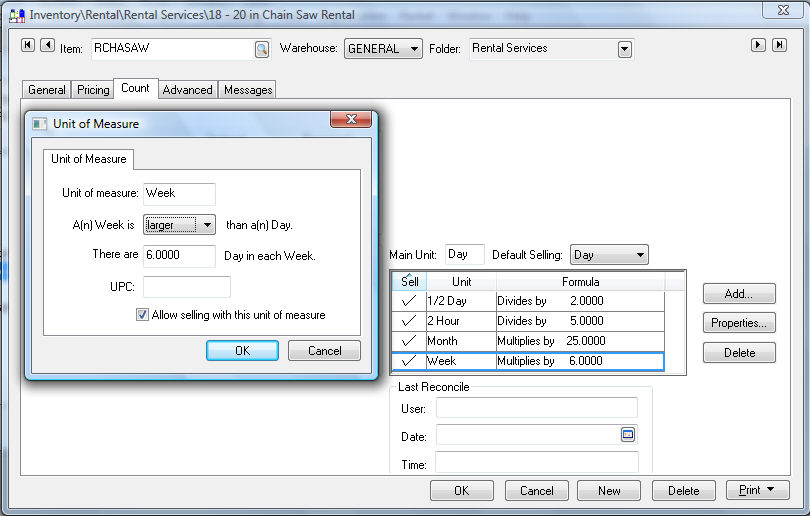
Click on the
Count tab to view unit of
measure settings:
All rental service items must have the Main
Unit entry set to Day.
Click on the Add button and
enter the standard unit of measure for each rental period option.
The unit of measure options can be ignored within the default settings
and entered into each item individually if the rental periods (unit
of measure) vary greatly. The following examples may be applicable
for rental service items:
Unit of Measure |
Smaller / larger |
Divisor / Multiplier of the main UOM - Day |
2 Hour |
Smaller |
Hours in Day setting divided by 2 Hours in Day column is found within the business hours table at Rental > Options > General table. Example: If the Hours in Day setting is 10, the divisor is 5. |
1/2 Day |
Smaller |
2 |
Day |
Main UOM |
This UOM is not shown on the UOM list since it is the Main Unit |
Week |
Larger |
6 This multiplier affects history. Each time the item is rented for a week, the total rentals (on history tabs) will be incremented by this number. |
Month |
Larger |
25 (See note above) |
A pricing record will appear for each time period or Unit-of-measure. The rental pricing must be set for each time period within each Price Level. The price levels that are not used within the rental system can be kept blank or ignored. The rental system includes many pricing exceptions to allow the user to tailor the pricing according to the rental company's policies. Review the Rental Pricing section for more details on rental pricing.
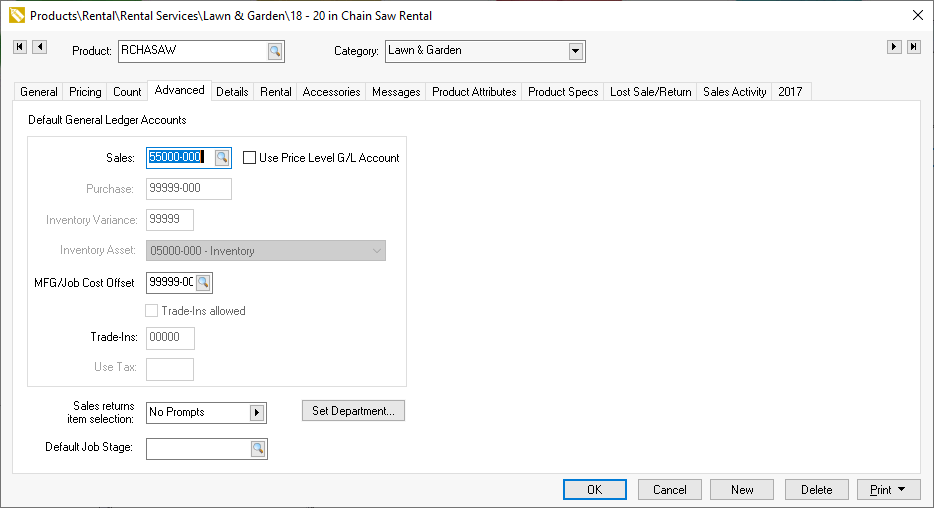
Click on the Advanced
tab to review the general ledger settings.
Disable the Use Price Level G/L Account
option and enter the rental income general ledger account into the
Sales account. The Purchase,
Inventory Variance, and Manufacturing Offset general ledger
codes can be ignored under normal circumstances. Review the Inventory Items > Changing
Inventory Defaults section of the Inventory manual for more details
on the Advanced tab settings.
Click on the OK button to save the settings for the rental service item. Repeat the steps within this section for each rental option. Continue with the Getting Started > Entering Rental Equipment section when all rental service items have been created.
Review Managing Rental Equipment > Availability for details on the rental tab.