Entering Barcodes
Barcodes can be associated within individual inventory items using the
following methods:
Enter the product's UPC code manually
Copy the UPC code from a vendor catalog which is the most efficient
Scan the UPC code with the product information in a vendor catalog
to add by scanning
Print the Product ID
using the BAR 39 barcode
Associate the barcode to the inventory code using a mobile scanner
Each option is described in the section below.
Review Scanning Barcodes for instruction
son how to use barcodes scanners and EBMS.
Enter the product's UPC code
Multiple barcodes such as a UPC
code can be entered within the inventory item record. Open an
inventory item and click on the General
tab.

Enter one or more UPC
or Alternate ID as shown above. Do not enter multiple
UPC codes that identify different brands or different sizes. This
barcode should only identify the Default
Selling unit of measure recorded within the Count
tab.
The barcode values for other units of measure are
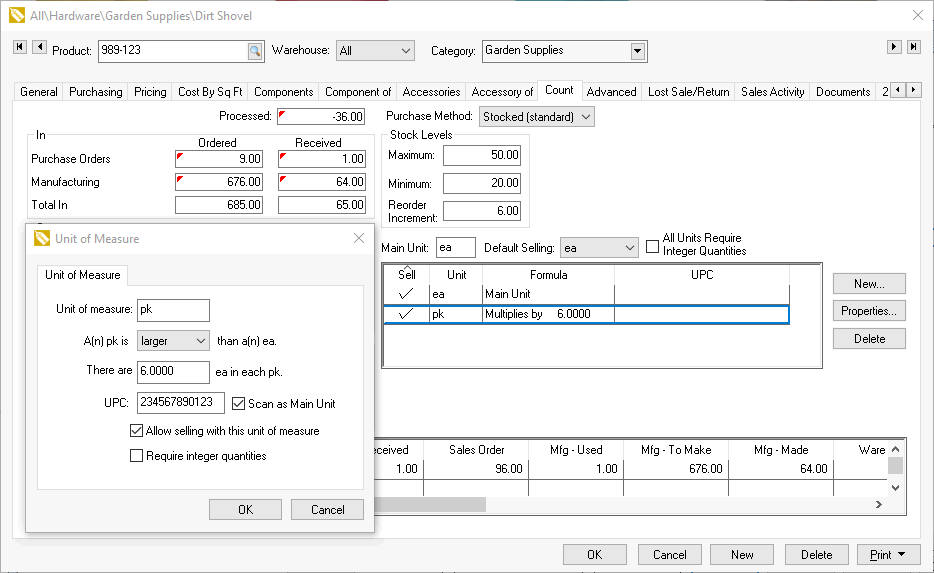
set within the UOM dialog. Click on the Count
tab, select a unit-of-measure form the list, and click the Properties
button to open the following dialog:
Enter the specific Unit
of measure barcode within the UPC
entry and press OK to save.
Review Printing Barcodes
for options to include the Unit of Measure into the barcode.
Enable the Scan as
Main Unit to always use insert the main unit of measure
within the sales or purchase document.
Associate a new barcode with a new or existing product
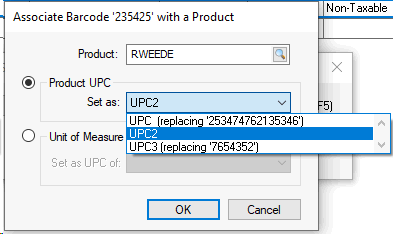
This convenient method of adding barcodes to the product catalog is
to scan the existing barcode such as a UPC code to open the following
dialog:

Select Create a New Product to create a new
item within the product catalog. Review Product
Catalog > Entering New Products for more details on creating new
items.
Select Associate Barcode to assign the newly
scanned barcode to an existing item.

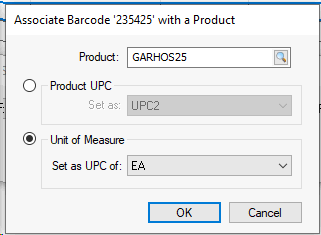
Or with a unit of measure’s UPC:

Review Scanning Barcodes for more
scanning configuration details.
This method can be used within a receiving process, transfer, or during
the point-of-sale step.
Copy the UPC code from a vendor catalog
This option is the most efficient way to associate a barcodes to a large
product catalog. Associate the UPC barcodes within the product
catalog with the UPC codes within the vendor catalog. Review Vendor
Catalog > Creating Relationship with EBMS Product Catalog to configure
the vendor catalog to copy the barcode into one of the multiple UPC or Alternate ID entries.
All new product items added to EBMS will contain the UPC
or Alternate ID since the new item is created and updated from
the vendor catalog. Review Vendor
Catalog > Creating Inventory Items from a Vendor Catalog for instructions
to add new products to a sales invoice or proposal.
Scan the UPC code with the product information in a vendor catalog
EBMS can be configured to associate the barcode to an existing item
using scanners. For example, product can be scanned during
the receiving process even if the product does not have a populated UPC or Alternate ID setting if the
following configuration is completed.
Associate a vendor catalog that contains the UPC code
and product information for the items that is being scanned:
Create a relationship between the UPC code within the vendor
catalog and the UPC or Alternate
ID codes in the EBMS product catalog. Review Vendor
Catalog > Creating Relationship with EBMS Product Catalog to
associate the barcode within the vendor catalog to the UPC
or Alternate ID entry.
Open a purchase order that contains product that requires a
barcode and has an associated vendor catalog with the barcodes. Review
Scanning Barcodes for additional
instructions.
Print the Product ID using the BAR 39 barcode
This method gives the user the ability to create a barcode using the
Product ID instead of using the
manufacturers barcode.

Complete the following steps to print BAR 39 barcodes:
Validate the Item code:
Unlike the UPC code, the barcode 39 can consist of numbers or
letters and can be of varying lengths. Note that the longer the inventory
item ID the longer the barcode.
Verify that the product Item
code does not include spaces or invalid symbols. Most
symbols do not properly convert into barcodes. Accepted symbols are
asterisk (*), dash (-), plus (+), and slash (/).Note that IDs that
contain spaces can not be scanned using the barcode 39 font.
The EBMS system contains many reports that contain barcode fonts.
Enable the Print barcode option
on the print dialog of the report if the optional EBMS barcode font
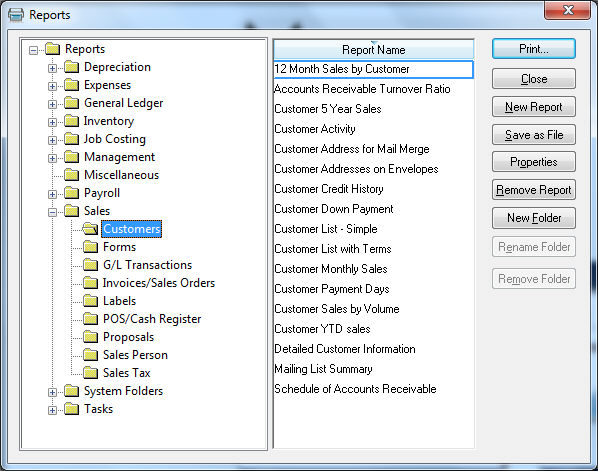
option is installed. Note that there are many barcode labels included
in the reports menu. Go to FIle >
Reports dialog for a complete list of reports.

Associate the barcode to the inventory code using a mobile scanner
Review MyInventory Scanner > Inventory
for instructions to use a mobile scanner to associate the UPC code to
an inventory item.
Review MyInventory Scanner >
Overview for instructions to use the mobile scanner.


