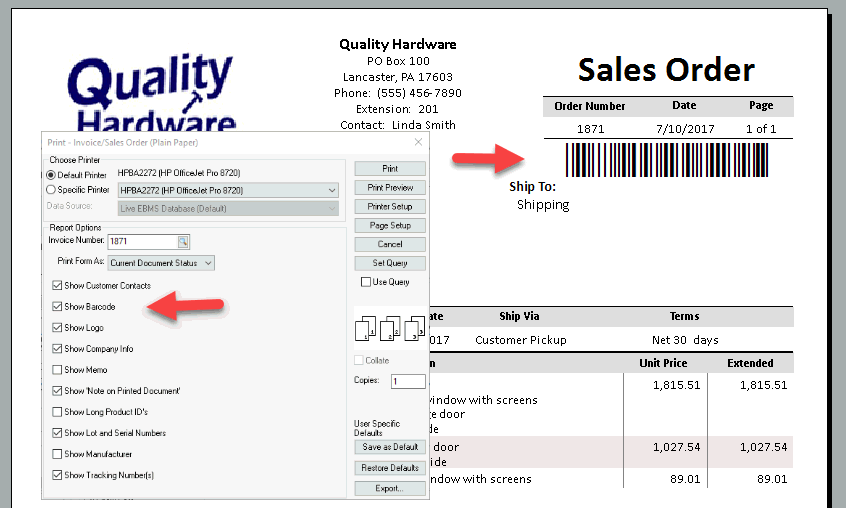
EBMS contains various product labels and forms that contain the option to print the following barcodes: See the following printer and EBMS configuration settings.
These two fonts are included with the advanced verson of EBMS. All other type of barcodes printed form EBMS require the user to purchase a True Type barcode font.
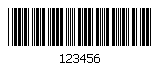
Many forms allow the user to add a barcode on the form to identify the document. The use can scan these forms to open a document within EBMS. Review Scanning Barcodes for instructions to open a dialog.
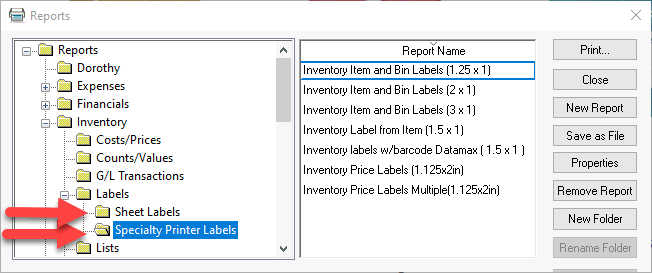
The recommended method to print labels is to use the Datamax E series printers. EBMS includes label forms to fit both speciality printers such as the Datamax and sheet labels. Select from the EBMS menu.
Select the Inventory Item and Bin Labels (2x1) which indicates the form
is created to match a label 2 inches wide and 1 inch high to open the
following dialog:
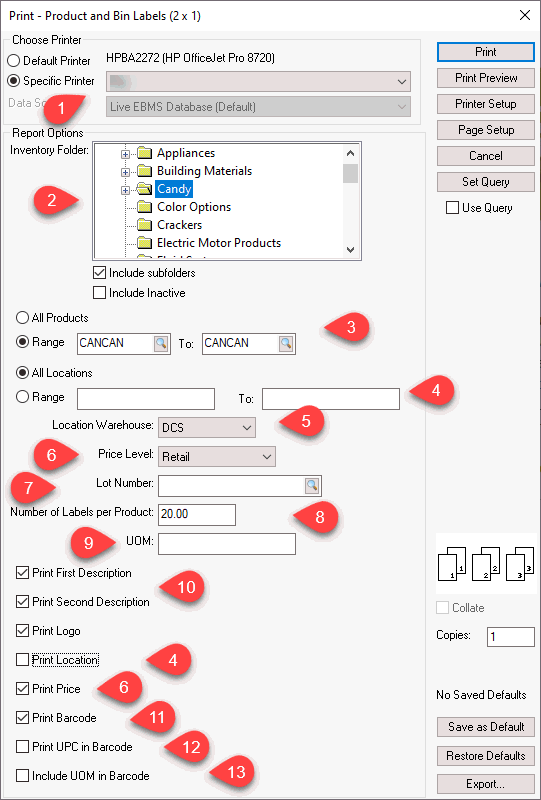
Select a label printer. A recommended printer for the speciality labels is the Datamax E series printer.
Identify the category of products if labels are being printed for an entire folder group. Click on the root folder if labels are being printed for a single item.
Select All Products to print labels for an entire category or enter the Product ID into the Range fields for a single item.
Enter a location located on the general tab of the inventory item only if the location value is printed on the label. See Print Location option at the bottom of the dialog. Do not confuse this prompt with the Location Warehouse setting.
Select a specific Location Warehouse if multiple warehouses apply.
Select a specific Price Level. This is an important prompt if the Print Price option located later in the prompts is enabled.
Enter a Lot Number. This prompt can be ignored unless product with lot information is involved.
Enter the Number of Labels per Product. Review the Labels from Purchase Orders section to set the quantity from a purchase order or expense invoice.
Enter a unit of measure only if a specific UOM is to be included in the barcode. The default sales UOM will be used if this setting is left blank. The system will only print product with matching UOM if the unit of measure is entered.
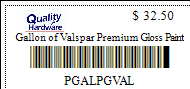
Select if the company logo prints and which descriptions should be printed on the label.
Enable the Print Barcode to include a barcode on the label. Install the EBMS barcode font kit if a barcode does not print with this option enabled. Review [Main] Server Manager > Optional Modules for instructions to add features.
Enable Print UPC in Barcode only to print the first UPC or Alternate ID instead the Product ID. This label form will print either code using BAR39 rather than the UPC barcode font. This option is an alternative if the Product ID is not formatted for barcodes. Review [Main] Features > Creating IDs for details on properly formatting IDs for barcodes.
Enable Include UOM in Barcode to create a barcode that selects the unit of measure. This option is only important if the product label is not referencing the default sales UOM. Review Entering Barcodes for more details on setting multiple barcodes per product.
Additional formatted label forms can be created using Crystal Reports.
Review User Defined Label section below for instructions
to create labels from MS Word data export.
EBMS includes label forms to fit both speciality printers such as the Datamax and sheet labels. Select from the EBMS menu.
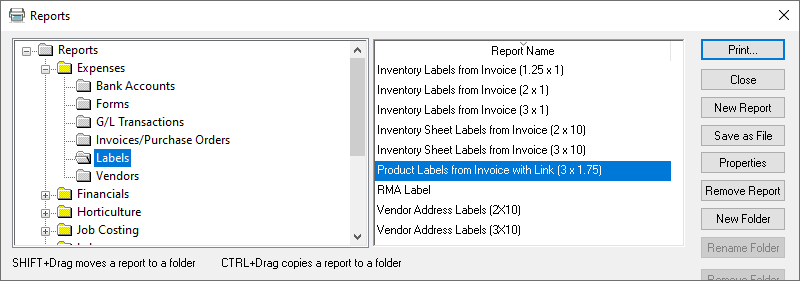
Any of the listed Expense > Labels can be used within a purchase order. Note that this report cannot be used from the receiving window.
Select Inventory Labels from
Invoice (size) to print labels from a label printer.
Select Inventory Sheet Labels from Invoice (size) to print labels from a sheet on a standard laser or inkjet printer.
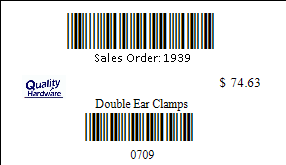
Select Product Labels from Invoice with Link (3 x 1.75) to print
labels that include the sales order barcode for product that was special
ordered.
Attach this label form to the purchase order Print
menu as shown below. Review the Print Menus section of [Main]
Reports > Print Buttons and Menus for setup instructions.
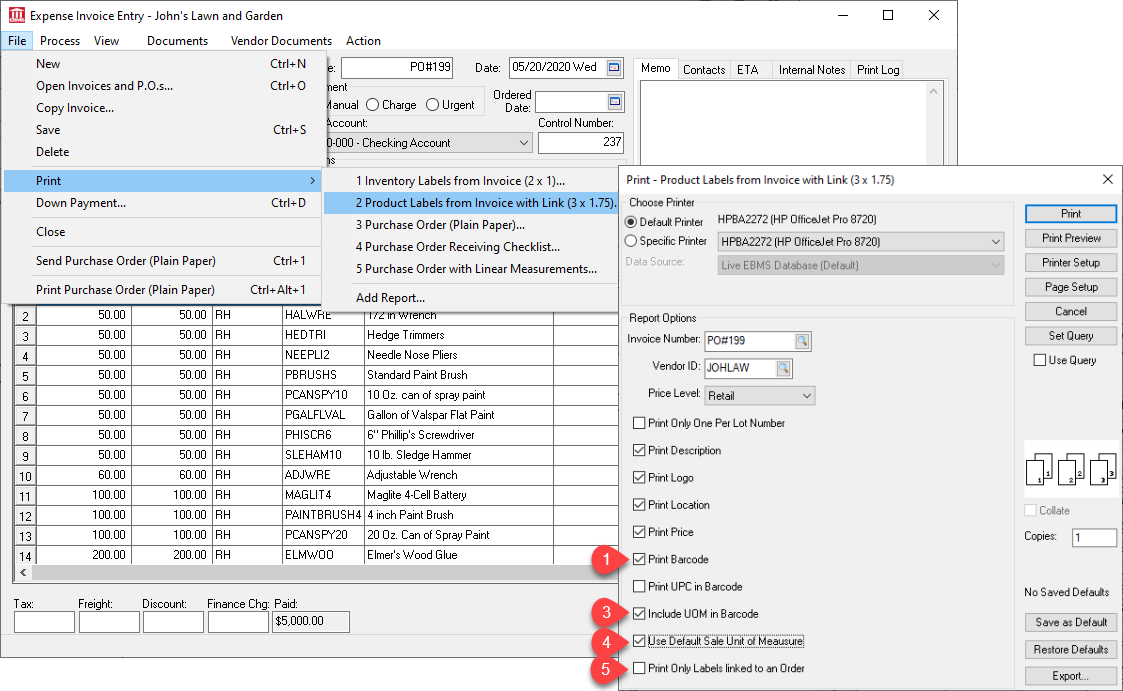
These label reports have many prompt options. The following prompts will affect the barcode on the label:
Enable the Print Barcode to include a barcode on the label. Install EBMS barcode font kit if a barcode does not print with this option enabled. Review [Main] Server Manager > Optional Modules for instructions to add features.
Enable Print UPC in Barcode only to print the UPC or Alternate ID instead the Product ID. This label form will print either code using BAR39 rather than the UPC barcode font. This option is an alternative if the Product ID is not formatted for barcodes. Review [Main] Features > Creating IDs for details on properly formatting IDs for barcodes.
Enable Include UOM in Barcode to create a barcode that includes the unit of measure within the purchase order. This option includes the UOM setting in the barcode so that the correct UOM setting is set when scanning by EBMS at the sales counter. This option should not be used if any other POS system is used to scan product.
Enable Use Default Sale Unit of Measure if it differs from the unit of measure on the purchase order. Review Entering Barcodes for more details on setting multiple barcodes per product.
Enable Print Only Labels linked to an Order to limit labels to only special order items. Review Printing Labels and Reports for more details on this option.
An application such as MS Word that can import CSV files or connect via ODBC can link to EBMS data to print labels. This gives the user the flexiblity to format the label and choose any label style. This option requires that the user have barcode fonts licensed to print on the labels. Review [Main] Features > Exporting Lists to CSV files for Mail Merges for steps to export from EBMS and import into MS Word or other compatible MS Windows application.
A Zebra label printer is configured using a MS Windows driver.
Complete the following steps to configure a Zebra printer for the EBMS Windows application:
Connect and power on the Zebra label printer.
Printer connected with USB: the Windows operating system should find the printer driver using the workstation's internet connection.
Network printer: Download the ZDesigner driver from Zebra’s website.
Open Control Panel and select Devices and Printers after the printer is installed on the computer.
Right click on the printer and then left click on Printing
Preferences
as shown below.
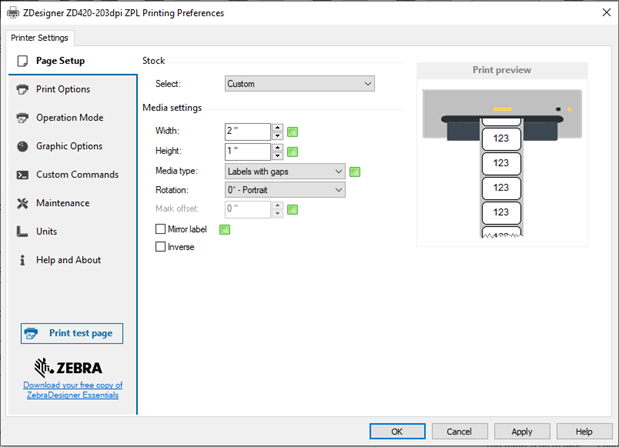
Set the label dimensions to the size of your label (typically this is 2x1),
Set the media type to “Label with Gaps”,
Set Rotation to 0 – Portrait