Select Expenses > Invoices
and P.O.s from the main EBMS menu to open the following dialog:
Select All to list all purchase orders or select one of the following query options: \
Vendor: to query all purchase orders from a specific vendor.
Ship To Customer: Query purchase orders that are being shipping to a specific customer. Review [Inventory] Special Orders and Dropped Shipped Items > Purchasing Special Orders for more details on the Ship To Customer setting.
Pay To Vendor: Query purchase orders based on the Pay To vendor setting.
Select the appropriate vendor or customer associated with the purchase order.
Set the Status setting to Purchase Order to list only purchase orders.
Search or select a purchase order to open as shown below:
Enter the amounts that are being received into the Received
column. Counts can be entered using a barcode scanner. Review
[Inventory]
Barcodes > Entering Barcodes for instructions to pre-configure
barcodes or to create a product by scanning a new barcode.
Click the Receive All button
to populate the Receiving
column with the balance. This value may be restricted to the
ordered quantity by setting the
option.
Right-click on any purchase order line and select Unfulfilled Sales Orders from the context menu to view the sales order.
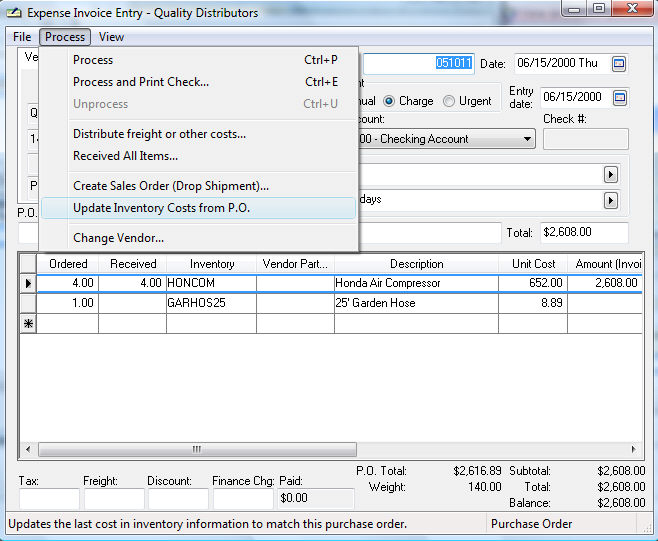
Complete the following two steps to update the inventory information in the inventory pricing tab. This step is necessary to print inventory price labels from the Purchase order with updated pricing.
Go to Process > Update Inventory Costs from PO from the main purchase order menu to update the last Cost value within Inventory > Count tab. This is necessary only if the pricing is derived from the last cost using a formula. Review the Inventory Pricing section of the Inventory documentation for more details. The last Cost value is updated when the invoice is processed, so this step is not necessary if the purchase order has been processed into an expense invoice.
Run either of the following price label reports found in :
Inventory Bar Code Labels from Invoice (Avery 5160).
Inventory Price Labels from Invoice (1.125x2in).
These steps can be very useful to verify that all items have been received since the number of labels will match the quantity on the P.O. Review [Inventory] Barcodes > Overview for more barcode details.