An assembly kit is defined within EBMS as an inventory item that includes inventory components but the group is priced as a unit rather than an individual component.. A bill of materials (BOM) can be grouped and associated to an inventory item at any time but the additional items will not take effect on sales orders and invoices that already exist.
A kit or bill of materials (BOM) consists of header item with one or more components. This header item may contain any of the following product classifications:
No Count, Service, and other non-inventory classifications: Complete the following Adding Componets steps to create an assembly kit.
Track Count, Serialized, Lots, and other classifications that manage counts and values: Review Manufacturing > Creating a Batch > Using Inventory Components for Manufacturing for steps to configure a bill of materials (BOM) using a component list. All components listed with a track count header item are identified as a bill of materials (BOM) used for manufacturing rather than a kit.
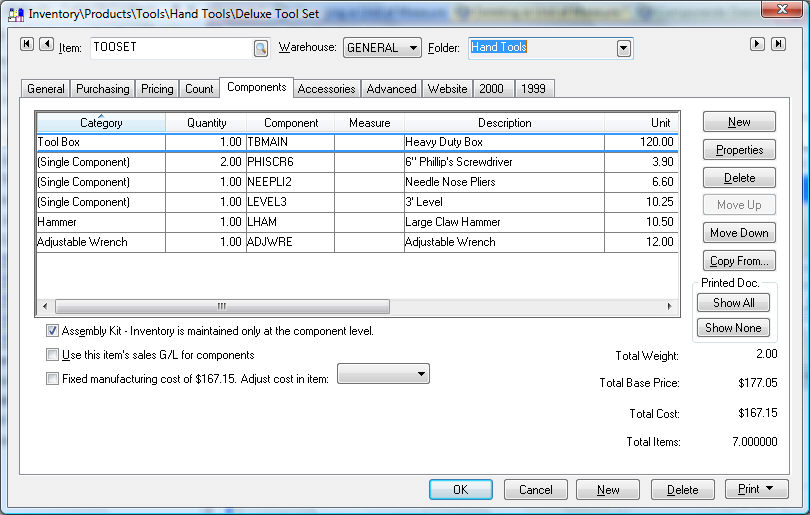
To add components to an Inventory Unit, go to and the following window will open:

The main item in which the components are placed must be a non-track inventory item classified as No Count or Service.
Set the Product Offset setting as a Product or labor in the Advanced tab. Review Product Catalog > Using Product Codes for No Count > Product Shorts and Credit Offset Switch for more information on this option.
Click the New button to add components to the list and the following window will open:

Enter the following component information:
Set the Type setting option as Single Component. Review Optional Components or Accessories for details on the Component with Options setting.
Enter a component inventory Item ID. Click on the lookup button if you wish to select an inventory item from the inventory list. The Unit Cost will be copied from the component's latest cost. The Total Cost amount will equal Quantity * Unit cost. If you wish to enter sub-components (components within components), enter the new component ID, and continue through the new inventory item wizard. Add any sub-components to the component tab using the same steps that are listed above. It is possible to nest components within components for many levels if necessary. EBMS recommends that not more than five levels of components be created because of reporting limitations.
Enter the Quantity of the components that are contained within the main item.
Select the appropriate unit of Measure if it is applicable. Multiple units of measure should not be used within a component list if the main inventory item has multiple units of measure. Review the Materials Lists > Tips and Frequently Asked Questions > Using Unit of Measure Settings within a Materials List Header or Detail section of the sales documentation for more details.
Click the Show on Printed Document option ON if you wish to default the component to show on printed documents such as the invoice, packing lists, or sales orders. The prices of each component will not show since the item is priced as a unit. The inventory item ID of the components will be inserted in the materials list and will not show on the main invoice. Review [Sales] Materials List for more details. This option can be changed on individual invoices by right-clicking on the materials list line and changing the Show on Printed Document option.
The user has two additional options if the Show on Printed Document option is enabled:
Disable the Show Quantity on Printed Document option to suppress the quantity value within the materials list line.
Disable the Show Unit of Measure on Printed Document option to hide (suppress) the materials list line's unit of measure value.
Review Notes and Instructions for more details on the Note entries.
Click on the OK button to save the new component information. Repeat the steps listed above for each additional component.
The Total Cost amount will calculate the total cost of all the components. Click on the Pricing tab and notice that the component total is copied to the Cost field. The Cost field cannot be edited if components are entered and the Assembly Kit switch is ON.
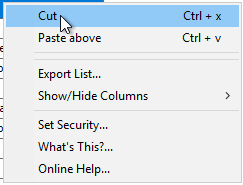
Order the component list by cutting and pasting or by using the Move Up and Move Down buttons.

Review Product Catalog > Using Product Codes for No Count Items > Service codes for more information on using items classified as Service.
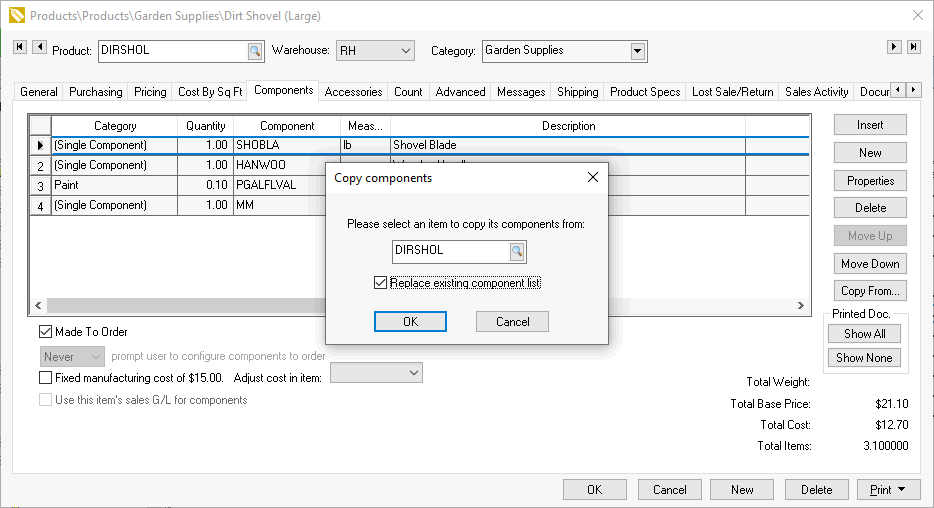
Components can be copied from another product to simplify the steps required to create a large component list for an item. Click the Copy From button on the right side of the component list to open the following dialog:

Enable the Replace existing component list option to delete the existing components.
Turn the Assembly Kit switch ON which will update the main item's cost to equal the total cost of all the components.
Turn the Use this item's sales G/L for components option ON if the revenue from the sale of the assembly is to be posted to a common general ledger account recorded in the assembly's advanced tab. It is recommended that this option be turned OFF so that the revenue for each component is posted to the sales general ledger account associated with each component. This sales G/L is recorded in the advanced tab of each component.
Review [Sales] Materials list for instructions on using inventory assemblies within a sales invoice.
A visual multiple level bill of materials (BOM) component list can be viewed using the following Inventory Component List report. Select from the main menu to view the following report:

Enter the desired prompts to print the components for a single item or a list of items.
