Paying Sales and Use Tax
EBMS includes a step by step payment wizard to pay sales tax that has
been collected from customers and use tax for consumed items. The tools
included with EBMS are convenient ways to calculate the tax payable, the
taxable totals, and the gross total required by most state tax agencies.
These tools can be used in connection with the optional TaxJar SmartCalc
sales tax calculation tool. This section can be ignored
if the TaxJar > AutoFile tool is used
to pay sales taxes.
Create Tax Agency Vendor
Complete the following steps to create a vendor to pay sales tax:
Create a tax agency vendor. See
[Financials]
Vendors > Adding a New Vendor of the main documentation for
more details on creating a new vendor.
Click on the terms tab of the vendor
and set the proper terms.
.
Set the discount terms to the proper
percentage if the tax agency gives the tax collector a percentage
for the collection costs. The Discount
and Due settings shown above
are the appropriate settings if the state gives a 1% discount and
the payment due date is the 20th of the month.
Set the proper terms so the sales
tax is paid by the due date.
Click on the Advanced tab to set
the Vendor Discounts financial account.
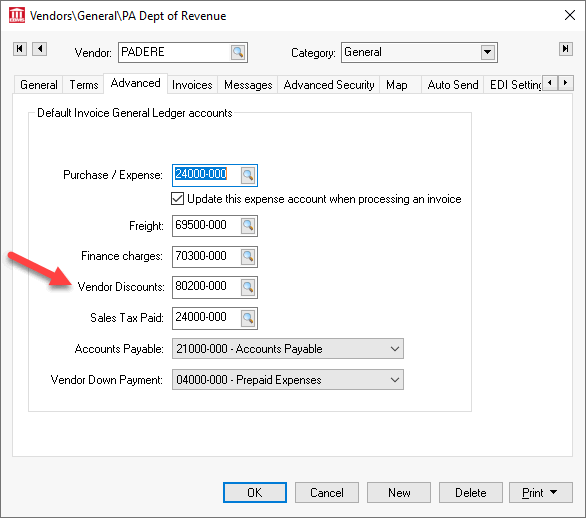
This account should be a miscellaneous revenue account. Review
[Financials]
Chart of Accounts > Adding General Ledger Accounts for instruction
to create a new revenue account.
Save this vendor by clicking OK.
Create Invoice for Tax Payment
Complete the following steps to configure the tax agency, generate an
expense invoice, and pay the tax liability.
Verify that all tax rate tables contain the proper
tax agency vendor ID. Repeat for all sales tax rate tables that
are paid to the specific tax agency. This step must be completed before
launching the Pay Sales Tax
wizard.
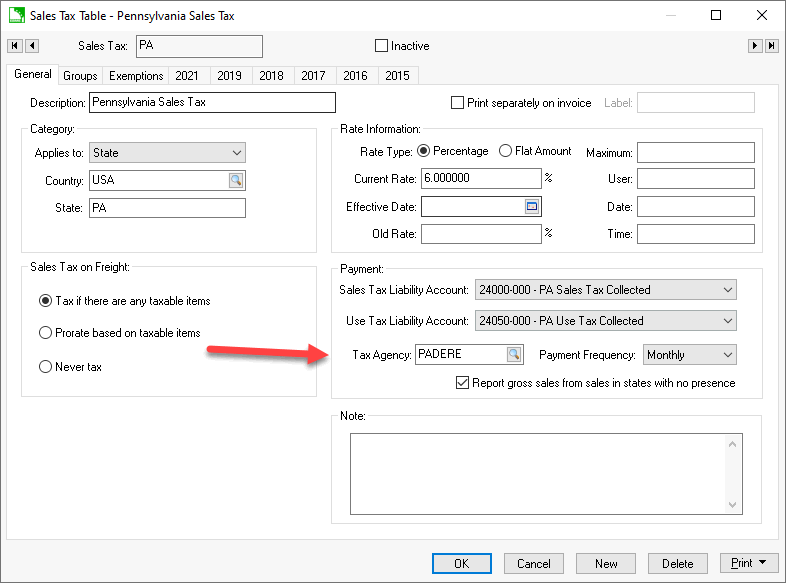
Launch the Pay Sales
Tax wizard by selecting from the main EBMS menu. Note
that this wizard will include applicable sales and use taxes.
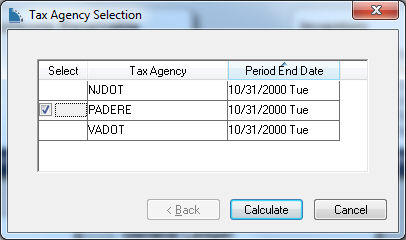
Select each Tax Agency
that is to be paid by clicking on the Select
column.
Click the Calculate
button to open the following Unpaid
Sales Tax list:
.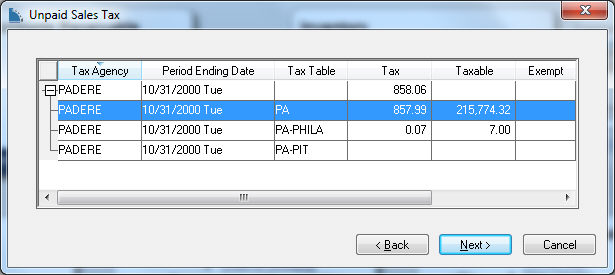
Review the tax values for each Tax
Table associated with the selected Tax
Agency. Click Next
to open the following dialog:

Enter any necessary Penalty
fees.
Click Print to print the
Sales Tax Detail report. Review the report documentation section
below for details.
Click View to add any discount to the invoice as shown
below:
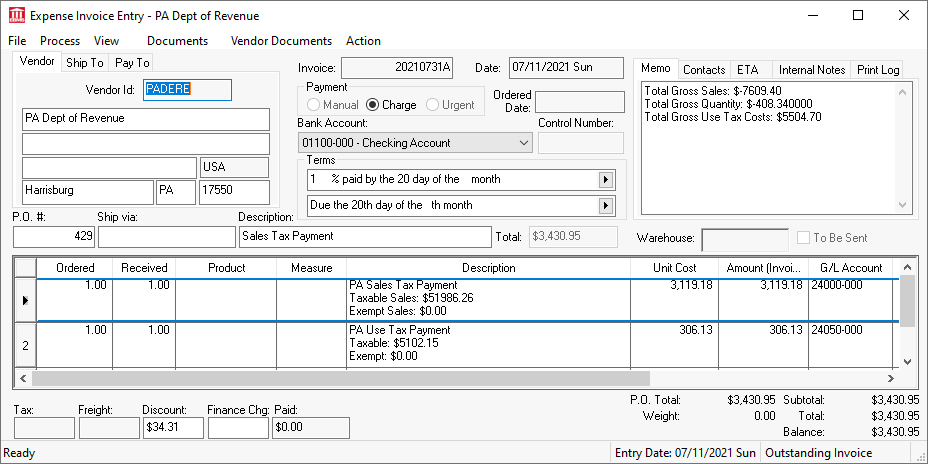
NOTE: that the discount must be properly configured. If
the user entered a credit line to the invoice the G/L
Account MUST identify
the discount income account and cannot use the same tax liability
account as the tax lines.
Click one of the following to create the expense invoice:
Click Finish to process
the payment expense invoice. Review [Financials]
Vendor Payments > Selecting Invoices to be Paid for steps
to generate the payment.
Click Close to create
a purchase order but not process the document into an expense
invoice.
The sales tax payment invoice can be deleted and the
payment wizard relaunched. Note that the system marks
sales tax transactions paid when invoice is processed. Creating
an invoice manually without using the payment wizard does
not properly mark sales tax records paid.
Review [Financials]
Expense Invoices > Processing an Invoice for instructions to process
the invoice.
Tax Report
This report requires that the payment wizard to create the payment invoice
(see previous section) has been completed.
Select from to list tax liability totals.
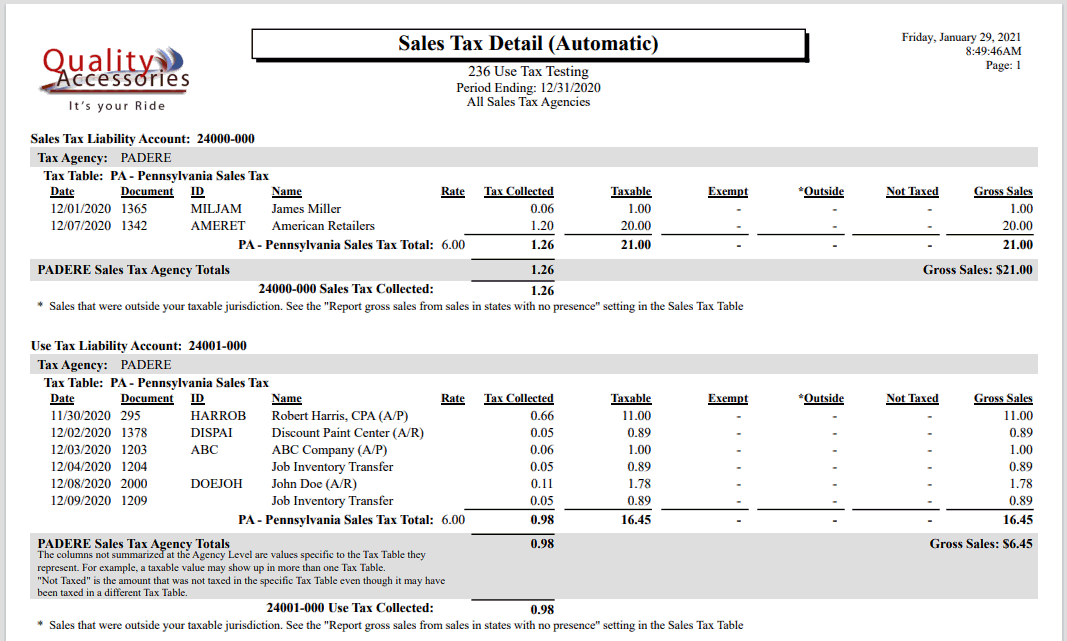
Reports can be printed to list the transaction detail by selecting the
appropriate report from the Print
button located on the tax rate dialog. Review [Main]
Reports > Print Button for instructions to add specific sales tax
reports to the Print button.


