Launch MyEBMS on a MS Windows device.
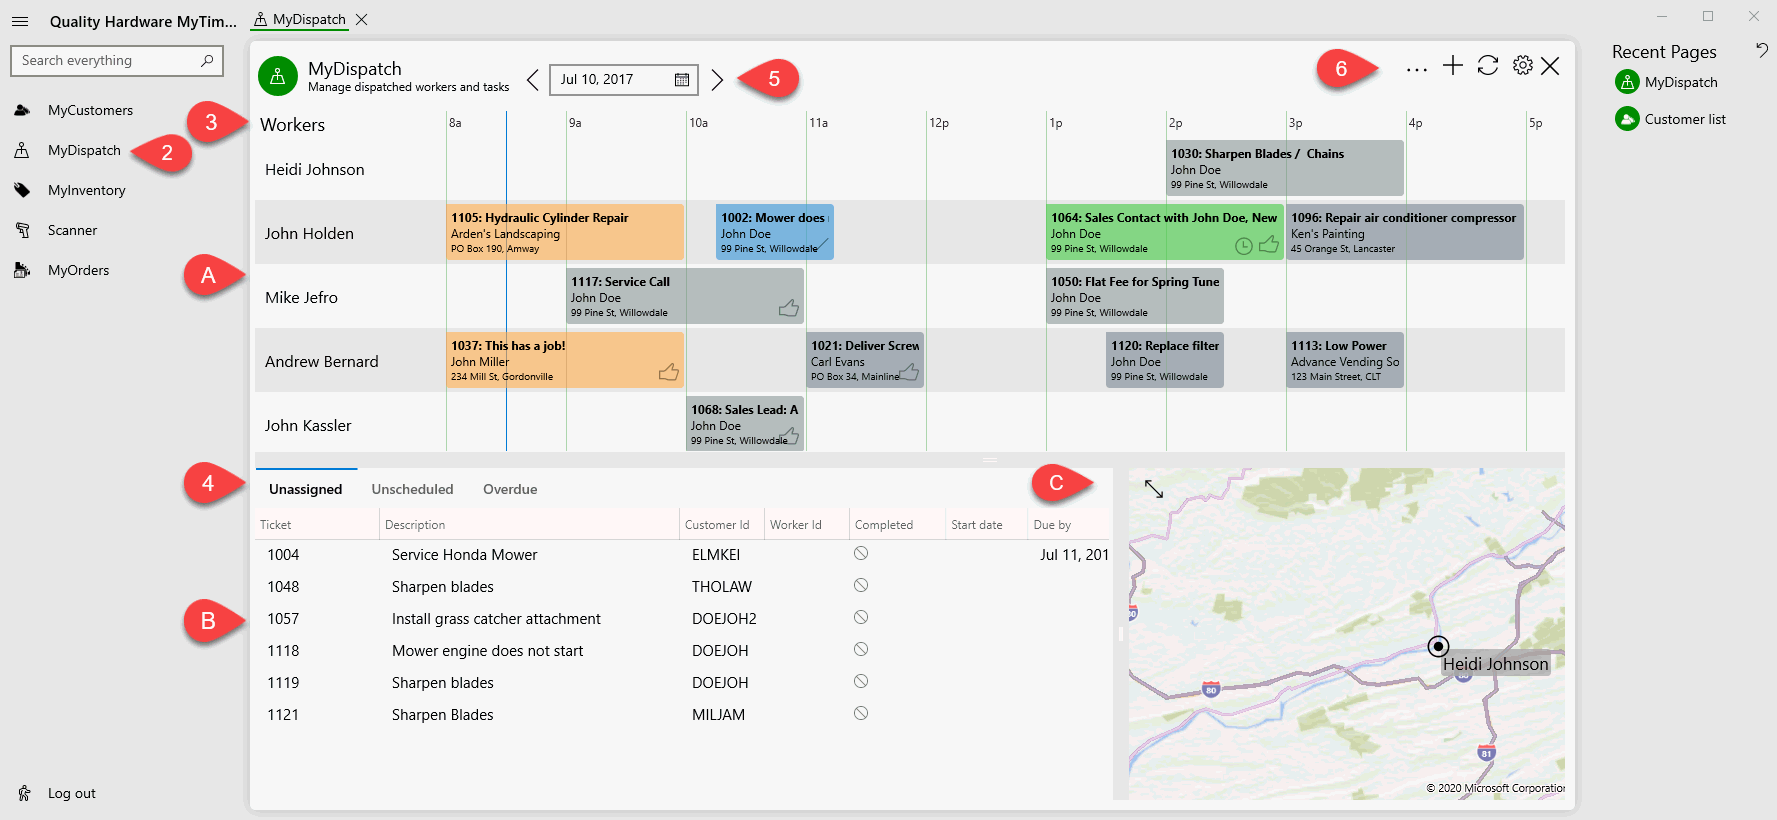
Select MyDispatch from the MyEBMS menu to open the following
3 panes:

The schedule pane: This pane displays the daily schedule for the managed workers. Review Creating a Schedule for more details on the schedule pane.
The list pane: This pane displays user defined task lists that allow the user to drag tasks to the daily schedule pane. Review Task Lists for more details on these convenient lists.
The map pane: identifies the map location of the technician using MyTime. Tap the user's name to communicate the technician's location from MyTime to MyDispatch. Reduce the size of this pane to allow the width of the task lists to increase if the map is not used.
Identify the Managed Workers list. Adding or removing workers from this list is done within the dispatcher worker record in EBMS.
These user defined lists are important to keep tasks accessible to the dispatcher. Review MyDispatch > Setup > EBMS User Configuration to add or remove workers and the multiple task lists shown in pane B. Some recommended list queries when scheduling technicians:
Unassigned: Advanced query expression: substr(id, 1, 3) <> '($)' .and. trim(emp_id)=trim(' ') .and. completed =.f. .and. PRIORITY <> 'Pending'
Unscheduled: Advanced query expression: substr(id, 1, 3) <> '($)' .and. (trim(dtos(start_date)) = trim(' ')) .and. completed=.f. .and. PRIORITY <> 'Pending'
Overdue: Advanced query expression: substr(id, 1, 3) <> '($)' .and. completed=.f. .and. end_date<>stod(' ') .and. end_date<date()
The queries listed above may be able to be accomplished by using the simpler Set Query dialog although the advanced queries can easily be copied from this documentation to the advanced query dialog.
Set the date to view the schedule for future dates.
Use the tool bar add or delete a task or refresh a list.
Tap
 or touch
and hold on the task list to create a new task
or touch
and hold on the task list to create a new taskTap
 to refresh
the schedule and lists immediately. Tap settings
  to adjust the automated refresh rate.
Tap
 to or
touch and hold on the task list to delete a task