Open the Customer Payments dialog by selecting from the EBMS menu and tap on the AutoPay Batch tab.
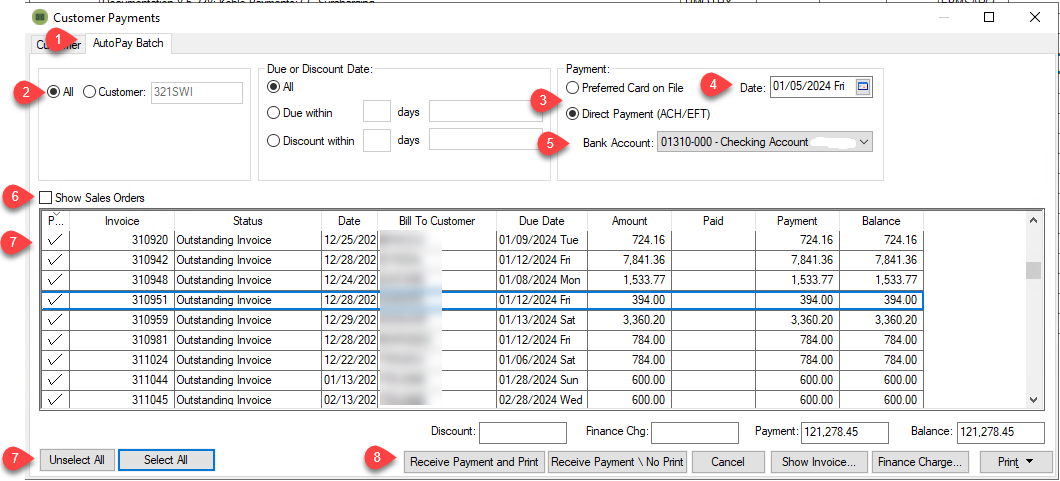
Enter a Customer ID or select All for a list of sales invoices.
Set one of the Payment options:
-
Select Preferred Card on file to process credit card sales.
-
Select Direct Payment (ACH/EFT) to process ACH payments using a NACHA file.
Enter the payment process Date.
Select the Bank Account. The general ledger account identifies the bank account that receives the electronic ACH payment from the customer.
Enable the Show Sales Orders option to apply a down payment to a sales order.
Select the outstanding invoices that are being paid via ACH payments or click Select All. Note that sales invoice terms must be set properly to process within the AutoPay Batch tab.
Click either of the Receive Payment buttons to process the payments. This step will create the files to transfer monies from the customer's bank account to pay for the selected sales invoices.
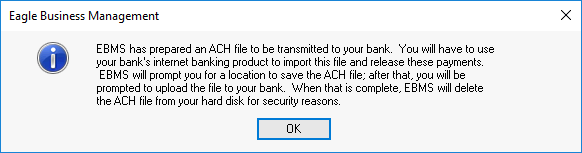
The following message will appear if a NACHA file is created. This dialog will not appear if no ACH payments are processed. Continue with the following steps to complete the process of the ACH NACHA file. Review Payment Card Processing > Reconciliation of Deposit to complete the credit card payment process at the end of the day.
Click OK to open the following dialog and save the NACHA file (Initially designed by the National Automated Clearing House Association) as shown below:
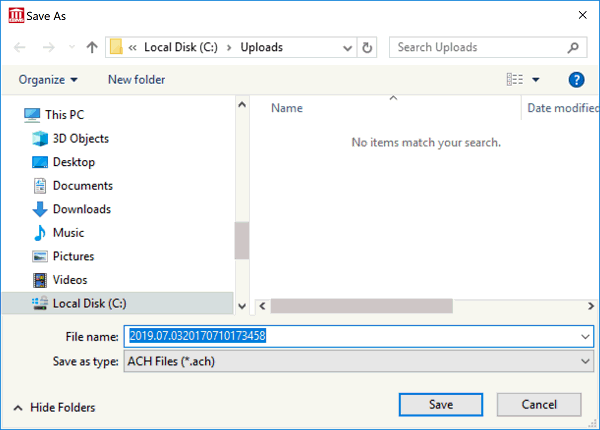
Click Save to save the *.ACH file in a location that is easy to upload to your bank’s cash management site. The following dialog will appear when the file is created. Keep the following dialog open until the
ACH file has been successfully uploaded to the bank’s cash management site.
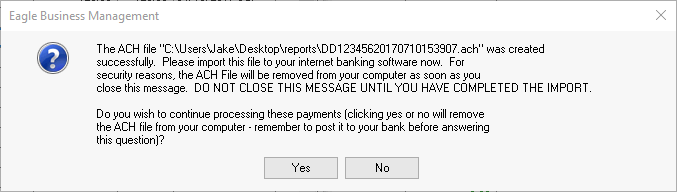
Click Yes when the ACH file has been successfully uploaded to the bank’s direct payment site. Click No if the ACH process was not successful to keep the invoices open allowing the payment process to be repeated.