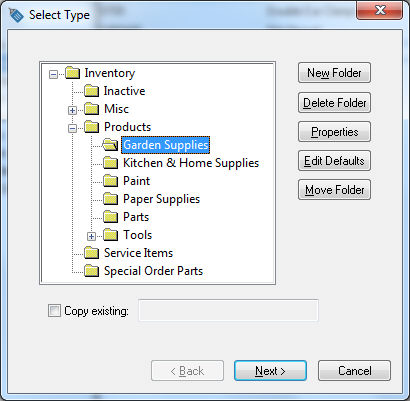
The rental service codes contain the pricing and rental description and are used within the rental contract. A separate rental service code should be created for each rental service that is offered. For example, a rental service code should be created
for each type of trailer that is rented because of varied pricing. But a single code may be created for a 20 foot trailer rental even though the company may be renting 6 different but similar 20 foot trailers.
-
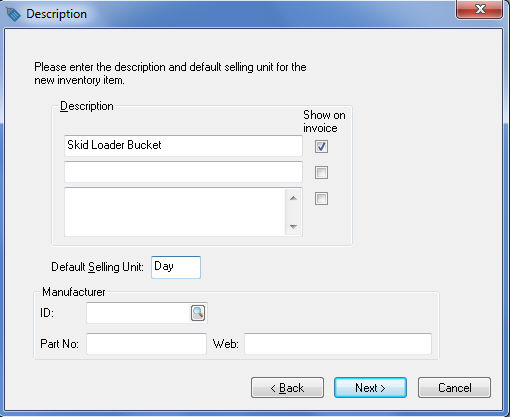
Enter a
Description of the rental item. The
Default Selling Unit must default to
Day. Review the Tracking Counts > Unit of Measure section of the Inventory manual
for more details on the
Default Selling Unit. Click the
Next button to continue to the
Information page.
-
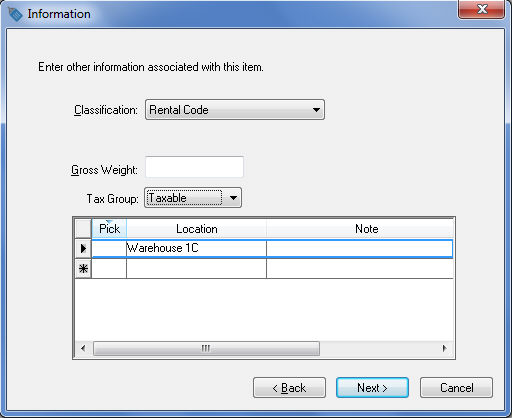
All rental service items must have the
Classification set to
Rental Code.
-
Ignore the
Gross Weight entry for rental service codes.
-
You may wish to enter the location of the rental item. This optional field can be useful to identify the location of the rental item within a warehouse or store.
-
Select
Taxable from the drop down menu if the rental service is subject to sales tax. Click the
Next button to continue.
-
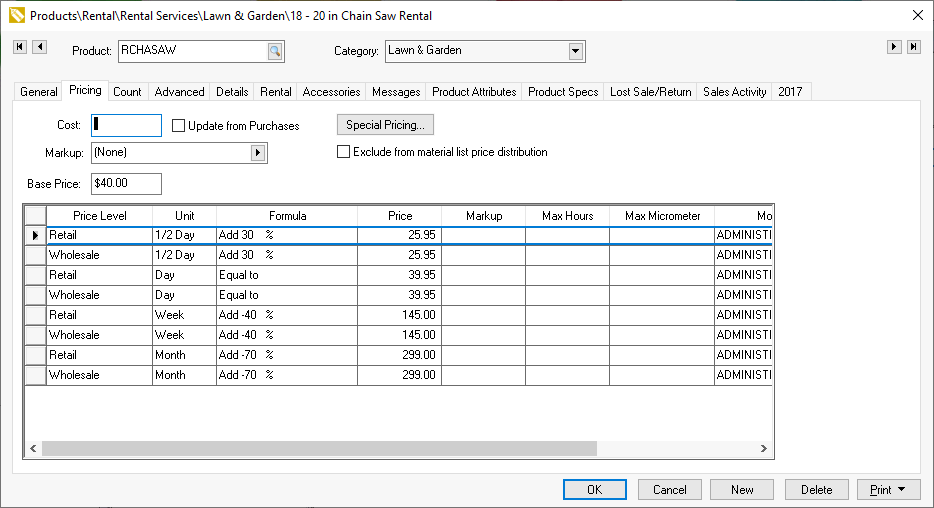
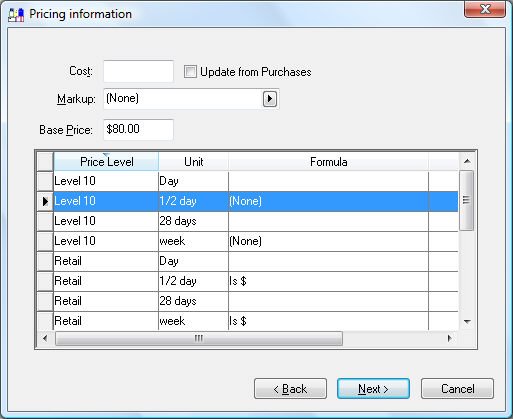
The
Cost entry can be blank unless a cost is desired for gross profit calculations or calculating commissions.
-
Disable the
Update from Purchases option since rental services are not purchased.
-
Set the
Margin/Markup setting to
(None) so the
Base Price can be set manually.
-
Enter the rental price for a day rental into the
Base Price entry since the main unit of measure is
Day. Continue with this section for more pricing instructions. Click the
Next button to continue.
-
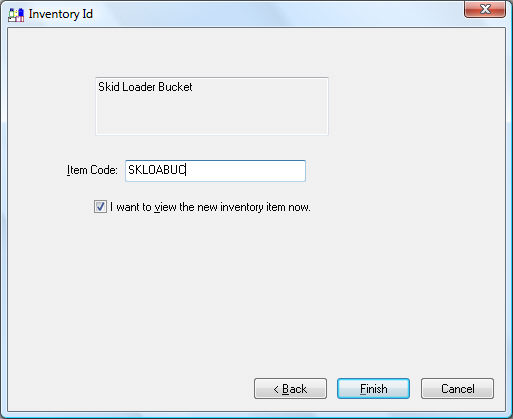
Enter the
Item Code for the rental service item. Enable the
I want to view the new inventory item now option to view the item record when the wizard is completed. Click
Finish to create the new rental service.
-
Click on the
Count tab to view unit of measure settings:
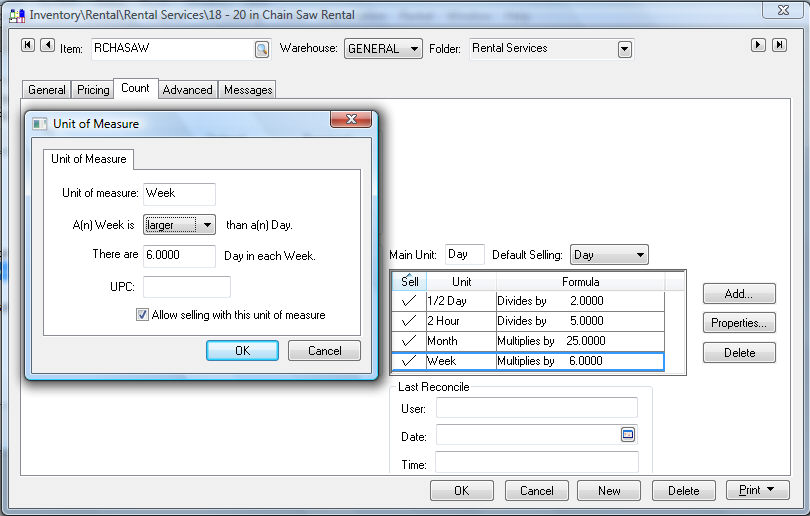
All rental service items must have the
Main Unit entry set to
Day. Click on the
Add button and enter the standard unit of measure for each rental period option. The unit of measure options can be ignored within the default settings and entered into each item individually if the rental periods (unit of measure) vary
greatly. The following examples may be applicable for rental service items: