It is possible to record a customer's down payment on a sales order before the sales order is completed or the purchasing details are entered. This feature is useful when a customer puts a deposit on a purchase or if a payment needs to be recorded before the sales order is completed. The down payment process will record the credit transaction as a down payment liability transaction until the sales order is processed into a sales invoice generating revenue transactions. The down payment can be applied to a sales order without the sales details. Review the report documentation at the end of this section for instructions to reconcile a down payment account.
Perform the following steps to record a down payment on a sales order or unprocessed invoice.
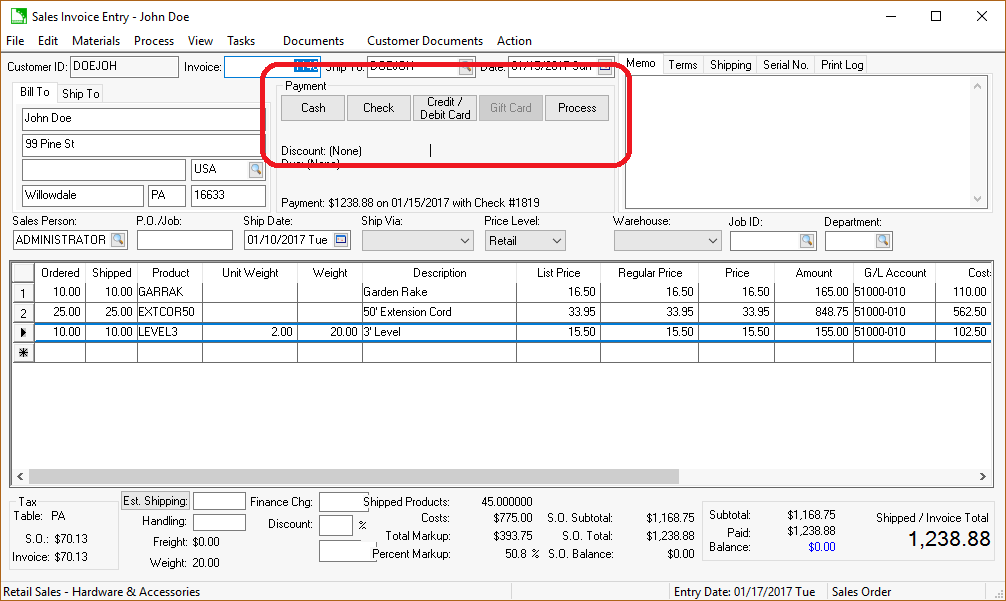
Select either the Cash, Check, or Credit/Debit Card Payment method as shown below:

Select the Cash option and following dialog will appear:

Enter the Cash Received to calculate the Change amount due to the customer. The Cash Received can be kept blank if no Change calculation is desired.
Verify the Cash Account.
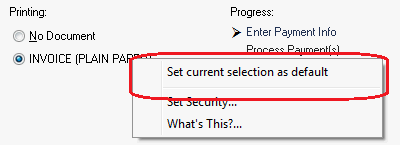
Select the desired payment receipt document. Select No Document if no receipt is desired. To set default Printing options go to Sales > Options and click on the Reports tab. To customize Printing options by the current computer and user, right click on the desired default option and select Set current selection as default as shown below:

Select the Email option. Select No Email to ignore any down payment email receipt communication. Review Auto Send Customer Payment Receipts for Email setup instructions.
Click on the Down Payment button to complete the down payment process.
Review Point of Sales > Penny Rounding Cash Payments to round all cash payments to the nearest nickel.
Select the Check option and the following dialog will appear:

Enter the down payment amount into the Amount on Check field.
Enter the customer's Check Number.
Verify the Cash Account.
Select the desired down payment receipt document. Select No Document if no receipt is desired
Select the Email option. Select No Email to ignore any down payment email receipt communication. Review Auto Send Customer Payment Receipts to configure or send receipts.
Click on the Down Payment button to complete the down payment process.
Select the Credit/Debit Card option and the following dialog will appear:

Enter the Amount of the down payment.
Enter the Card Number without spaces or dashes.
Verify the Card Type. This setting will be defaulted based on the card number.
Enter the card's Exp. Date using month and year.
Enter the CVV code located on the back of the card.
Select the desired down payment receipt document. Select No Document if no receipt is desired.
Select the Email option. Select No Email to ignore any down payment email receipt communication. Review Auto Send Customer Payment Receipts for Email setup instructions.
Click on the Down Payment button to complete the down payment process.
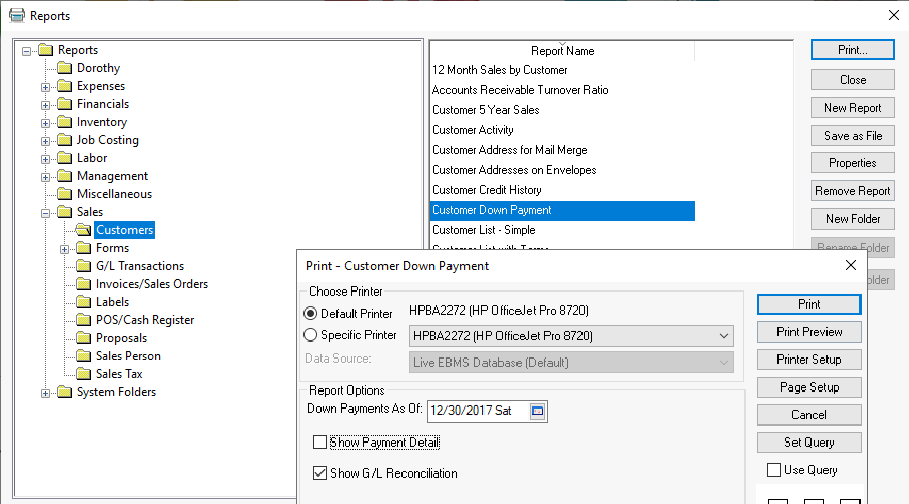
The following down payment report can be used to list down payments as well as reconcile the general ledger down payment liability account. Complete the following steps to generate this down payment report:

Set the Down Payment As Of date. This date can be dated in the past to correctly reflect the down payment balance as of any given date. This date is very useful to generate a down payment list based on the end of a given financial period.
Enable the Show Payment Detail to list the individual down payments for each listed customer invoice.
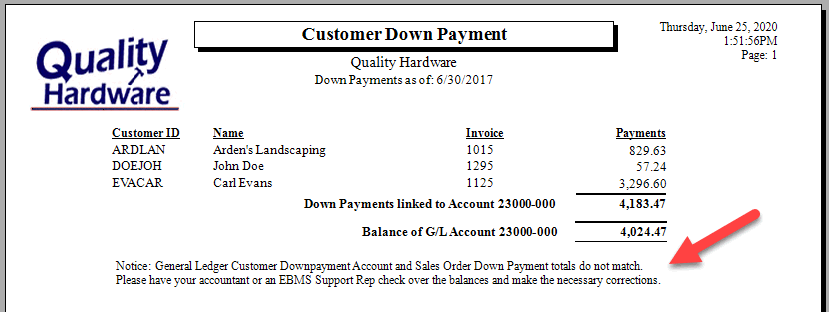
Enable the Show G/L Reconciliation to show both the general ledger balance compared to the down payment transaction list. The example below notes that the G/L balance does not match with the down payment details.
