This module adds the capability to store a variety of documents within a customer, vendor, inventory item, task, invoice, quote, and other documents. The user is able to store an electronic copy of an invoice within the invoice record, store customer or vendor specific documents within the account record, or drawings and design documents within a quote, job, or manufacturing batch. The document storage option is very useful within the task module to store task or work order details, instructions, or other files.
This feature allows the user to attach graphic files, design documents, PDF, and a variety of other file formats to specific accounts or documents.
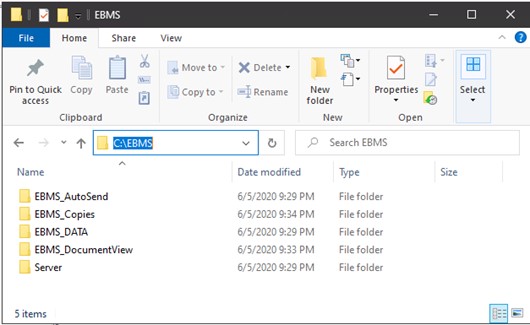
A file directory is created by EBMS within the MS Windows operating system for each document. The folders are conveniently created and maintained by the EBMS software. This allows the user to separate the EBMS data files from the files that are attached to EBMS documents.
Create a unique folder for the document storage labeled EBMS_DocumentView as shown below:
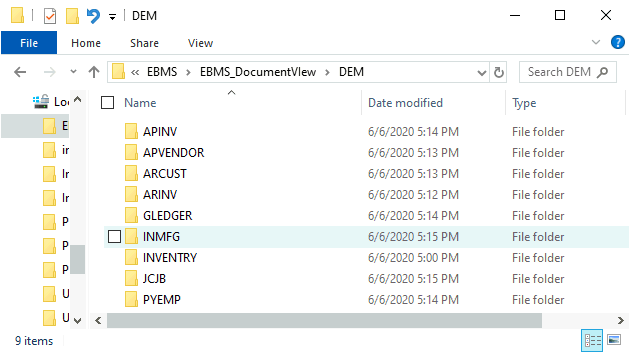
Create a sub-directory of the \EBMS_DOcumentView\ directory within MS WIndows for each data set (d:\EBMS\EBMS_DocumentView\data code. Example: C:\EBMS\EBMS_DocumentView\DEM. A unique directory Document Folder Path must be created for each EBMS company data set.
NOTE: Do not configure the Document Folder Path setting to use the same file path within multiple EBMS companies. The location of the common directory that stores these documents is identified by selecting File > Document View from the main EBMS menu to open the following dialog:
Select from the main EBMS menu to set the Document Folder Path for the Document View files.
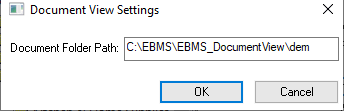
The Document Folder Path should be directed to a path that is accessible to the appropriate EBMS users.
This shared drive should also be properly secured and regularly archived. Review Secure Document Folder Path at the end of this section.
Contact your network administrator for instructions on creating this path and properly backing up its contents.
Complete the following steps to access or add documents to the following records:
Customer: Open the customer record by selecting from the main EBMS menu, open the customer record, and click on the Documents tab. Review the Changing Customer Information section of the Sales documentation for more information about the customer record.
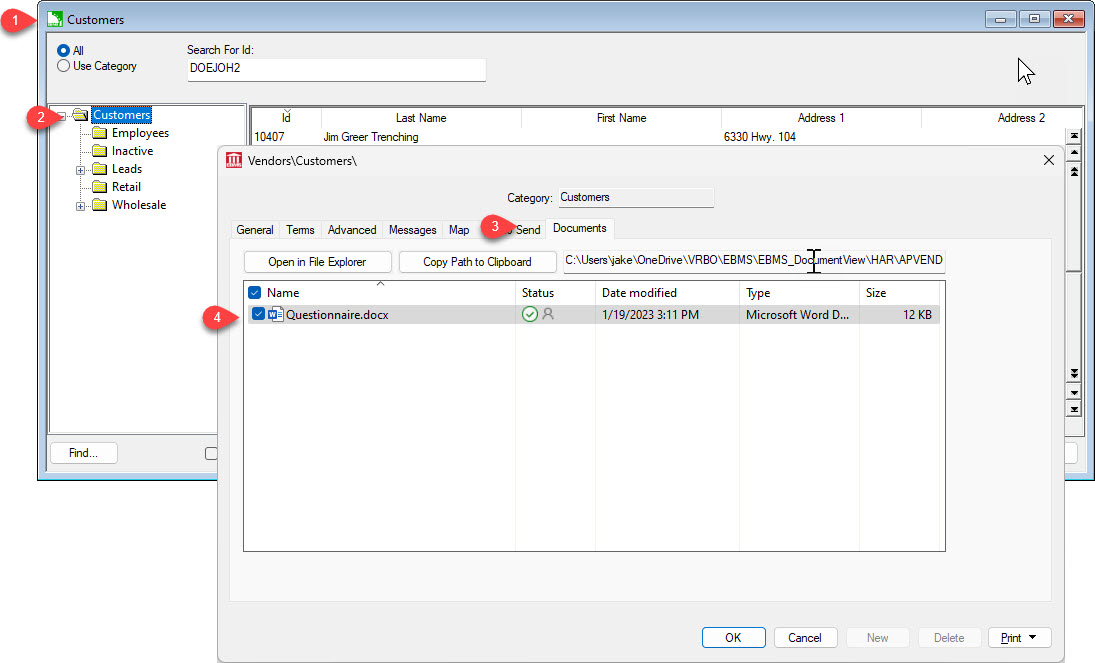
Vendors: Open the vendor record by selecting from the main EBMS menu, open the vendor record, and click on the Documents tab. Review the Changing Vendor Information section for more information about the vendor record.
Workers: Open the worker record by selecting from the main EBMS menu, open the worker record, and click on the Documents tab. Review the Changing Worker Information section in the Labor documentation for more information about the worker record.
Inventory: Open the product record by selecting from the main EBMS menu, open the product record, and click on the Documents tab. Review the Changing Inventory Items section in the Inventory documentation for more information about the product record.
Expense or sales Invoices: Open the invoice record and click on the Documents menu within the invoice. Note that the invoice must be created by entering to tabbing through the invoice number entry before documents can be attached. Review the Viewing and Changing Sales Orders section for more information about the invoice and sales order record.
Tasks: Open the task record and click on the Documents tab of the task.
Manufacturing batches: Open the manufacturing batch record and click on the Documents menu within the batch.
Rental Contract: Open the rental contract by selection rental.contracts from the main EBMS menu. Open the contract and click on the documents tab to add documents to the rental contract. Review [Sales] > Rentals > Rental Contracts > Creating a Contract.
Jobs: Open the job record and click on the Documents tab within the job. The job documents can also be accessed by clicking on the Job Documents option within the manufacturing batch. Review Changing Job Information for more information about the job record.
The following Documents tab appears:
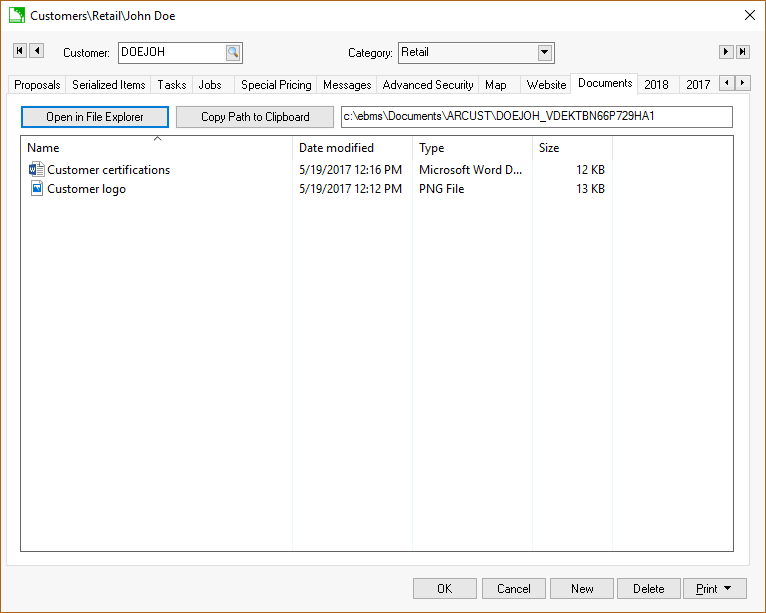
Files can be copied or opened directly from this tab. Right click on the Documents tab to open the File Explorer context menu. This menu can be used to conveniently scan documents directly into this tab or document. Some security options may need to be adjusted within the File Explorer settings to make these Document tabs for convenient.
Click on the Open in File Explorer to open the document’s directory within MS File Explorer.
A legacy method used with this module is to use OLE fields within the EBMS database files. This option inserts the stored document within the EBMS file. This option has been discontinued because of OLE issues and complications. The OLE option also restricts the number of files attached to each record or document.
Documents within Document Storage can be e-mailed using the Auto Send tool. Review [Sales] CRM > Auto Send > Auto Send Additional Documents for instructions to add documents.
Documents can be copied to every new record using edit defaults or task types. Review [Labor] Tasks > Getting Started > Creatin Task Types and Defualts to assign default documents to a task.
Complete the following steps to add default Documents:
Open any account that contains a category.
Right click on a category and select Edit Defaults from the context menu.
Click on the Documents tab.
Attach one or more template documents: a copy of this document will be made every time a new account is created.
The EBMS Data Folder should not be shared for security reasons, but the Document View folder needs to be shared, but with some restrictions.
Non-public documents may be stored in the Document View folders in the form of scanned formed and documents that the user may wish to secure. The security settings for EBMS users must give access to sub-folders to the Document Folder Path setting located by selecting from the main EBMS menu.
EBMS uses the MS Windows security settings to restrict user access to specific folders that contain sensitive information. Have your IT staff configure the MS Windows settings for the following folders:
The EBMS Document View directory is the root folder for all Document View documents. This directory must be created when the Document VIew feature is installed.
A sub-folder is created manually for each data set so a user can be restricted from EBMS data sets where the user has no access.
Sub-folders are created by EBMS when the first documents are stored within a dialog as shown below:
Sub-folders are created for each record or document within these dialog folders when the first documents are stored.