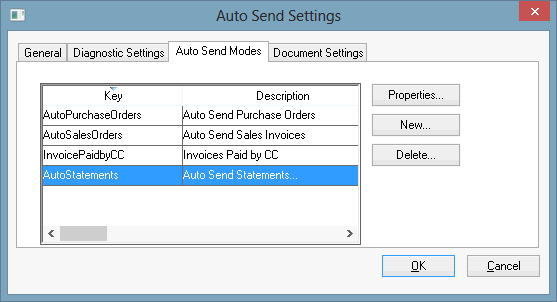
Select File > Auto Send Options > Auto Send Modes from the main EBMS menu to open the following list:
The Auto Send module is a convenient tool to e-mail or fax accounts receivable statements for customers. The user can choose between sending statements to all customers who have a balance due or only send statements to customers with overdue invoices. Continue with the following steps for details on configuring or sending a batch of statements to customers.
Complete the following steps to setup a Auto Send Mode.
Select File > Auto Send Options > Auto Send Modes from the main EBMS menu to open the following list:
Click the New button to create a new Auto Send Mode and open the following dialog or select a Statements Auto Send Mode and click
the Properties button. Continue with step 6 if the mode has already been created:
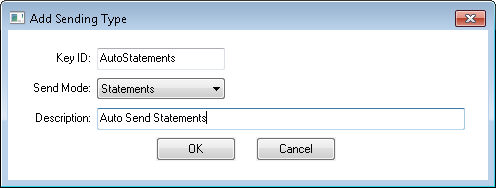
Each Auto Send Mode requires a unique Key Id. This Key ID should be a simple descriptive code that does not include spaces or symbols.
Select the Statements Send Mode option as shown above.
Enter a short Description of the auto send mode type. This description should clearly describe the mode process. Note that this text is used as the EBMS menu label. Click OK to continue.
Select from the main EBMS menu as show below:
: 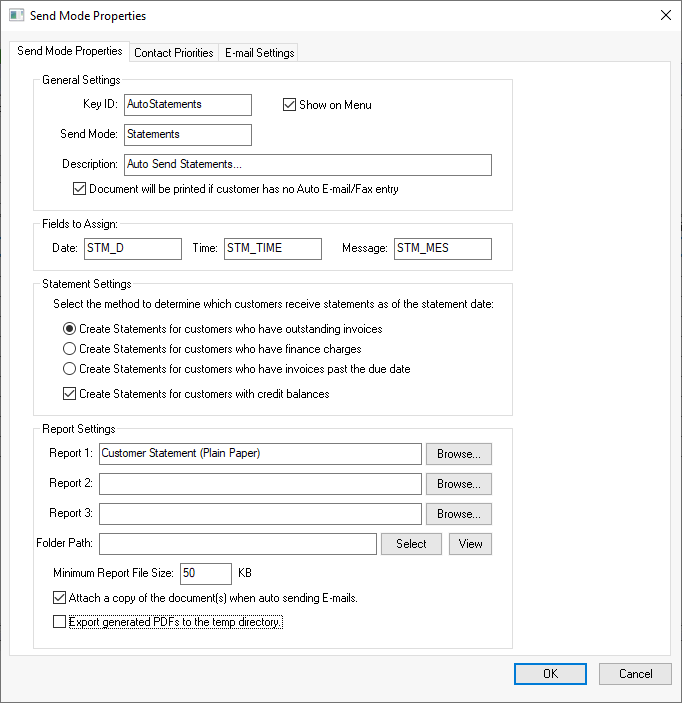
Select the Show on Menu option to make this option appear on the main EBMS Sales menu. This option should be disabled if the event is scheduled using the Task Scheduler App with the URL text described below.
Enable the Document will be printed if customer has no Auto E-mail/Fax entry option to print documents for customers without the settings required to email a statement. Review the following Customer Configuration setting within Auto Send Sales Orders or Invoices for instructions on setting these options.
Maintain the default values within the Fields to Assign settings since they are advanced settings. These settings are option in most modes.
Select one of the following options to determine which customers receive statements:
Select the Create Statements for all customer who have outstanding invoices option to send statements to all customers with outstanding invoices. A statement will not be send if the balance due is equal or below zero.
Select the Create Statements for customers who have finance charge option to send statements only to customers with finance charges. This method uses the system’s finance charges to determine overdue charges. If the finance charge amount on an invoice is greater than $0.00, it generates and sends a statement to this customer.
Select the Create Statements for customers who have invoices past the due invoices option to send statements to customers with past due invoices. This method uses the system’s finance charges to determine overdue charges. If the overdue amount on an invoice is greater than $0.00, it generates and sends a statement to this customer.
Enable Create Statements for customers with credit balances to send statements for all customers including customers with credit balances.
Enter the appropriate Crystal report form into the Report Settings. This setting should reflect a standard Customer Statement report or an approved custom statement report. Many other reports may not execute properly within Auto Send. Contact your Koble Systems representative for more assistance. Click Advanced to configure the exported PDF Attachment Name.
Review Auto Send Additional Documents to include other reports to this E-mail.
Minimum Report File Size: This feature is used to stop any sends on export files that are below a certain file size.
The Attach a copy of the document(s) when auto sending E-mails option MUST be enabled to attach a copy of the statement to the E-mail.
The URL code can be copied to the Task Scheduler App to automate the sending process. Review [Main] Technical > Automate using Task Scheduler App for instructions to send statements on a weekly or monthly basis.
Click on the Contract Priorities tab to enter the recipient options. Review Contact Priorities for configuration details on these important recipient settings.
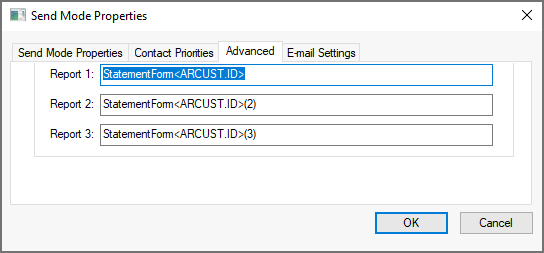
Select the Advanced tab to set the PDF Attachment Name created by the reports configured in the Send Mode Properties. User defined file names can be set for each of the corresponding reports
set in the main property tab described previously in this section.
Click on the E-mail Settings tabs to configure the e-mail that will be sent to customers as shown below:
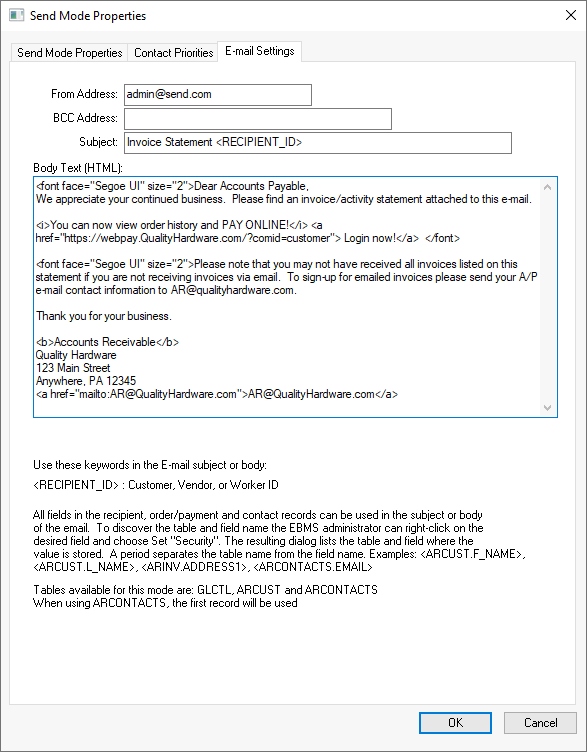
The recommended From Address is to match the From Address entered within the . Customer replies will be sent to this e-mail.
Subject: Enter a brief subject for the E-mail such as the example shown above.
Enter the e-mail’s Body Text (HTML) as shown above. Either use plain text or HTML for the body of the e-mail. Note that line break tags (<br>) may cause extra lines in the E-mail. Review the Test Mode section for details on testing the appearance of the e-mail.
Insert text to direct customers to the online payment portal if this option is available. Note that an online payment portal does not require an e-commerce website. Review E-Commerce > Customer Portal > Auto Send Temporary Web Account Credentials for instructions to add steps to pay invoices online.
Click OK to save settings.
Complete the following steps to send a single statement to a customer:
Open a customer by selecting from the EBMS menu and selecting a specific customer.
Click on the Auto Send tab as shown below.

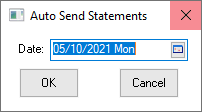
Enter the statement Date and click OK.
A statement will be sent to a single customer similar to the Send Now feature.
Accounts Receivable statements can be sent to customers a frequently as desired. Complete the follow steps to send statements:
Review the Auto Send tab of a customer to add a Message or to exclude specific customers from the Auto Send batch.

Launch the Auto Send process by selecting Sales > Auto Send Statements from the main EBMS menu.
The system will prompt the user to update the finance charges for overdue invoices. Review Sales > Customer Finance Charges for more details on this step.
Set the Auto Send Statement Date as shown below. This date will be used as the statement date.
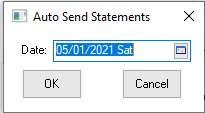
Customers with balances due before or on this date will be handled. Statements will be created based on the option set in File > Auto Send Options > Auto Send Modes > AutoStatements > Properties dialog. The statement will be either E-mailed, faxed, or printed depending on the settings within the customer record.
Click on the OK button to continue process. Review the Test Mode section for details on testing the process.
The process will create a CSV log file if the logging option within the Auto Send Options > Diagnostic Settings is enabled as shown below:
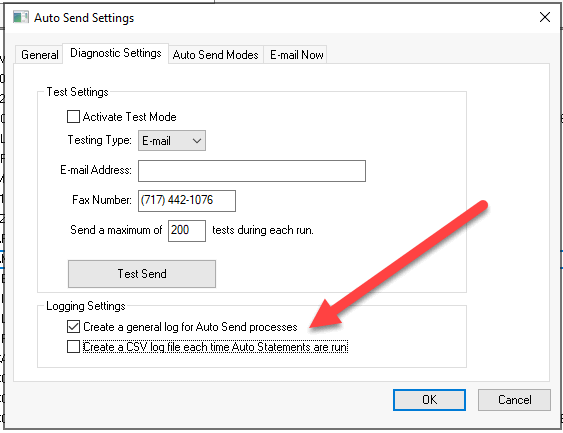
The log file is found in the export folder set in General tab of . The log file will be labeled Auto Statement Log and appended with the date of the statement process.