The Vendor Payments dialog is the tool used within EBMS to process direct payments as shown below: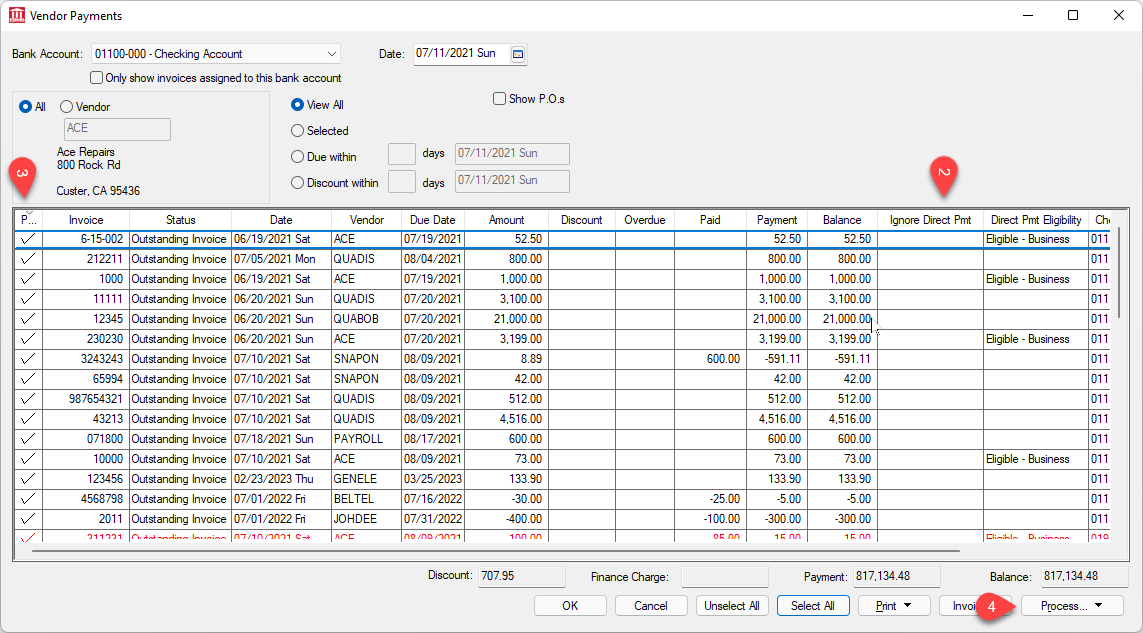
Expose the Direct Prnt Eligibility and Ignore Direct Pmt coumns as shown above. Enable the Ignore column to print a check instead of processing the payment using the ACH direct payment option. No changes are needed to process direct payments for all eligible vendors.
Select the invoices to pay. Review Selecting Invoices to be Paid for more information on selecting invoices or adjusting the payment amounts.
Click on the Process button on the lower right corner of the dialog and select Process Checks and Direct Payments as shown above. Review the Vendor Payments > Selecting and Invoice to be Paid section for details on steps to Process Checks or to enter Manual Payments. The following dialog will appear to Process Direct Payments:
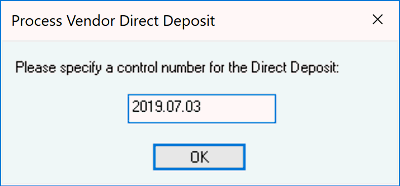
Enter a control number of the batch of vendor payments. You can enter a date or other unique control number of each batch of payments as shown above. Click OK and the following dialog will appear.
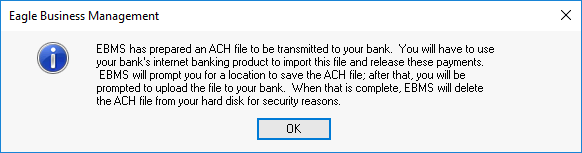
Click OK to open the following dialog to save the NACHA file (Initially designed by the National Automated Clearing House Association) as shown below:
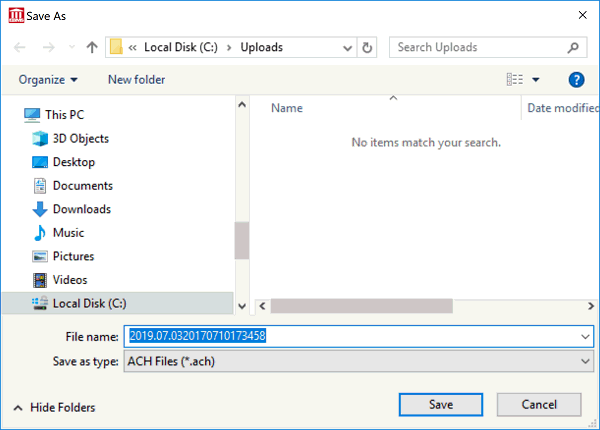
Click Save to save the *.ACH file in a location that is easy to upload to your bank’s cash management site. The following dialog will appear when the file is created. Keep the following dialog open until the ACH file has been successfully uploaded to the bank’s cash management site. Review Bank Accounts > Create Prenote and Submit Nacha to Bank Web Portal for instructions to upload this file. Complete this upload step before continuing with the next step.
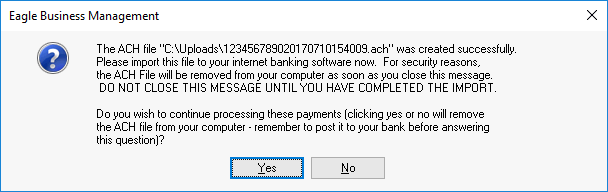
Click Yes when the ACH file has been successfully uploaded to the bank’s direct payment site. Click No if the ACH process was not successful to keep the invoices open allowing the payment process to be repeated.