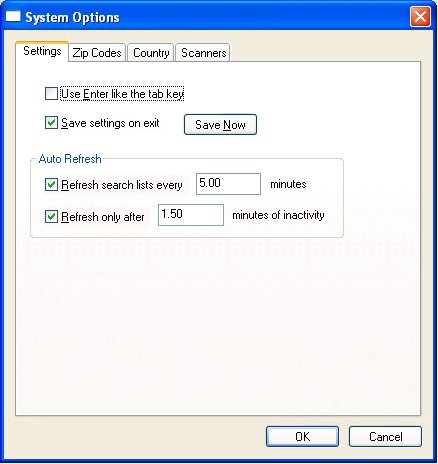
Go to File > System Options > Settings tab to set universal settings as shown below:

· Use Enter like the tab key allows you to tab through the fields in a window with the use of the enter key. The tab key still functions normally. The recommended setting is OFF unless the user is accustom to the Dos version of EBMS and requires this feature.
· The Save desktop settings on exit option caused the system to save all the open lists within the main desktop. For example, if the inventory list and customer list are open at the time EBMS is shut down, these lists will reopen the next time EBMS is launched. Complete the following steps if the user prefers to have specific lists opened the same way each time EBMS is launched:
1. Open the lists that need to be opened each time EBMS is launched on the current computer. Review the Search Lists section for more details.
2. Size each list to the desired length and width.
3. Go to File > System Options > Settings tab and click on the Save Now button. This will save the lists opened at the time the button was clicked.
4. Turn the Save desktop settings on exit option OFF so that any changes to the orientation of the lists will be overridden by the desired standard layout.
· The Auto Refresh options are used to determine if and how often the search lists are refreshed with the current data. For example if another user on the network adds an item to the list, the items will not be displayed until the list is closed and reopened or unless the sort or folder setting are changed.
· The Refresh search lists every ____ minutes value determines the amount of time the system will wait to refresh since the last list update or refresh. The option is required to be checked ON for the option to be activated. This option will refresh even when the system is busy.
· The Refresh only after _____ minutes of inactivity will cause the system to refresh only after the system has been idle for the determined about of minutes. This option is useful if the refresh step slows down the computer system. Again this option is required to be checked ON to be valid.
Zip Codes
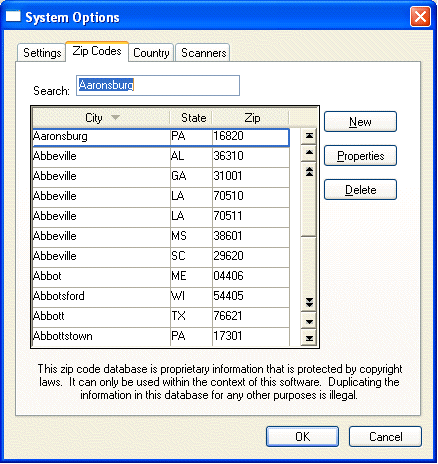
Go to File > System Options > Zip Codes tab to view the zip code database as shown below:

· A zip code list is built and maintained each time a City, State and Zip combination is entered within EBMS. This includes the Customer, Vendor, and Employee contact information tabs. Review the Adding a New Customer section for more details on entering contact information.
· City, State, and Zip combinations can be edited on this list. Click on any column heading to sort the list in alphabetical or numerical order.
· Press the Ctrl + Delete keys on the keyboard to delete a City, State and Zip combination. This will not delete any contact information but will prohibit the zip code from defaulting from the City and State combination.
· Press the Ctrl + Insert keys to insert a new City, State, and Zip entry. Note that each time a new City, State, and Zip combination is entered in any contact entry screen such as the customer entry window, the Zip Code database is updated with the new information.
Click OK to exit the Zip Code window.