Search lists are used as a convenient way to search or manage a list of records such as your customers, vendors, inventory items, employees, etc. A number of search lists can be opened within the main EBMS desktop. Each list can be moved and resized within the desktop. All lists launched from the main menu will be minimized when the EBMS desktop is minimized. Open lists will be maintained when exiting based on the Save desktop settings on exit option found by going to File > System Options > Settings tab. Review the System Options section of this documentation for more details.
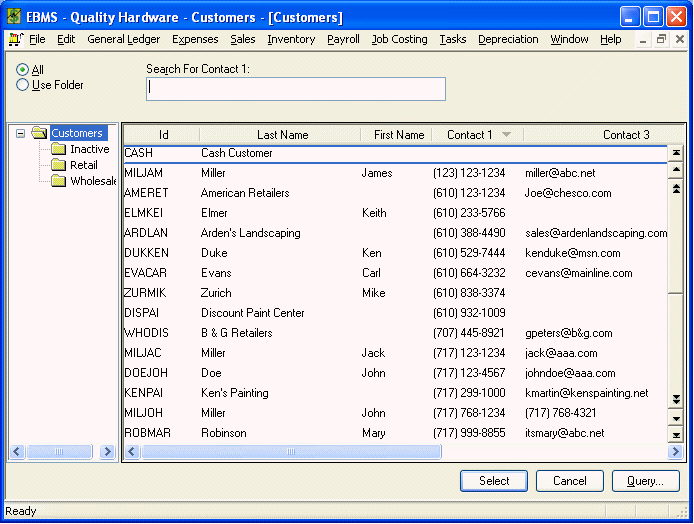
These lists can become very lengthy since EBMS does not restrict you to the number of items that can be entered making it very important that you have access to this information in a number of ways. Following is an example of the Sales > Customers lookup:

The search list box consists of:
· Title Bar
· All & Use Folder option
· Search entry
· Folder pane
· Information pane, which includes
· Information titles
· Information list that highlights a specific record using a selection bar that identifies the current selection.
· The Title Bar identifies the list being viewed such as Customers in our example. If the title bar is not visible, click on the restore button in the upper right corner. (It’s the middle of the three buttons.) To move the list within the program pane, click on this title bar with the left mouse and drag it. See the Windows manual for more information on moving windows.
The information in this list can be displayed in:
· A simple list format with all customers in a single list. This is accomplished by selecting ALL;
· A hierarchical list by selecting Use Folder. This feature allows you to view your information in a group method. See Folder lists in this section for more information.
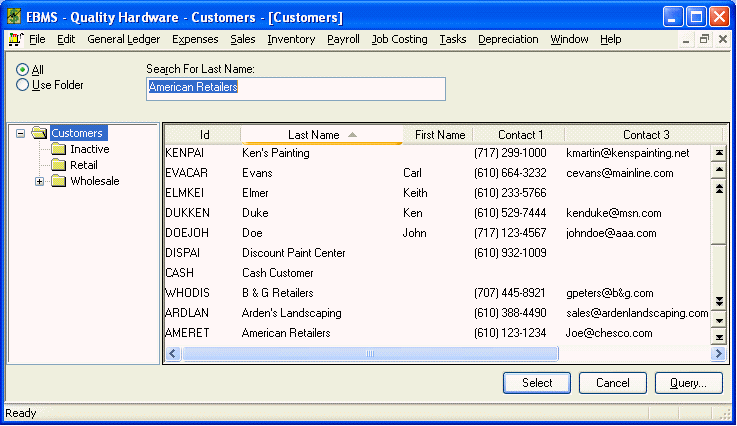
· The Search entry is used to conveniently position the list to the desired record. The search entry is labeled as Search For ID in our example and note that the information is sorted by the ID. The search topic can be changed by clicking on the column heading. To search for last name simply click on the Last Name heading.
As you type in text, your strokes will be displayed with a background of white while the system attempts to complete your code with the first matching Id code available. Note that the information bar moves to attempt to identify the specific information that you are searching. If you enter text that does not match any of the list information, it will be underlined in red.
· If the All & Use Folder List option is set to All this folder pane has no affect on the information listed. If the option is set to Use Folder the system will only list the information contained within this folder. You can also change folder selection by clicking the desired folder with you mouse or by using the up and down arrows on your keyboard. Note that a record (in our example a customer) cannot be located in more than one folder. For additional information see section on folder lists.
· The Information Pane is where the actual information is listed. This list can be resized by adjusting the size of the folder pane and the information pane by clicking on the center bar with the mouse. You can also enlarge the entire list box. See Windows manual for more information on resizing windows.
· The information titles identify the contents of each column and are also used to resize and hide columns, or sort information.
· Columns can be resized by holding the mouse cursor between two column titles. When the cursor changes into a move cursor depress the left mouse button and move to the left or right to readjust column widths.
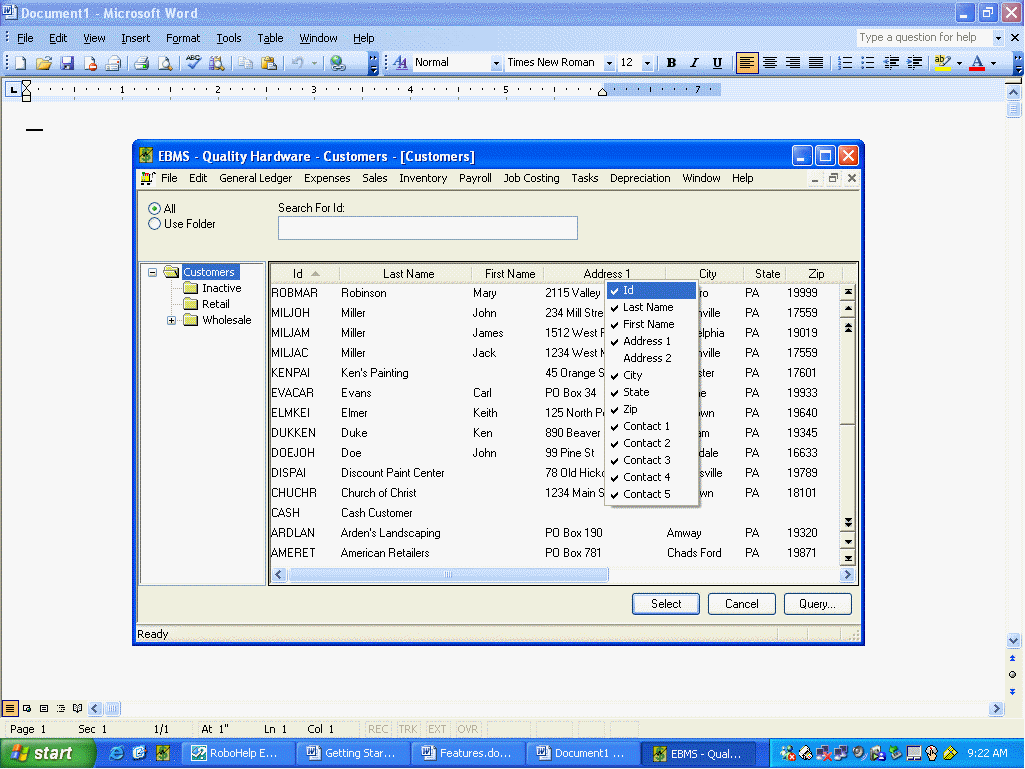
· To hide or show specific columns in a lookup list, position the mouse cursor anywhere on the column titles and right click your mouse.

· Hide a specific column by selecting any that are prefixed with a check mark or show any columns that are not prefixed with a check. This feature allows the user to only show the information that is relevant to the current user. These settings are stored by each user. Therefore, you could hide a specific column but another user on another computer could show the same column.
§ To change the sort order of a list, click on the column title with your mouse. For example, if you want to sort by the Last Name, click on the Last Name title and the entire list will be resorted by the last name in ascending order. If you prefer to list the information in descending order, click on the title a second time. Note that when you click on a specific column the search entry label changes to reflect the current sort order.

§ The information list includes a selection bar that can be moved by clicking on a specific line with the mouse or using the arrow keys to move list bar up and down. The page up and page down keys on the keyboard will move the entire list an entire page. A scroll bar will appear on bottom of list if the column widths are greater than the width of the pane. Note that you can also move the list information up and down by using the scroll bar on the right of the information pane.
· When you have the selection bar placed on the desired selection you can press the enter key or click on the Select button with your mouse.
· The Cancel button can be pressed to exit list without making a selection. Note that many lists can continue on the window for convenience while you select another list or window using menu or hot keys.
· The Query button activates a Query, which can be very powerful, when a specific list is desired. When a Query is active, the button will be labeled Stop Query, which can be selected to abort the Query. Review the Queries section for more details.
· The tab key will tab between fields and buttons on the list box window, similar to the way it operates on dialog windows.
Lookup List Boxes are a very useful tool in locating information quickly or sorting in a variety of ways.
Go to the Getting Started > System Options > Settings tab for more details on configuring the lookup list windows each time EBMS is launched.
PRACTICE EXERCISE: Open the Customer List Box by selecting Sales > Customers. Select a desired customer by clicking the Last Name title to sort by last name or company name. When selection bar has highlighted the desired customer, select Sales > Invoices and S.O.’s on the program menu. Notice that the invoice/Sales Order window opened with the selected customer’s Id code already entered. If you prefer to change the desired customer, you can do it two ways:
· Exit the invoice window by pressing Cancel and moving the list to a different customer.
· Click on the lookup button and an additional customer list will open.
You can select another customer and continue.