Reserving a Rental

A rental contact is created when a customer reserves or checks out any rental equipment. A contract can be created using one of the following two methods:

  1. Launch the Rental > Availability Wizard from the EBMS menu. This option allows the user to identify the availability of the equipment that is being requested before identifying the customer or contract details.

  2. Open the rental dialog by selecting Rental > Contract from the EBMS menu. This option must be used to open or add to existing contracts. This approach is recommended if the customer was identified before the rental equipment was selected.  Review Creating a Contract for details.

Availability Wizard

Complete the following steps to select equipment using the Availability wizard:

  1. Launch the availability wizard by selecting Rental > Availability Wizard from the EBMS menu as shown below:
  2. Select one of the following selection options:
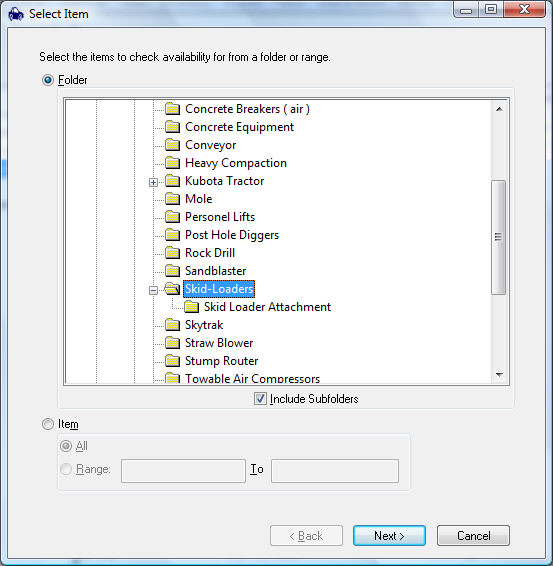
    1. Select Folder to view the availability of a group of items organized within a folder or subfolders. Notice that the attachments are located within a subfolder in the example shown above. Since the Include Subfolders option is enabled, the items within the subfolder Skid Loader Attachment will be included in the list of options.

    2. Select the Item option to select by inventory code range.  

  3. Click on the Next button to continue.
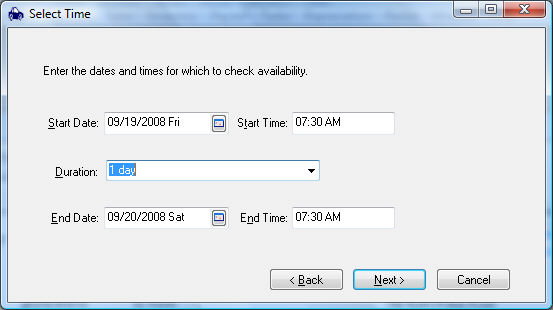
  4. Enter the requested time period for the rental item.

    1. The Start Date and Start Time will default to the current date and time. This time can be altered by the user.  
    2. The Duration is calculated from the End Date and End Time. The End Date and End Time settings are changed if the user changes the Duration setting. Click Next to continue.

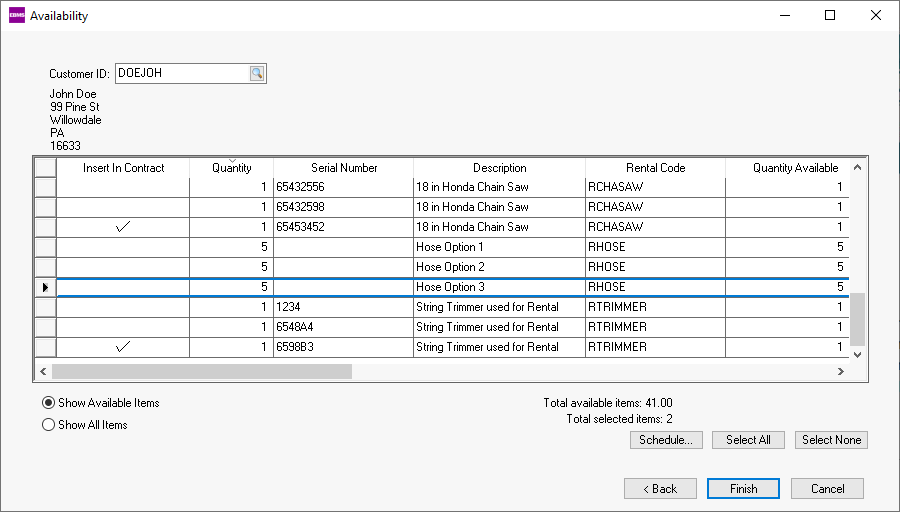
  5. Enter the Customer ID of the customer who is reserving the equipment. Enter a Misc customer to view availability before the current customer is entered.  

  6. Select Show Available Items option to view only the items within the previously defined criteria that are available for rental.  

  7. Click on the Show All Items to view items including those that are not available.

  8. Click Schedule to view the schedule of specific items.  Review Rental Schedule for more details to view the schedule of specific equipment.

  9. Click the Back button to change criteria.  

  10. Click on the Finish button to open the rental contract. Continue with this section for details on adding additional items, attachments, or consumables to the rental contract.

  11. A contract's Status can be changed to Pending or Canceled to save the contract without scheduling the reservation.  

Rental Contract

Complete the following steps to add an item within a rental contract:

  1. Select Rental > Contract to open the contract dialog as shown below:
  2. Enter the Customer ID similar to a sales invoice. The following dialog will appear on the screen only if an existing contract is open:
  3. Select an exiting contract from the list or click the No button to create a new contract.

Review Creating a Contract for more instructions to enter information on the contract form.

Review Process a Rental for instructions to process a rental contract.

Review Rental Schedule for schedule information for specific rental services.