Network the UPS WorldShip shipping computer to allow access to the EBMS data.
Add UPS to the shipper list. Review Setup Shippers for instructions.
Configure an ODBC driver on the shipping computer. Review Configurating ODBC Database Drivers for instructions.
Configure the communication to pull shipping information from the EBMS software: Complete the following steps to launch the UPS WorldShip Connection Assistant to map communication to import shipping information from EBMS:
Launch the UPS World Ship software and Select Import-Export > Tools button > Connection Assistant as shown below:
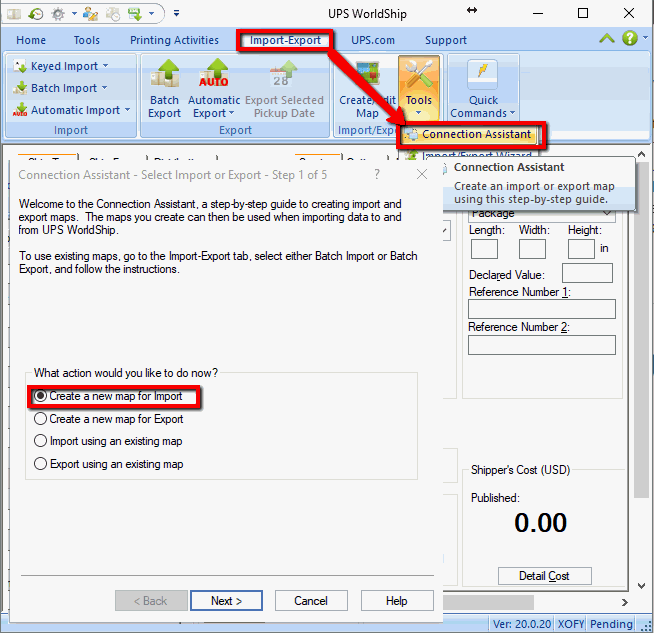
Select Create a New Map for Import option as shown above and click Next.
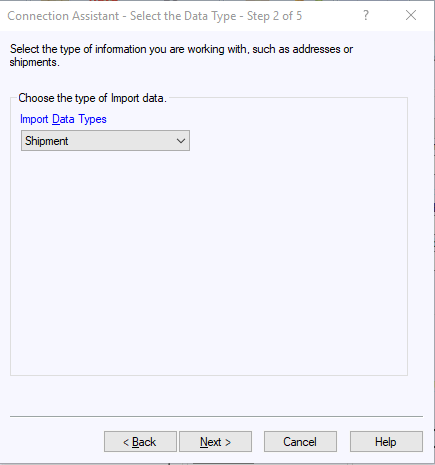
Select the Import Data Type option Shipment and click Next to open the following wizard page:
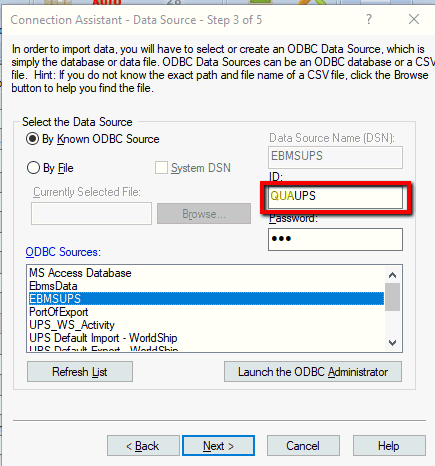
Select the EBMSUPS ODBC Sources as shown above. Review the Configurating ODBC Database Drivers if the EBMS ODBC driver source does not appear.
Set the EBMS user name as the ID and Password that is used to access EBMS data. The user name and password should be set with the same credentials as the ODBC driver. The user name must be prefixed with the 3 character EBMS Company ID found in File > Company Information > Advanced tab > Company ID. In the User Name example shown above, the QUA represents the Company ID and the UPS text is the user name. Review the [Main] Getting Started > Security > Creating Users and Assigning Rights for more details on creating users and setting passwords.
Click Next to open the next page as shown below:
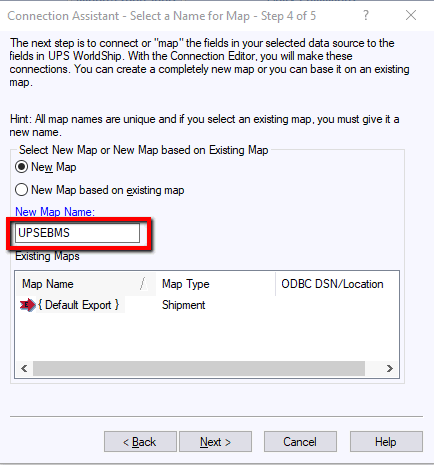
Select New Map and enter EBMSUPS into New Map Name entry as shown above and click Next.
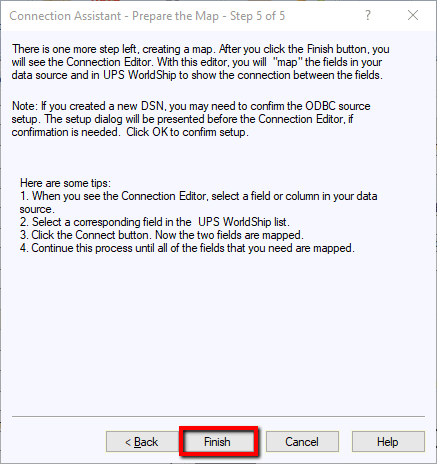
Click Finish to complete the wizard and open the following import map dialog.
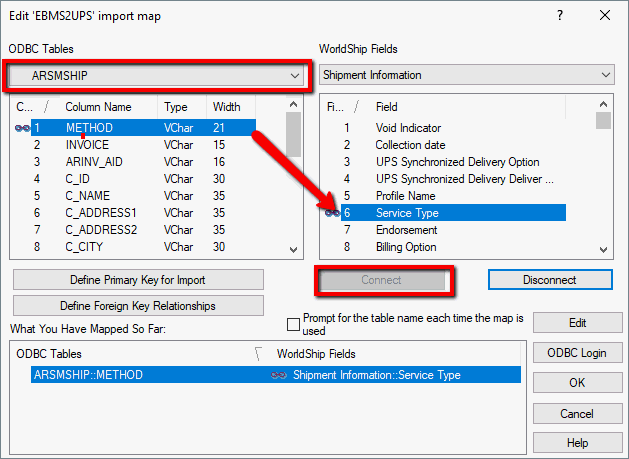
Complete the following steps to connect the WorldShip Shipment Information field:
Select the ARSMSHIP from the ODBC Tables drop down and the WorldShip Fields drop down to Shipment Information as shown above:
Click on the Method field from the ARSMSHIP fields on the left column and click Service Type on the right column
Click the Connect button to associate the EBMS field to the WorldShip field.
Complete the following steps to connect the WorldShip Ship To fields:
Change the WorldShip Fields drop down setting to Ship To and keep the ODBC Tables set to ARSMSHIP.
Select ODBC > Invoice field in the left column and the WorldShip Fields > Tax_ID and clicking the Connect button.
Connect each EBMS ODBC field with the corresponding WorldShip > Ship To field described within import field mapping table at the end of this section.
Connect each EBMS ODBC field within the ARSMSHIP table with the corresponding WorldShip > Package field as listed in the mapping table at the end of this section.
Connect each EBMS ODBC field within the ARSMSHIPDET table with the corresponding WorldShip > Package field as listed in the mapping table at the end of this section.
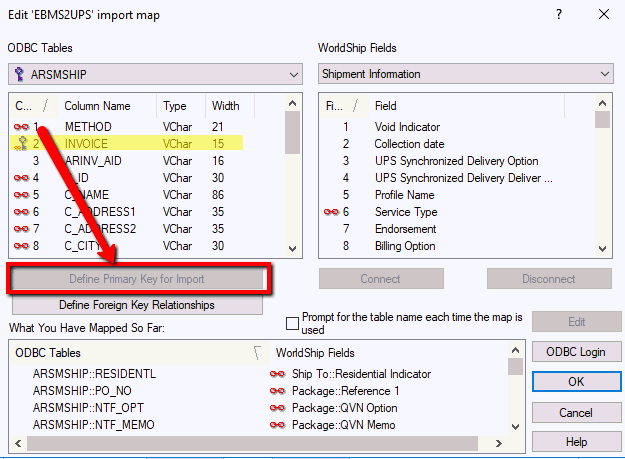
Define Primary Key for Import but selecting the Invoice
Column Name within the EBMS ODBC Table ARSMSHIP and clicking
the Define Primary Key for Import
button as shown below:
Associate child EBMS files to ARSMSHIP
tables by completing the following steps:
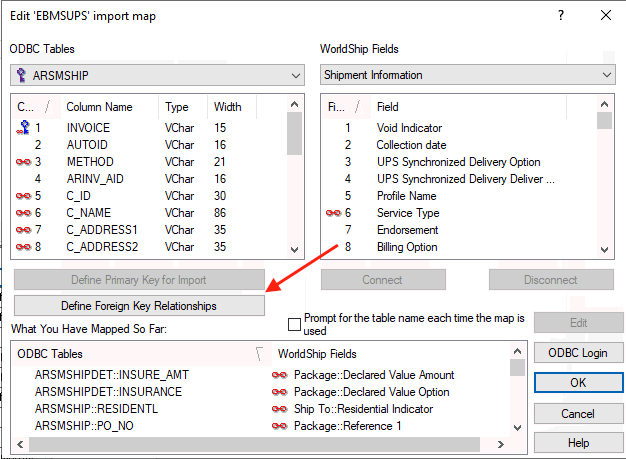
Click on the Define Foreign Key Relationships button to open the following dialogs:
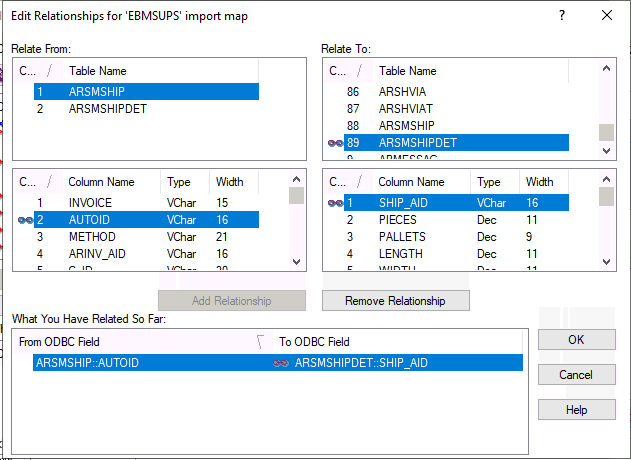
Since the main EBMS shipment export table is ARSMSHIP, select ARSMSHIP within the Relate Frompane and Relate To: file of ARSMSHIPDET as shown above.
Select the main key field ARSMSHIP > AUTOID in the left pane and relate to the ARSMSHIPDET > SHIP_AID field in the right pane and click Add Relationship button.
Click OK to save.
Complete the following steps to launch the UPS WorldShip Connection Assistant to map communication to export tracking and billing information to EBMS:
Launch the UPS WorldShip software as done in step 3A:

Select Import-Export > Tools button > Connection Assistant from the WorldShip menu to launch the following wizard:
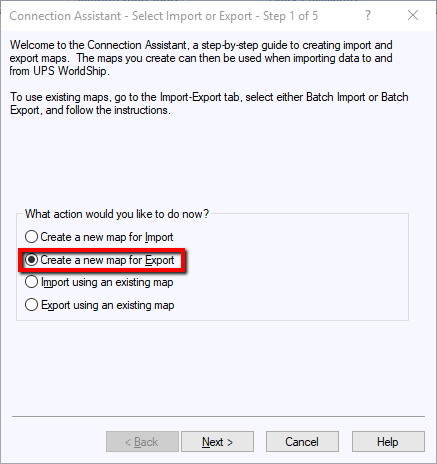
Select Create a new map for Export option as shown above and click Next.
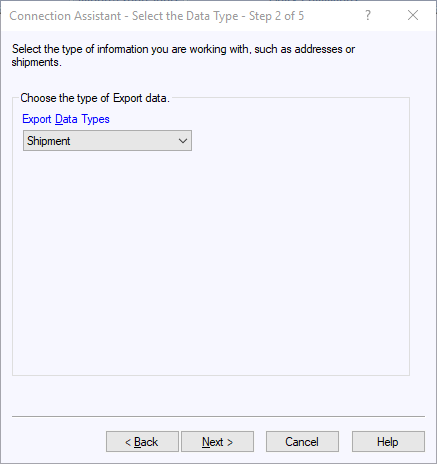
Select Export Data Types option to Shipment as shown above and click Next.
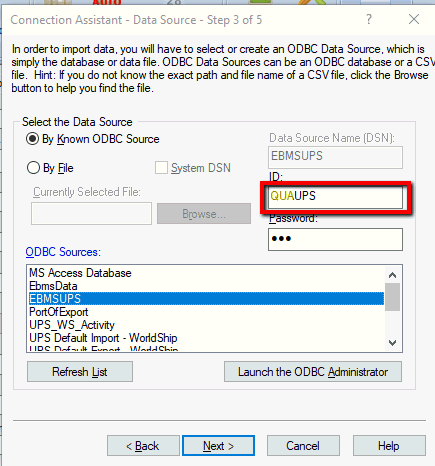
Select the EBMSUPS ODBC Sources as shown above. Review the Configurating ODBC Database Drivers if the EBMS ODBC driver source does not appear.
Set the EBMS user name as the ID and Password that is used to access EBMS data. Use the same user name and password as set in step 3E as described above. Click Next to continue to the next page as shown below:
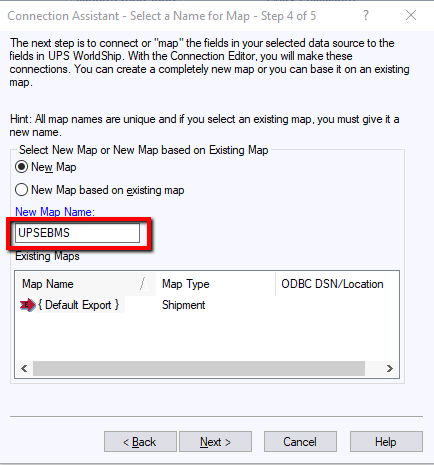
Select the New Map option and enter a New Map Name such as UPSEBMS since the data will be exported to EBMS. Click Next.
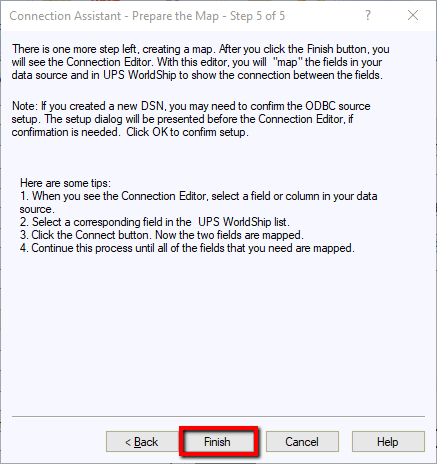
Click Finish to complete the wizard and open the following export map dialog.
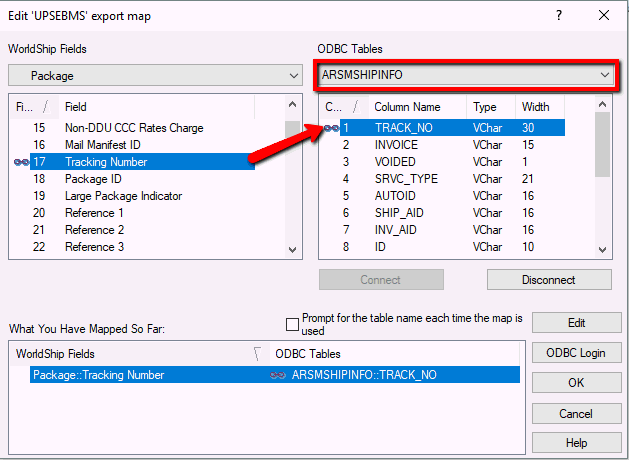
Select the WorldShip Fields drop down setting of Shipment Information and select ARSMSHIPINFO from the ODBC Tables drop down.
Map each WorldShip field to the corresponding EBMS field as shown above. Utilize the export field mapping table below to identify the appropriate field association.
The following steps are needed to configure group multiple packages within UPS WorldShip. The step is done to group multiple packages under a common tracking number. This option will allow the user to attach multiple packages including WorldShip calculated handling fees to a single EBMS invoice. This optional may not be important if the cost is calculated within the EBMS sales invoice rather than calculated by WorldShip. Set the following additional WorldShip Fields for Shipment Information settings to group multiple packages:
Copy the Shipment Information > Total Shipment and Handling Published... within WorldShip to the ARSMSHIPINFO > SHIP_COST field instead of copying Package > Package Published Charge to ARSMSHIPINFO > Cost as described in step #16.
Copy the Shipment Information > Lead Tracking Number within WorldShip to the ARSMSHIPINFO > TRACK_NO instead of copying Package > Tracking Number as described in step #16. See the details within the export field mapping table at the end of this section.
Select the WorldShip Fields drop down option of Ship To and map each WorldShip field to the corresponding ARSMSHIPINFO field as listed in the export field mapping table below:
Select the WorldShip Fields drop down option of Package and map each WorldShip field to the corresponding ARSMSHIPINFO field as listed in the export field mapping table below: Click OK to save
Complete the following steps to setup automatic exports: This automatic process is important to push information back to EBMS after WorldShip as processed the shipment.
Select Import-Export Data > Automatic Export After Shipment Processing from the main WorldShip menu as shown below:

Select the More... option from the submenu to select the EBMS export table as shown below:
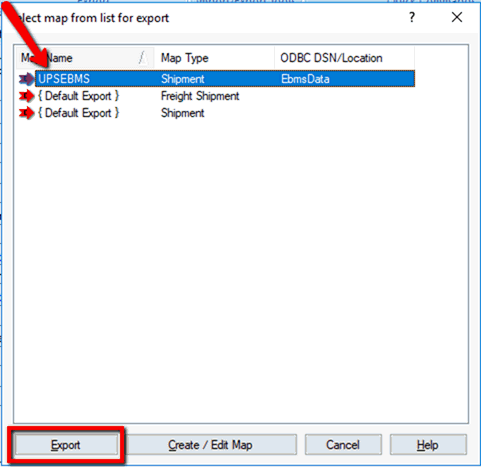
Select the EBMSUPS ODBC DSN file as shown above. Review the Configurating ODBC Database Drivers if the EBMS ODBC source does not appear.
Click Export to select the EBMS file to export automaticly. The EBMSUPS file will appear on the menu as shown above.
Test the connection to EBMS from UPS WorldShip. Review Using EBMS Data within UPS WorldShip to test connection.
Use the folowing table to edit the field mapping relationship
between EBMS and UPS WorldShip if any information is not being copied
between EBMS and UPS.

Import map will read from the EBMS ARSMSHIP & ARSHIPDET Tables via the ODBC Connection and import into WorldShip
Export map will copy data to the EBMS ARSMSHIPINFO table using the WorldSSelect the ARSMSHIP from the ODBC Tables drop down.