The Time Track App is an electronic time clock that populates the timecard details such as the date, work code, date, and units/hours as well as the clock in and clock out times within the EBMS timecard. The Time Track App should be conveniently located where employees can clock in and out when starting or leaving work. The app can be run on individual users' computers or be mounted in a central location for workers to clock in and out similar to a traditional time clock. Time Track can click in multiple individuals that are associated with the Worker and are grouped in the same Worker category. This device can also be used to record piecework details.
Review Installing and Configuring the Store App for instructions to install Time Track on a device and configure options. Launch the MS Store Time Track App as shown above.
Review the following sections for information on the following scenarios:
User Clock In/Out: Steps for a worker to record daily time within a timecard
Clock In/Out Multiple Individuals: Steps for a worker to record additional workers' time when recording daily time
Piecework Pay Data Collection: Steps for a worker to record the number of piecework items completed in a day
Additional EBMS timecard information is shown at the end of this page.
Complete the following steps to use the Time Track App:
Enter the PIN number that was added in the user configuration process, and select Clock In/Out. Review User Configuration for details on the PIN number and other user setup
requirements.
The following login information will be temporarily displayed on the left of the key pad:
Worker name
The time that is being recorded as the click in time
Other times within the current date
The total amount of time recorded for the current date
The total amount of time for the week or pay period. Change the
Enter the PIN number again to clock out in a similar manner as the clock in. The following option will appear only if multiple Work Codes are entered in the App Settings tab of the worker record:
Review User Configuration for instructions to configure multiple work codes for a worker. Review Piecework
Pay > Collecting Piecework Details using Time Track for instructions to configure Time Track to record piecework pay.
Slide the various bars up and down until they accurately represent the user's time allocation. Enter piecework quantities if the work is configured for piecework pay rather than hourly pay.
Click Assign to write timecard lines. Click Skip to assign timecard lines at a later time or by the payroll staff. If the Insert Lunch Break is selected on the Time Clock tab of the employee's payroll record, they will see an option to add or change lunch.
The following configuration allows other workers to be clock in/out using the same time and steps as an identified worker such as a manager or leader.
Complete the following steps to identify the manager or leader and clock in/out a group of workers:
Open the manager or leader Worker record in EBMS and click on the App Settings tab.
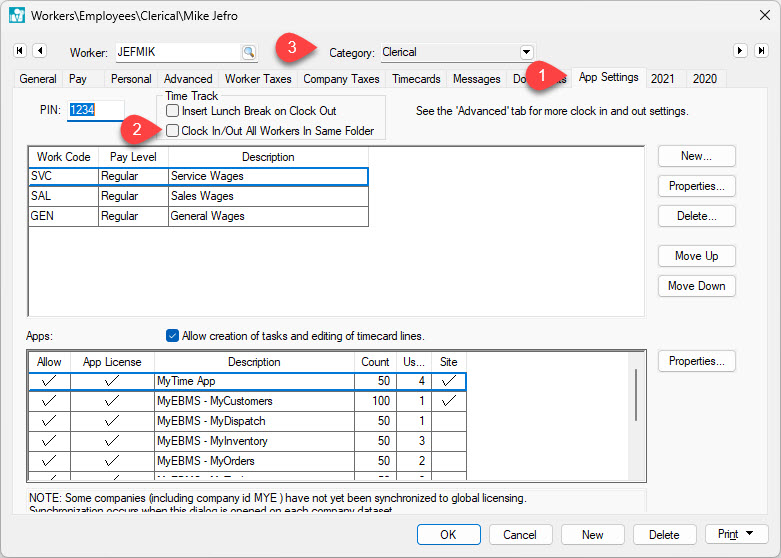
Enable Clock In/Out All Workers in Same Folder only within the manager or leader's worker record. Do not enable this option for other workers that are grouped with the manager or leader.
Verify that all workers that are clicked in at the same time must be placed in the same Worker category.
Repeat these steps for other worker groups with a consistent leader or manager.
Review Collecting Piecework Details using Time Track for steps to use this powerful app to add piece work information to worker's timecard.
The time entry device and user are displayed in the timecard dialog (Dialog > Timecard Entry) as shown below:
The following columns can be used to show the source of the timecard time:
The Start T1 Entry Device will indicate the time clock source of the data entry. This copies the name of the MS Windows device that is hosting Time Track. Right click on the windows start button and select System from the Windows 10 context menu to access the Device Name.
The Start T1 Entry User will show the login user that recorded the time. Review User Configuration for instructions to setup a time clock user setup and details.
These columns may be hidden. Review the Standard Features > Column Appearance section of the main documentation for instructions on showing or hiding columns within the timecard.