Select from the main EBMS menu.
Click
the Edit menu and select New. A new worker wizard will start
taking you through the following steps:
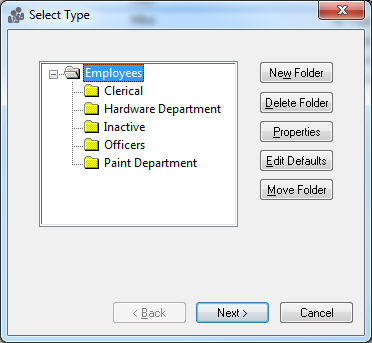
Highlight
the folder in which you want to place the new worker and click Next. Review the Workers
> Adding and Deleting Worker Folders section for more details
on creating new folders.

Enter
the worker’s name and address information into the appropriate fields.
EBMS searches a postal code database when the user enters a Zip code and populates the matching
City, State,
and Country settings. Review
the Standard
Features > Postal Code Database section of the main documentation
for more details. Click Next
to continue.
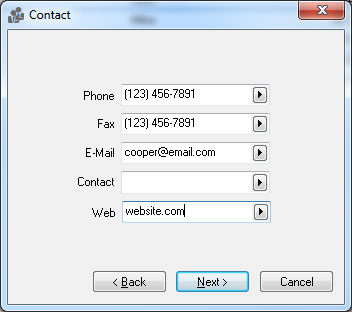
Enter
the Contact Information for
the worker as requested. Clicking on the arrow key to the right of
the field and selecting the appropriate field name can change the
field label. Click Next.
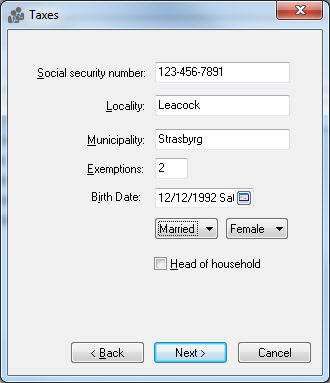
Enter worker’s Social Security number. Social security numbers are required for all worker records by law.
Enter Locality. The county of the worker.
Enter Municipality or township in which the worker resides.
Enter the number of Exemptions the worker is claiming for tax purposes as recorded on W-4 form.
Enter the worker’s Birth Date.
Select the worker’s marital status as Single or Married by clicking on the down arrow.
Set the worker’s sex as Male or Female.
If the worker is claiming Head of Household status for tax purposes, click the switch. Click the Next button and the following window will appear:
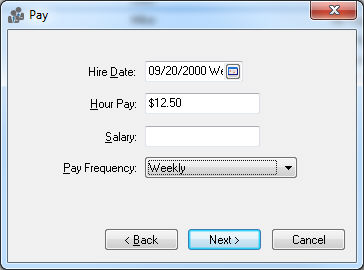
Enter Pay information.
Enter the Hire Date of worker. This date is used to determine the worker’s anniversary.
Enter worker’s Hour Pay. If this worker is salaried enter an hourly pay rate only if overtime pay is used for this worker.
Enter Salary Pay only if an worker is salaried, otherwise keep this field blank.
Select the appropriate Pay Frequency for the new worker. Click the Next button and the following window will appear:
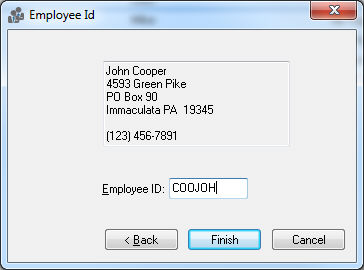
Enter the Worker Id code. This code is required to be unique to a specific worker. This Id is used throughout the entire accounting system for all transactions associated with this worker. (Changing the worker Id is a lengthy process – plan and use an Id that is satisfactory). Click Finish to create a new worker or Cancel to ignore new entries.