Customization Designer
Using the Customization Designer, a manager or administrator can extend or customize EBMS by adding custom fields, or display a standard EBMS field in a new location. For example, a user may wish to add certification information into
a customer record that is read by a report or customization, or display the Purchasing Agent field on the Expense Invoice header rather than having to go to Advanced Settings dialog to view and edit it.
The following definitions are important to understand to use the Customization Designer:
- Standard field: a property or segment of information within a record or entity added by EBMS developers. For example, standard fields in a customer entity include first name, last name, city, and terms.
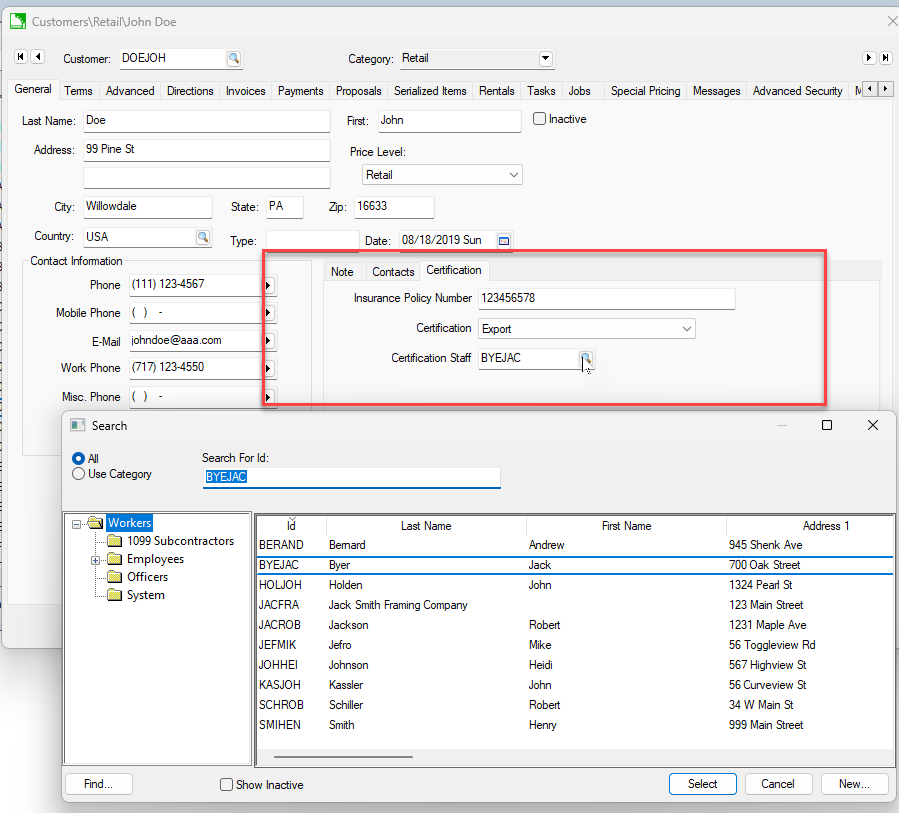
- Custom field: a property that has been added by the user or custom developer. For example, to add certification information. If the field was created by a developer, its definition cannot be edited or deleted.
- Document: a collection of fields or information for a single record. For example, a customer's fields or information is stored in a customer document.
- Table: a collection of records or documents.
Warning: Adding fields to the EBMS database often requires exclusive access to data to apply. Exclusive access requires all users to exit EBMS while the system adds the information. The time required varies based on the size of the tables being altered.
Review Server Manager > Optional EBMS Modules for instructions to install optional modules such as Customization Designer.
Create a Custom Field
-
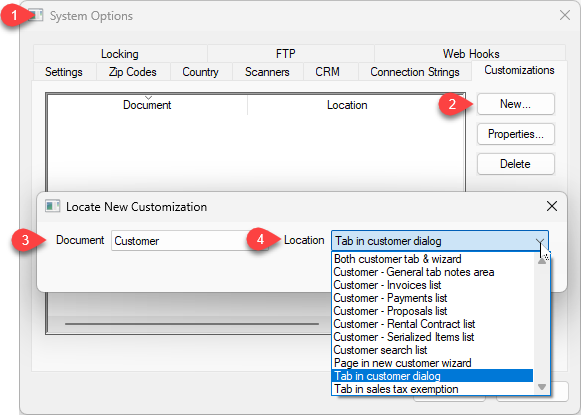
Select from the main EBMS menu, and click on the Customizations tab.
-
Click New to choose the document and location where the new fields will be added.
-
Select the existing document where the custom fields are shown.
-
Select the field display location and click OK.
-
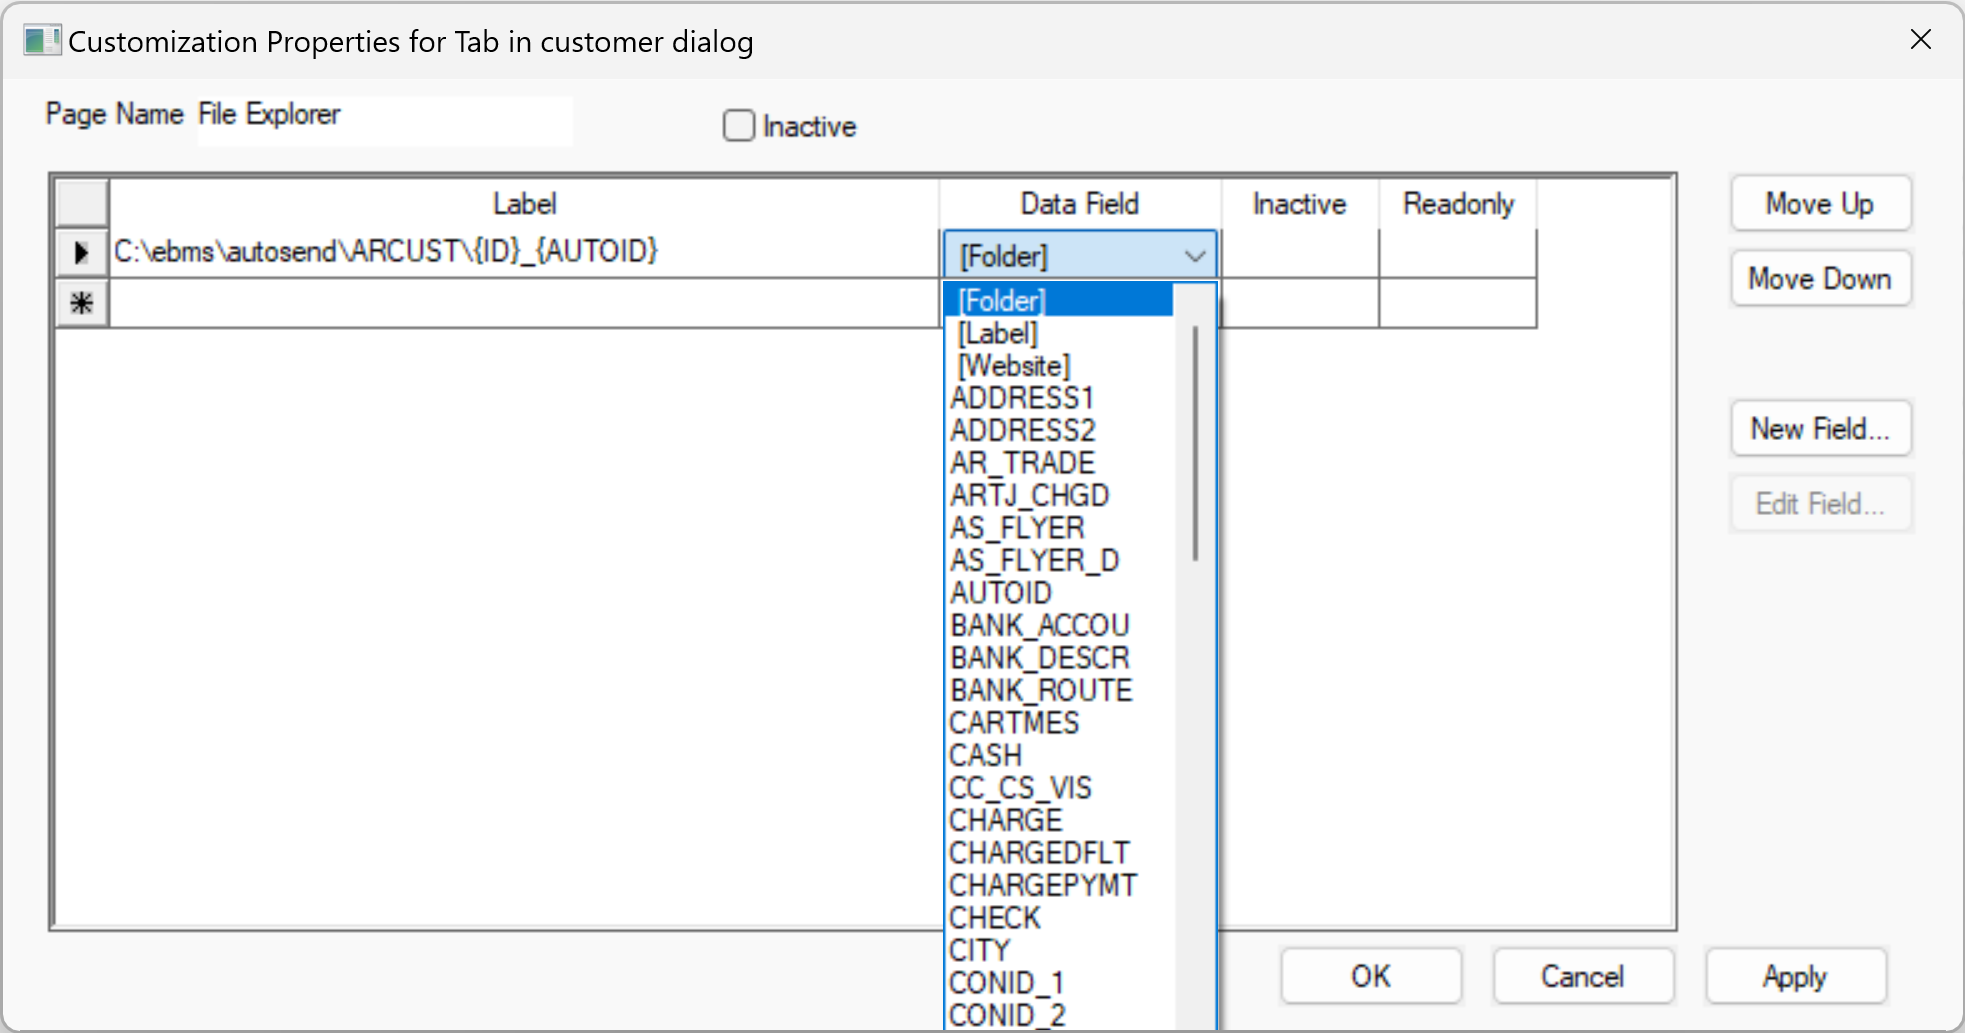
Highlight the customization and click properties.
-
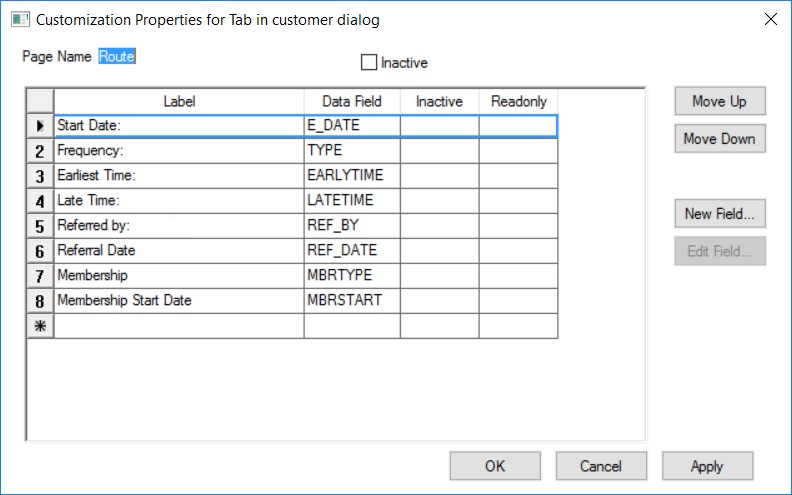
If it is a page-oriented location rather than an existing tab, enter the Page Name.
-
Enter the Label that will show on the page. The label can be used to describe the field, page, or some instructional text. The label can alternatively represent a CodeBase expression if it is surrounded by square brackets. Example:
[IIF(cust_id='ZURMIK', 'http://www.koblesystems.com/zurmik','http://www.koblesystems.com/other')]. Review Database Expressions for information on Codebase Expressions.
-
Select the existing Data Field. Click New Field to add a new field to the table. Review EBMS Tables and Fields for instructions to locate the file and field names. Review
the Create New Fields section below for field details.
-
Click Edit Field to change field attributes
-
Repeat steps 6-9 for any additional fields
-
Click Apply to implement the changes, or OK to apply and exit.
-
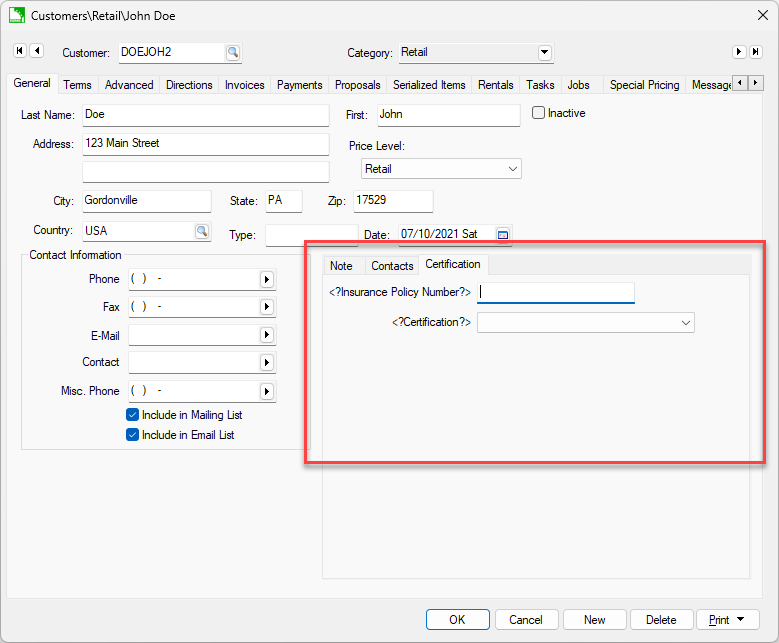
Review the customizations within the EBMS document. For example: open the customer's general tab and click on Certification page. The <?Label?> indicator indicates that the fields have not been created within the table.
These changes are active immediately for all users, but all users must exit EBMS before new and redefined custom fields can be applied to the database.
-
The Update process must be used to apply the changes to EBMS data. Review the Apply Changes section below to complete the customization of EBMS.
Apply Changes
The process to apply changes to the EBMS database often requires exclusive access. Schedule a time to run the following process when all users have logged out of EBMS. An extended amount of time of exclusive access may be required to apply changes.
The time required varies based on the size of the tables being altered.
To apply changes, complete the following steps:
-
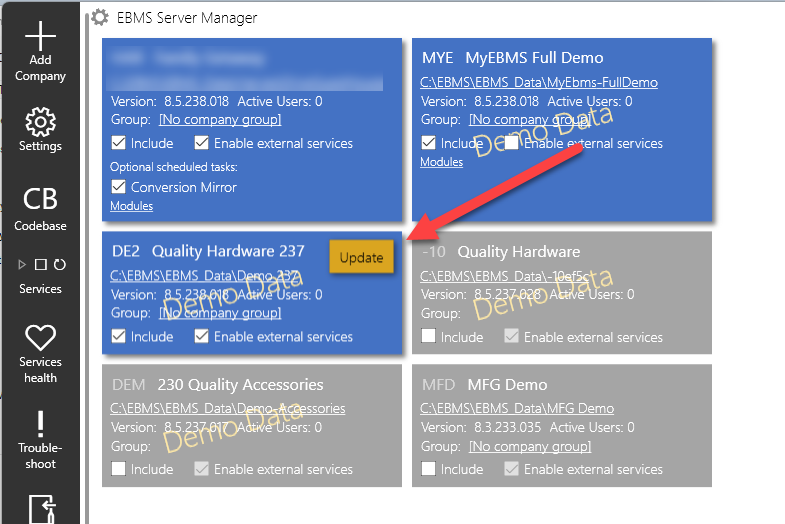
Verify that all users have exited EBMS. See Active User count within the data pane.
-
Launch the Update process to create the fields. Review Server Manager > Overview for instructions for running the update process.
-
Login to EBMS and verify changes have been applied.
Create New Fields
-
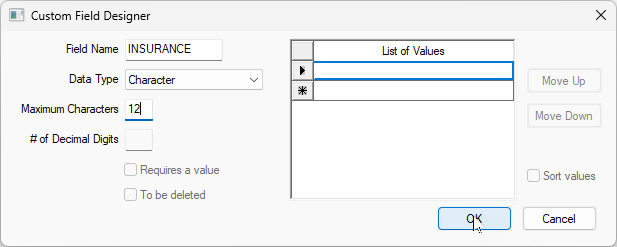
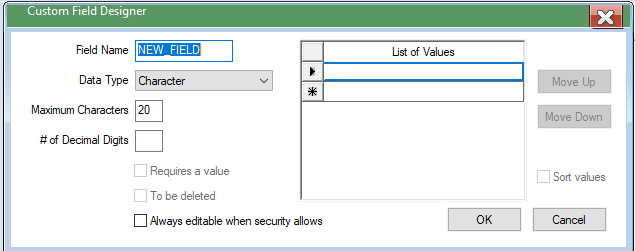
Field Name needs to be ten or less characters long.
-
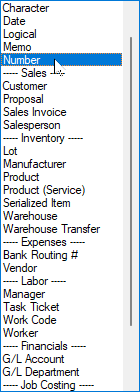
Select one of the following data types:
-
Character: a description, text, and other alphanumeric information
-
Date: a calendar date formatted as mm/dd/yyyy
-
Logical: to enable or disable
-
Number: any numeric value, including currency
-
Memo: a lengthy, multiline text
-
Sales > Customer: a customer ID, including a customer lookup option
-
Sales > Invoice: invoice number
-
Inventory > Serialized Item: a serial number of an inventory item
-
And many others as shown below:
-
Maximum Characters applies to Character and Number field data types.
-
Number of Decimal Digits can be set for Numeric fields.
-
Enable the Requires a Value for some standard EBMS data types.
-
Enable the To be Deleted to remove existing custom fields. Note that the fields will not be deleted until step the EBMS tables are update using EBMS Server Manager.
-
Only enable Always editable when security allows for fields that should be editable even when a document is processed or closed.
-
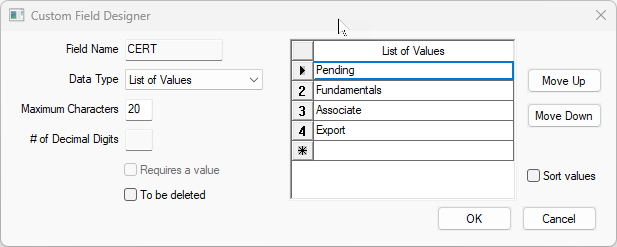
Select List of Values data type to show a drop down of values.
-
Enable Sort Values to sort the list of values.
Show Additional Fields in MyEBMS
Additional fields can be added to a MyEBMS app. Field options include existing EBMS fields and custom user-defined fields. For this example, custom fields were added to MyCustomers using a custom Route tab.
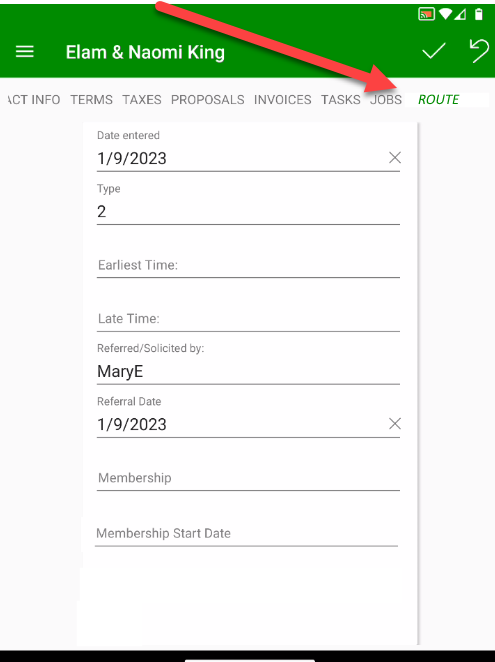
Note that the same customer fields are added to the custom Route tab within EBMS.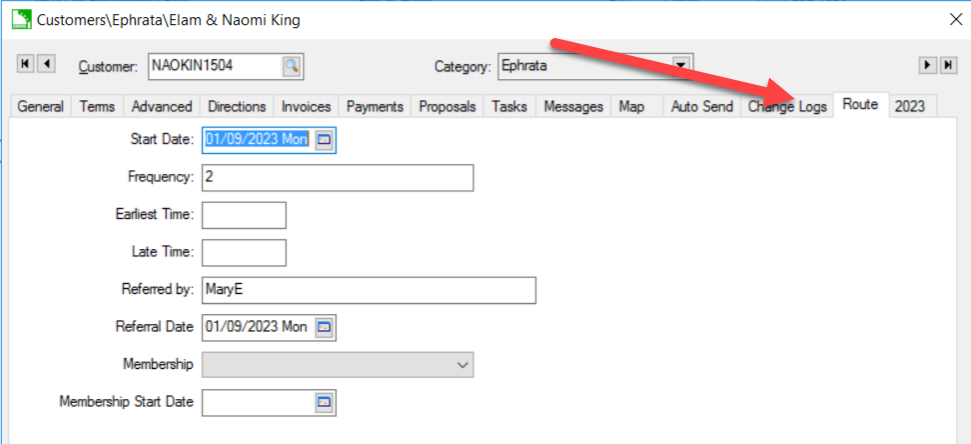
Refer to the beginning of this section for instructions to configure this custom tab (Page Name) within the Customer dialog.
Review EBMS Tables and Fields for instructions to locate the file and field names.