The Inventory Tax Groups shown above are the standard groups shipped with EBMS. These groups can only be changed if the Advanced Sales Tax module has been installed. Review [Main] Server Manager > Optional Modules if the Advanced Sales Tax module must be added.
It is very important that all the tax rate methods are setup before continuing with tax groups:
Attach the TaxJar SmartCalc tool to determine sales tax rates: Review TaxJar > Configuring EBMS to use TaxJar Tax Rates for setup instructions.
Enter tax rates into EBMS: Review Establishing Tax Rates for more details on creating rates within EBMS.
Click on the Non-Taxable Tax Group if it exists to replace this group with multiple exempt or reduced tax rate groups.
Select Edit > New
from the main EBMS menu to launch the New
Sales Tax Group wizard as shown above.
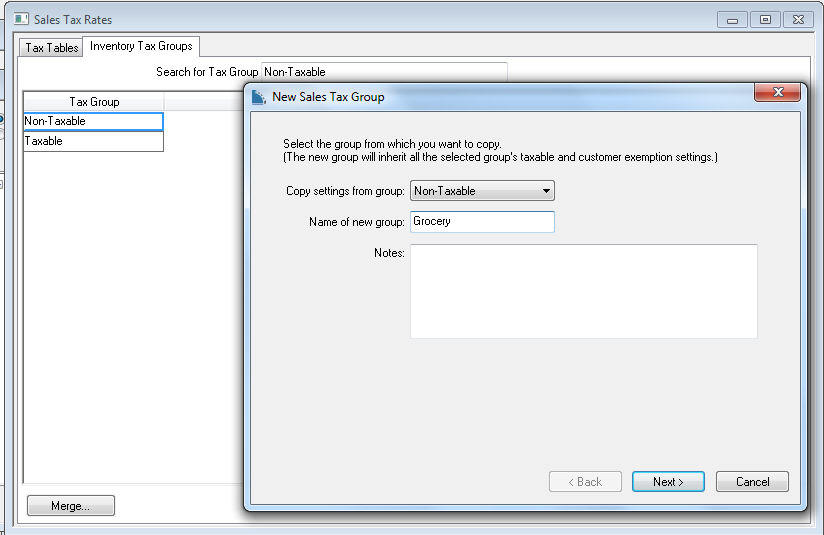
Select the Non-Taxable option from the Copy Settings from Group drop down options as shown above.
Enter the Name of New Group
label. Use the TaxJar catagory label for the new inventory
tax group label even if TaxJar is not being used. Reviewhttps://developers.taxjar.com/api/reference/#get-list-tax-categories
for a current category list. Add only the tax groups that apply to
the products sold at the company. Consider all the
company's state sales tax nexus. For example:
Other taxable:- The group that is used for standard taxable product
groups
Prepared Foods and Sodas group would not be required to be separate
inventory tax groups since the rates are the same for all 4 tax jurisdictions.
Groceries requires a separate group since rates are lower or groceries
are exempt.
Clothing requires a sperate group because of the PA exemption.
Inventory Tax Group |
PA rate |
NJ rate |
VA - local rate |
VA - State Rate |
|
| Other taxable | No code |
6% | 7% | 1% | 4% |
| Prepared Foods | 41000 |
6% | 7% | 1% | 4% |
| Sodas | 40050 |
6% | 7% | 1% | 4% |
| Groceries | 40030 |
0% (Exempt) | 7% | 1% |
1.50% |
| Clothing | 20010 |
0% (Exempt) | 7% | 1% | 4% |
Repair Services |
19007 |
6% | 7% | 1% | 4% |
.Enter the Name of new group
and click on the Next button
to continue to the following dialog

Enable the Taxable option for all items that are taxable for the new tax group. Disable the Taxable option for all taxes that exempt the items within the new Inventory Tax Group. This step can be ignored if the TaxJar SmartCalc service is being used to calculate sales tax rates. Click Finish to create new group.
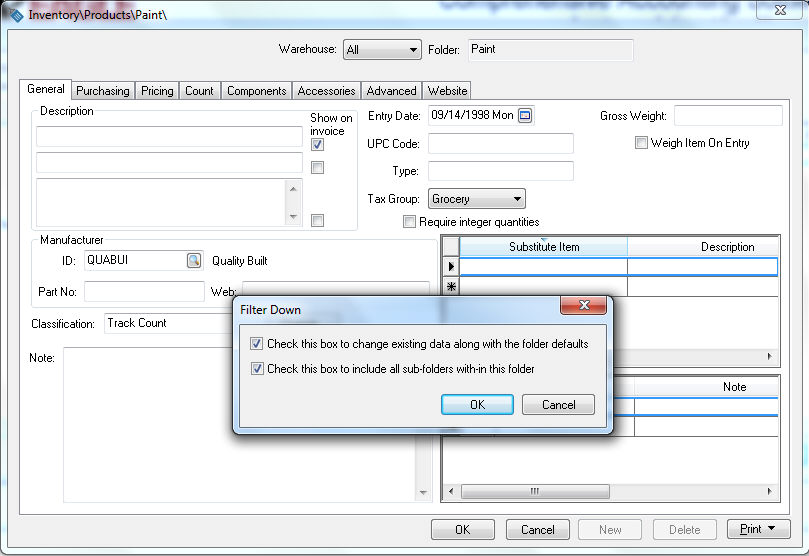
Relabel or make the Non-Taxable group inactive since it was
divided to clarify the original inventory group by double clicking
on the original Inventory Tax Group,
clicking on the General tab,
and changing the Tax Group
label.
Inventory groups should be clearly labeled to avoid confusion when
identifying the tax group within the inventory system.
Open the new Inventory Tax
Group from the Tax Group
list by double clocking on the Grocery record.
Click on the Taxability
tab to setup EBMS taxable rates. This step (#9) and #10 can
be ignored if the TaxJar SmartCalc
service is being used to calculate sales tax rates

Select the proper taxable switch from the following three options:
Select This group is taxable for all the taxes in the selected folder option to make the current Inventory Tax Group taxable for all tax rates/jurisdictions. Set the minimum unit price if sales tax is not applicable until the unit price of the item is greater than the If the unit price is greater than value.
Select The group is not taxable for any of the taxes in the selected folder option to make the current group non-taxable.
Select This group’s taxable settings vary for taxes in the selected folder option to set the taxable setting within each rate/jurisdiction. This option is used if the current Inventory Tax Group (Grocery) varies between states or jurisdictions. In the example above, Groceries are taxable in NJ but not in the PA jurisdictions. Set the minimum unit price if sales tax is not applicable until the unit price of the item is greater than the Price Greater Than value.
Click on the TaxJar tab to associate the appropriate TaxJar category if the TaxJar cloud based sales tax service subscription is enabled. Enter the corresponding TaxJar Category number as listed in https://developers.taxjar.com/api/reference/#get-list-tax-categories. Review Configuring EBMS to use TaxJar Tax Rates for more configuration requirements to use TaxJar to calculate taxes. This step can be ignored if EBMS is used to calculate sales taxes.
Click on the Inventory Item tab to view the items that are within the current Inventory Tax Group. Items cannot be added within this tab. A product’s Tax Group must be set within the inventory item’s General tab. Review the Product Catalog > Changing Inventory Items section of the Inventory documentation for more details on changing product information including the tax group.
Click OK to return to
the Inventory Tax Groups.
Repeat the steps above for each new Inventory Tax Group.