Install EBMS client on the shipping computer that contains the shipping software such as UPS World Ship or FedEx Shipping Manager.
EBMS will create an ODBC driver the first time a report is printed. Select File > Reports and print preview any report on the shipping computer if an EBMS report was never generated.
Login into MS Windows as an administrator.
Open Windows Control Panel select Administrative Tools > Data Sources (ODBC).
Click Add on
the System DSN or User DSN tab to
open the following dialog: Some 64 bit Machines require the 32bit ODBC Data Source Administrator found
in C:\Windows\SysWow64 folder\odbccad32.exe.
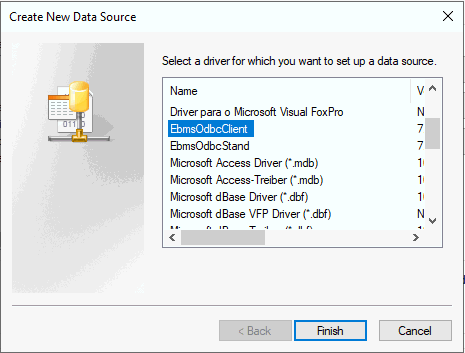
Select EbmsODBCClient for EBMS Client/Server as shown above
and click Finish.
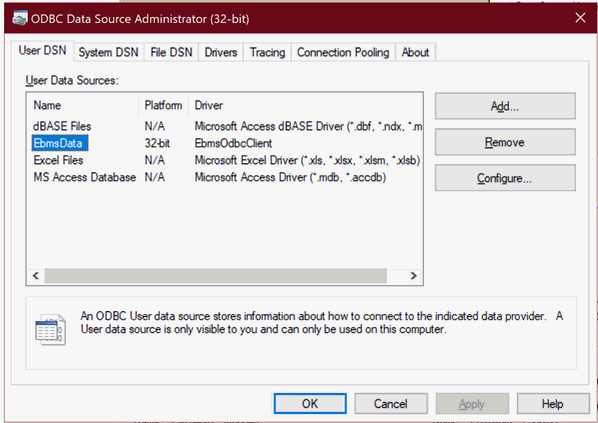
Click Configure to
configure the ODBC connection to open the following dialog:
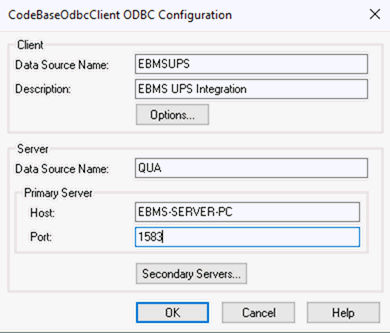
Enter a descriptive Data Source Name and Description: The example above is an ODBC configuration to connect to UPS WorldShip.
Enter the EBMS Data
Source Name. This 3 character code for the EBMS
data set can be identified within the File
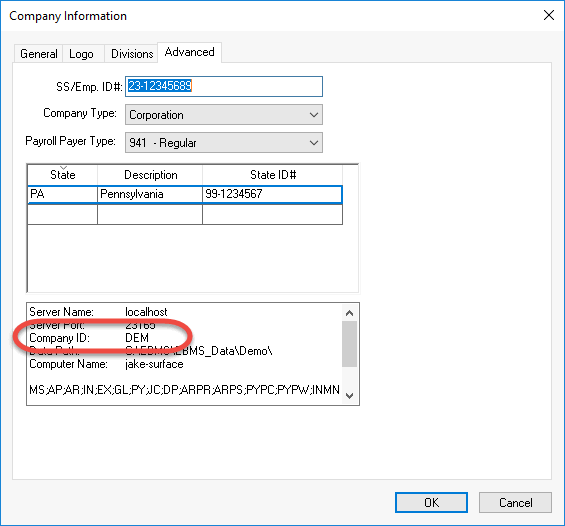
> Company Information > Advanced tab as shown below:
The Host is the computer name of the EBMS data server where your data resides.
The Port is normally set to default Port of 1583 and click OK.
Create a UPS user within EBMS: This shipping software user is tagged whenever the shipping software edits or adds information into EBMS. Review the [Main] Getting Started > Security > Creating Users and Assigning Rights for more details on creating users and setting passwords.
The following prompt will appear during the Configuration
of the Maps. Enter the following settings:
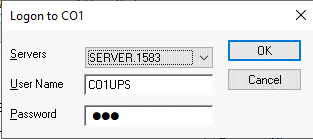
Enter the Servers setting.
Enter the EBMS login User Name and Password: The user name must be prefixed with the EBMS Company ID found in step #9 above. In the User Name example shown above, the CO1 represents the Company ID and the UPS text is the user name.