Click the Edit menu and select New. A new customer wizard will start taking you through the following steps:
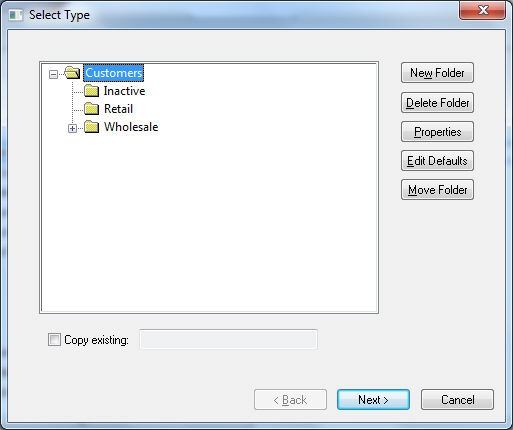
Highlight the folder in which you want to place the new customer. Turn the Copy existing switch ON if you wish to copy the new customer's information from another customer account. Review the Adding and Deleting Customer Folders section for more details on creating new folders.
Click the Next button to continue. The following window will appear:
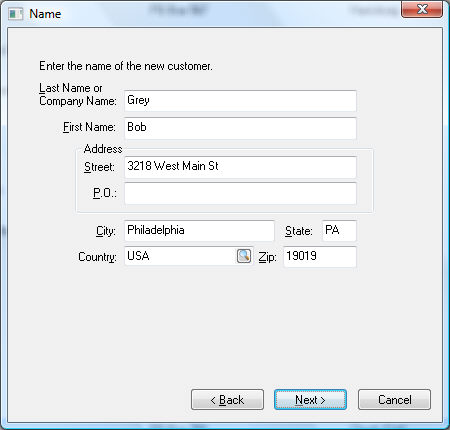
In the Name window, enter the customer information in the appropriate fields.
Enter the customer's name and address information in the appropriate fields. Enter a company's name in the Last Name entry field and let the First Name blank. EBMS searches a postal code database when the user enters a Zip code and populates the matching City, State, and Country settings. Review the Standard Features > Postal Code Database section in the main documentation for more details. Click Next to continue with the next wizard page.
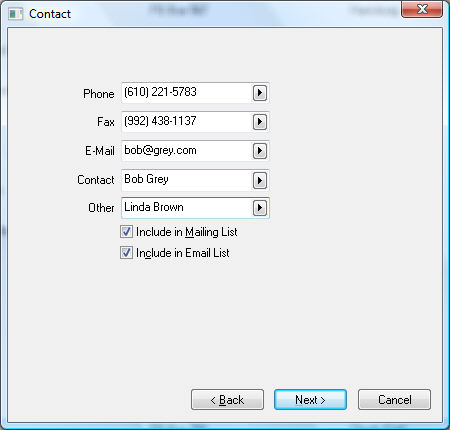
Enter the customer Contact information as requested. Click on the right arrow key to the right of the field and select the appropriate field label.
Enable the Include in Mailing List or/and the Include in Email List options if they apply. Click next to continue.
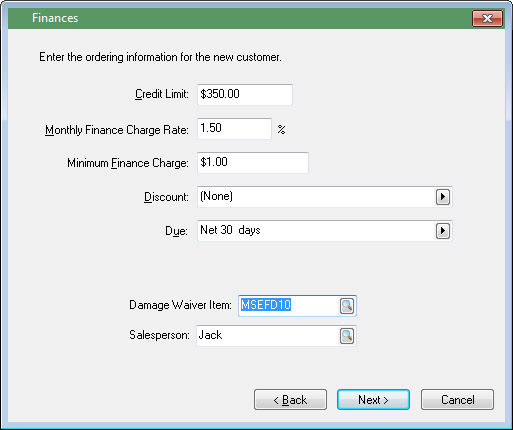
Enter the following customer Finances information.
-
C redit Limit: Enter the maximum credit for this customer. To extend unlimited credit, set the Credit Limit to zero.
-
Set the M onthly Finance Charge Rate that will be charged on overdue invoices. Many companies charge an overdue finance charge rate of 1% to 2% per month. This computes to a total of 12% to 24% annual rates. See the Printing Customer Statements section for more details on processing finance charges.
-
The Minimum F inance Charge amount is the minimum charge per invoice. If the calculated finance charge for any overdue invoice is less than the Minimum Finance Charge, the finance charge amount will equal the Minimum Charge. Zero this field if you do not wish to set a minimum charge amount.
-
Set the D iscount field to list the standard discount, if any, are allowed for this customer. To set the discount, perform the following two steps:
-
Set the proper discount template by clicking on the right arrow button to the right of the discount field. A drop-down list will display all the discount options. If no discounts are allowed for this customer, set the entry field to (none) and ignore the second step.
-
If you have set the discount template, you will need to enter the discount detail information. For example, if you set the option to "__ % paid in __ days" you must enter the discount percentage and the number of days in which the customer is allowed to take the discount.
-
-
Set the D u e terms for this customer. To set this customer as cash, select Cash as the Due setting. Otherwise set the Due terms, which requires two steps:
-
Set the template entry by clicking on the right arrow and selecting one of the options. If this field is set to "(none)," the customer will be allowed unlimited terms. The most common term template is "Net __ days." A "Collect on Delivery and Due on Receipt" term setting will cause the sales invoice to be processed as a charge invoice, but will set the due date as immediate.
-
The template may require term details such as a date or number of days. For example, if the "Net __ days" template is selected, the exact number of days must be set to complete due date terms.
-
-
Enter the Damage Waiver Item.
-
Enter the Salesperson.
Click the Next button to continue to the next page of the wizard.
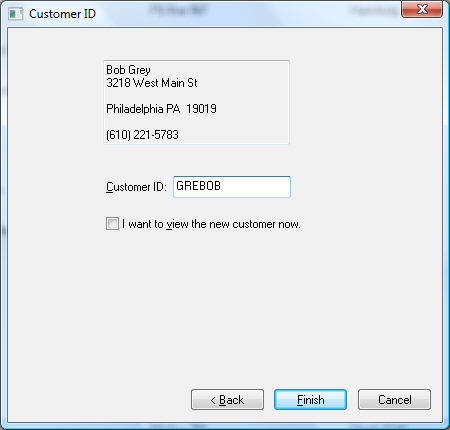
Enter the Customer ID. This code is required to be unique to a specific customer. This identification code is used throughout the entire accounting system for all transactions associated with this customer (changing the customer ID is a lengthy process; plan ahead and utilize an ID that is satisfactory). Example: Customer Name Martin's Auto Body could have a Customer ID of MARAUT. John Roland may have a Customer ID code of ROLJOH. Review the Creating and Changing IDs section for more details.
Enable the I want to view the new customer now option to immediately open the customer record for further editing or review.
Click Finish to create the new customer or Cancel to ignore new entries.