Cash Drawer
The EBMS system supports serial and USB cash drawers. The cash
drawer can be configured to open when a cash sale is processed within
the sales order window or the POS software. complete the following
steps to install the cash drawer to a computer with EBMS installed:
- Connect the power cable to the cash drawer. Directions are
in the booklet that comes with the cash drawer. This install
step will require a screwdriver.
Connect the cash drawer to the USB to Serial Adapter and then
plug the USB into the POS station?
Install the driver found here: https://eshcomputer.sharepoint.com/:f:/s/SolutionsGroup2/EjJWsKIt2WVEiG0hG9OQzjIBwAJmGNFpZ4wvCPwm8IEmLA?e=DtJNgJ
Open Device Manager and note the COM port that is created.
- Open the following EBMS Devices
tab within the computer that is attached to a cash drawer. Select
from the main EBMS menu
and click on the Device tab
as shown below:
- Select the Connect to Serial Port
option when the cash drawer is connected to a printer or other device.
Set the following Control String
settings:
^G for
MMG brand drawers
AA for
most other cash drawers
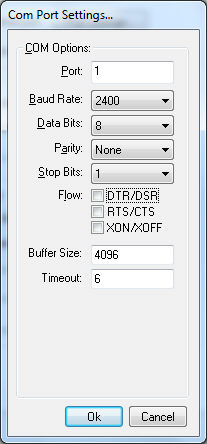
- Click Port Settings and set the following
serial port settings:
- Click Ok and test by opening an invoice
and selecting
from the invoice menu.
NOTE that all the settings within the Devices
tab of Sales > Options are
stored within the MS Windows registry of each individual computer.