Creating Task Groups
The
task group feature within the search view is a powerful tool to organize
tasks and work orders in a convenient manner. Click on the icon to enable the group option. Disable this option to enhance performance
if the query includes a large number of records. The group feature requires
the system to load all records into memory before displaying the information.
A virtual list is utilized if the group option is disabled. Records within
a virtual list are not loaded into RAM memory until the information is
displayed.
icon to enable the group option. Disable this option to enhance performance
if the query includes a large number of records. The group feature requires
the system to load all records into memory before displaying the information.
A virtual list is utilized if the group option is disabled. Records within
a virtual list are not loaded into RAM memory until the information is
displayed.
The
task module groups information within multiple user-defined levels. This
feature gives the user many display options within a specific view tab.
For example, the Group option in the task list below was selected to schedule
an employee. The Employee & Due Date
setting groups the task by Employee ID, Past/Today/Future
setting, and Date.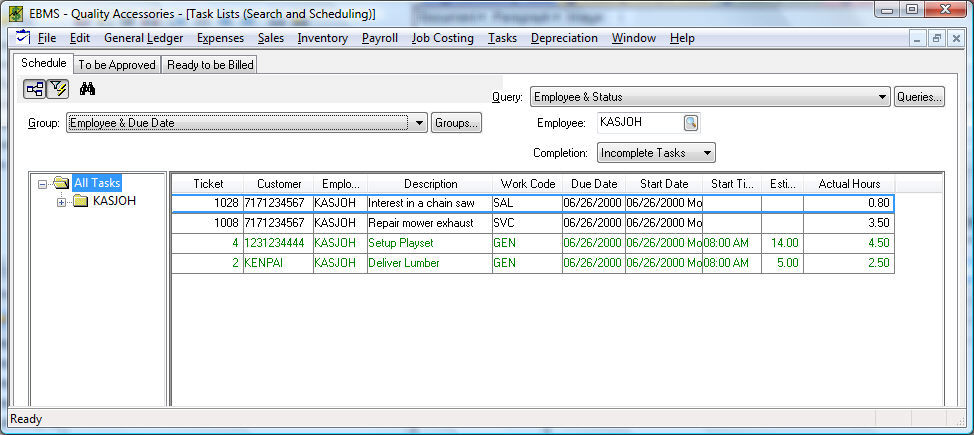
Folder
groups will appear only if a task exists within that group or date. Note
the No Due Date folder in the list above. This grouping is useful to identify
tasks with no due date. Create additional tab views if additional
lists such as pending tasks, tasks that are on hold waiting for parts,
or completed task are needed. Open a task by double-clicking on
the task. The Schedule entries
are found within the Schedule
tab of the task.
Click
on the Groups button to change
or edit a group setting.
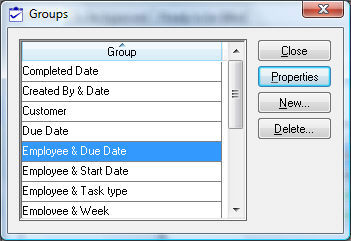
Select
a new group and click the Close
button to select a new group.
Click
on the Properties button to view
or edit the group settings as shown below:
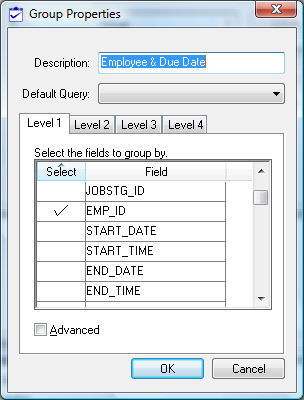
The
group Description describes the
grouping.
The
Default Query setting allows the
user to associate a query setting to the group. This option is left blank
if the Group and Query
settings are independent of one another. Review the Creating
Queries section for more details on queries.
The
Employee & Due Date example
contains three levels:
Check
one or more of the options within the list to identify a field within
the first level of the group. The selected field -
EMP_ID in the example shown above, groups the first level of the
task view by the employee id. Review the Standard
Features > Advanced Query Options section in the Main documentation
for details on identifying a field name.
Click
on the Level 2 tab as shown below:
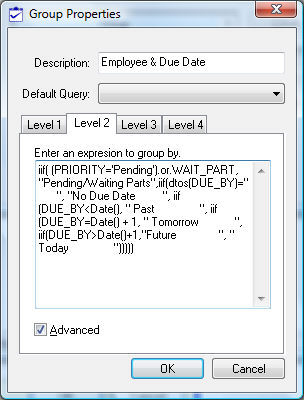
The
Level 2 grouping option is using
Advanced code to group the second
level. The second level is not identified by a single field or two but
is created using programming code as sown below. The Advanced
option is enabled to change the grouping option from a field list to programming
code. This code is similar to the advanced query code explained in the
Standard
Features > Advanced Query Options section of the main manual.
Click
on the Level 3 tab as shown below:
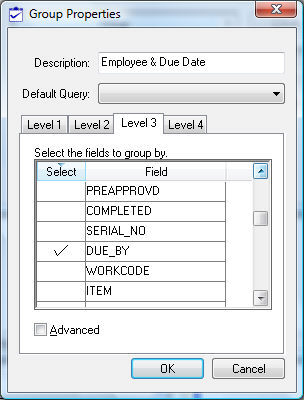
Configure
the Level 3 tab of the group by
selecting the DUE_BY field. You
may need to scroll to find the selected field within the group since the
task record consists of a large number of fields.
The
last level (Level 4 in example
above) always contains a list with no selections. A new unselected level
will appear each time fields are selected within the "last"
tab.