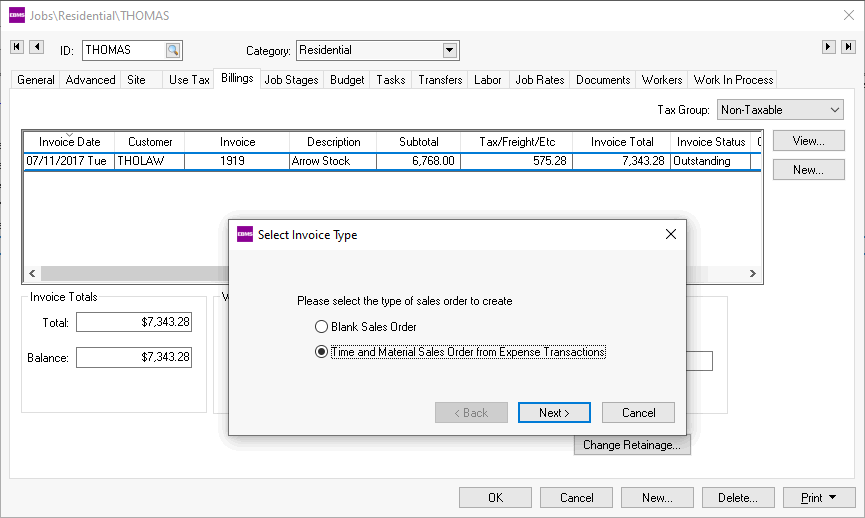
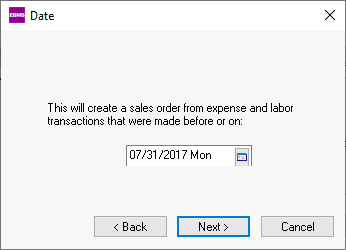
Enter the date that is to be used to scan
transactions. If this T&M billing
is for the end of last month, enter the last day of last month in
the date field. Click on the Next
button to continue.
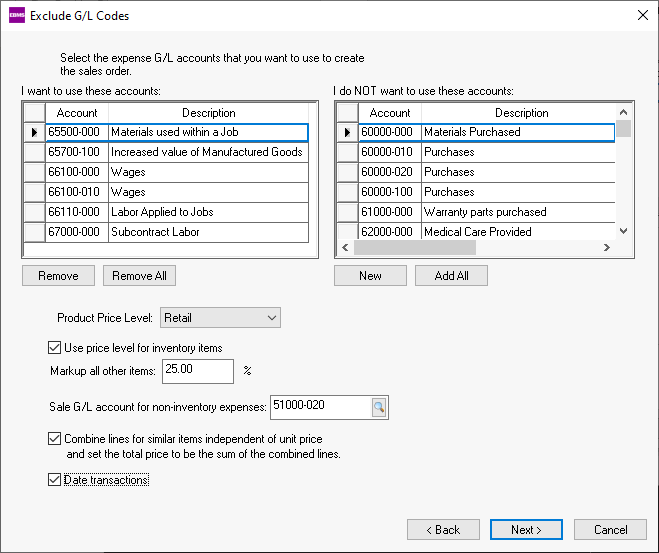
All general ledger accounts
that are identified as Direct
Job Cost Accounts will be listed. Go to
>
Chart of Accounts > Advanced to identify the Direct
Job Cost Accounts. Note that all accounts
will be listed if the option is turned
OFF.
Highlight an account within the include list and press the Remove button to move an account to the ignore list. If you wish to move all accounts from the include list click the Remove All button. If you wish to include an account that is listed in the right window and has been ignored, click the Add button.
Click the switch to the left of the Use price level for inventory items option ON to use a specific price level for all inventory items. Click the option OFF if you wish to markup ALL items (including inventory items) based on a percentage rate.
Enter the Markup percentage rate to be used for all other items such as non-inventory materials. If the Use price level for inventory items switch is OFF all inventory will be priced using the Markup all other items percentage. This markup value will not affect any labor costs.
Enter the sales general ledger account that is used on the sales order for product that was not applied to the job using a product code. Use a revenue GL account that is used for general job billings for T&M materials.
Enable the Combine lines... option to combine redundant lines that contain the same inventory code. Note that the unit price will be the average product price.
Enable the Date Transactions option to group materials by date and place a date record to label the group. See example in the sales order below.
Click on the Next
button to continue to the next page:
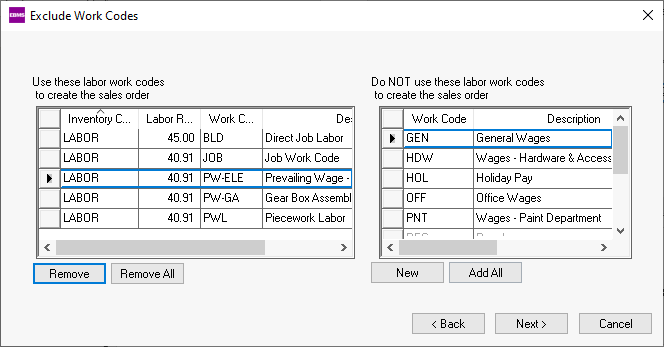
All labor work codes that should be billed to the customer must be displayed in the left window and all the work codes to ignore should appear on the right side. Highlight any work code on the include list and click on the Remove button to move the work code to the ignore list in the right window. Highlight and click the Add button to move a work code from the ignore list back to the left window.
All work codes displayed on the include list
must also contain a Labor Rate. Enter the unit Labor
Rate used to bill a customer. If the labor
for this T&M job is billed at the
same rate, enter the rate within each work code. Click the
Next
button to continue.
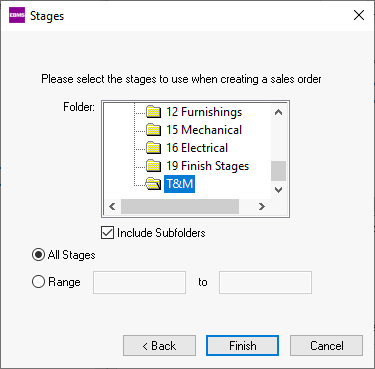
Select the root folder to select all stages or select a sub-folder. Example: Select T&M to only process transactions within stages in the T&M folder.
Select the All
Stages option to invoice all expenses. Select
the second option and set the range of stages to scan only the expenses
allocated to a limited list of stages. This option is useful to invoice
the customer for a specific stage. Click Next
or Finish
button to continue. The following dialog will only
appear if an existing sales order exists.
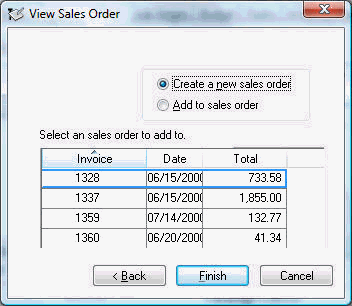
A new billing can be added to either an existing sales order or a new sales-order. To Create a new sales order select the first option; select the second option to Add to sales order and choose the desired sales order to append to an existing order.
Click the Finish
button to add transactions to a sales order and
open the sales order.

Note the following results on the sales order:
Inventory items should NOT contain product codes. Previously purchased product or inventory transferred to a job should be listed but the product codes should not be listed.
WARNING: Do not use an inventory item code on an invoice for an item that was previously transferred to a job using the Job Cost > Transfer window. This would cause the inventory count to be applied to the job twice, once when it was transferred to a job and again at the time it was sold.Product may be combined into a single line averaging the unit price of the materials applied to the job. The combining of lines is based on the option on the 2nd wizard page. See step #8.
Product will be grouped by date if the Date Transaction option was enabled in step #9.
Pricing is based on either the inventory pricing or the specified markup within the wizard.
Labor will be listed based on the service codes associated with each work code.
Delete the sales order if mistakes were detected and the wizard must be run again. The wizard can be activated again to create another sales order if the transactions are not marked as processed in the next step.
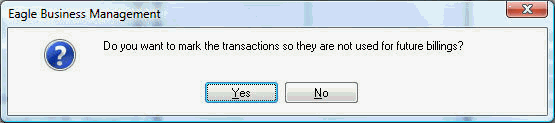
- YES to mark the transactions as billed so they will not appear when the wizard creates future billings for a job. This selection should be used if the sales order that was created or appended is correct.
- Click NO if you wish to run the wizard again and ignore the current sales order. THE TRANSACTIONS THAT WERE CREATED WITHIN THE SALES ORDER WILL NOT BE DELETED by selecting NO. The sales order must be deleted by selecting File > Delete from the sales order menu. If the transactions were appended to an existing sales order, the new sales order lines must be deleted individually.