Configuring EDI Between EBMS Companies
The method
used to create an EDI relationship between a customer in one company and
a vendor in the other. This relationship identifies the same company
but in different roles; a vendor in the customer's company and a customer
in the vendor's company. This relationship creates a seamless
link between the two ERP systems.
A typical use for the standard EDI features is to create a document
such as a purchase order within EBMS in one company and importing it as
a sales order in another company running EBMS. When used in combination
with the Task Scheduler App and Batch Processing, purchase orders created
in company A can automatically be communicated within company B for fulfillment
as sales orders.
Complete the following steps to configure EDI to communicate a purchase
order in one company to a sales order in a 2nd EBMS company.
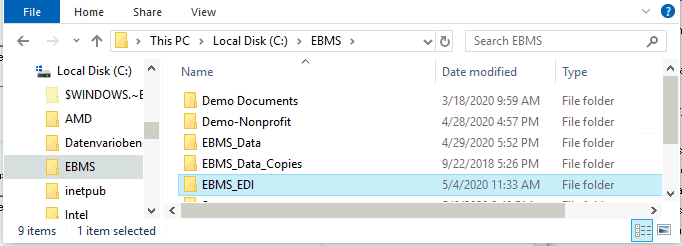
- Create a staging folder on the sever that is accessible from both
company data sets. This is the location of the export XML file
that the 2nd company will access to import. For example,
create a subfolder \EBMS\EBMS-EDI folder as shown below.
Verify that the optional EDI module is installed on both EBMS
data sets. Review [Main] Server Manager > Optional Modules
for instructions to add a feature such as EDI
Framework module. The example below will reference the
following demo companies:
Quality Hardware: QH will purchase product from QA
who is referenced as a vendor.
Quality Accessories:QA will sell product to QH who is referenced
as a customer.
Open the QH company which is initiating the transaction by creating
a purchase order. Create a vendor referencing Quality Accessories
(QA) if this vendor record does not already exist. Review Vendors > Adding a
New Vendor for instructions to create a new vender record.
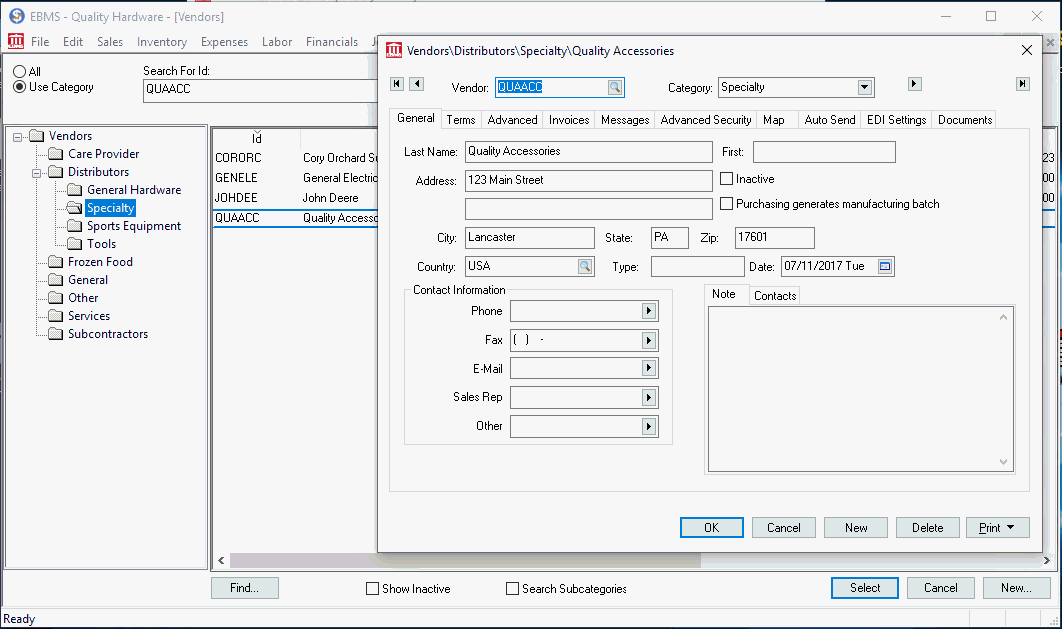
Click on the EDI Settings tab as
shown below:
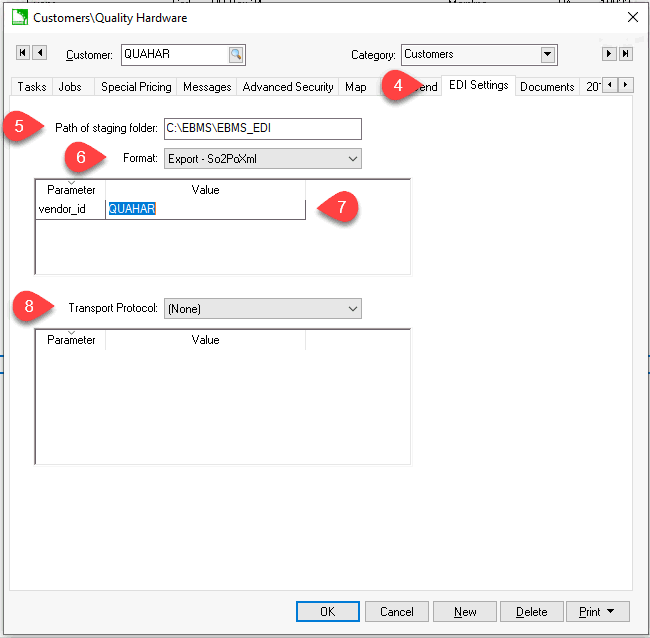
Set the Path of Staging Folder that
was created in step #1.
- Set the EDI Format option to Export
- So2PoXML as shown above. Review EDI
Formats for more option details.
- Enter the customer ID that identifies Quality Hardware QH within
the Quality Accessories QA's data set into the vendor_id's
Value setting.
- The Transport Protocol should be set
to [None] since this data is being shared within the local network.
Click OK to save.
- Open the QA company and create a customer referencing Quality Hardware
(QH) as a customer if it does not already exist. Review [Sales]
Customers > Adding a New Customer for instructions to create
a new customer record.
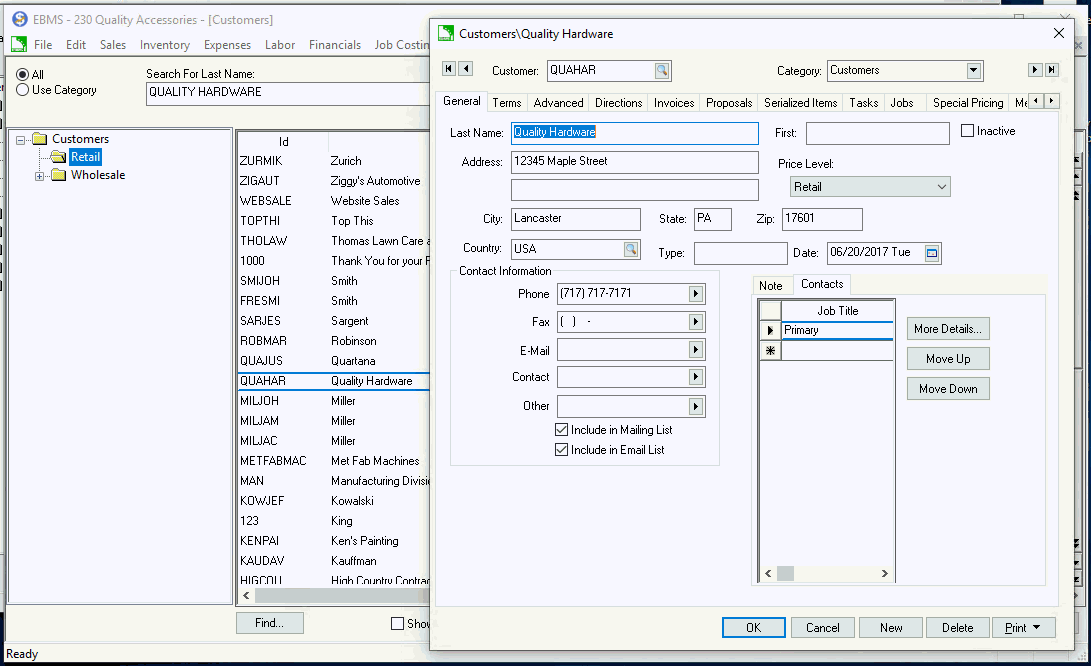
- Click on the EDI Settings tab of the
customer as shown below:
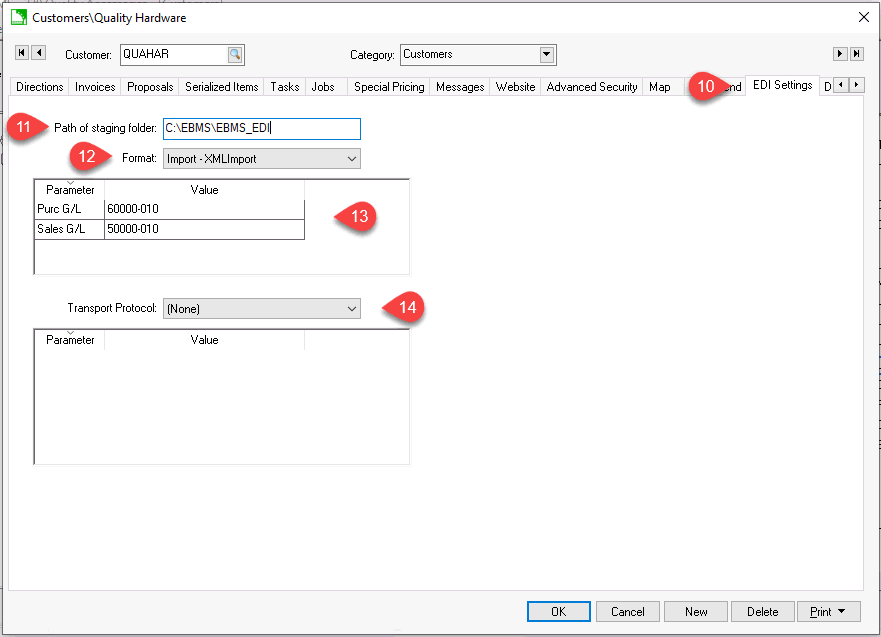
- Set the Path of Staging Folder that
was created in step #1.
- Select the EDI Format such as Import
- XMLImport to import the sales order into EBMS. Review
EDI Format for a list
of format options.
Configure the general ledger accounts and any other Parameters
needed within the imported sales order.
- The Transport Protocol should be set
to [None] since this data is being shared
within the local network. Click OK
to save.


