Test Mode
The test mode is an option to test the service without sending documents.
Complete the following steps to set the test mode.
- Go to from
the main EBMS menu Click on the Diagnostic
Settings tab as shown below:
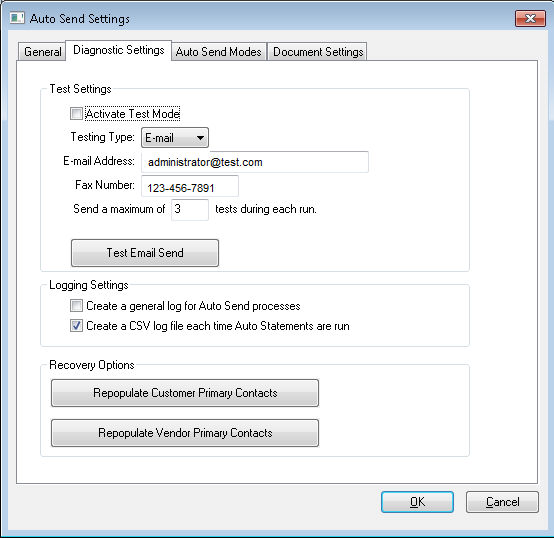
- Enable the Activate test mode
to put the Auto Send module into test module. During an Auto
Send module test, no documents will be e-mailed or faxed to the customer.
Instead all the documents will be sent from the Auto Send Module to
the contact information provided.
- Select the Testing Type.
This setting determines if the documents are sent to
the set e-mail or fax number. A maximum
number of tests during each run
can be set. A value of blank or zero will indicate no limit for
the test. Note that you can only test one mode at a time. The
mode is determined by the Testing
Type.
- Set the appropriate contact settings such as email or fax number.
- Set the maximum number of tests during each run in to the Send a maximum of __ tests during each run.
- The Logging Settings are
optional ways of recording a log of the documents that were sent including
the status of the send.
- Enable the Create a general
log for Auto Send processes option to create a log that
will record each module function. This is useful in identifying
a problem with the process. This option should be temporarily
enabled while testing the process and should not be enabled under
normal circumstances.
- Enable the Create a CSV log
file each time Auto Statements are run to create a Comma-Separated
Values (CSV) file when the Auto Statements process is run. This
log will contain all the send information. A new file will be
created for each run. This file can be used for diagnostic purposes.
The log files are found in the Export
Folder set within the general tab.
The Recovery Options repopulate the contact information from the General tab, within a customer or vendor record,
to the Primary field within the Contacts
tab. All previous Primary contact information
will be removed.