Assigning Default Landed Costs to an Item
A purchasing agent may wish to assign default landed costs to inventory
items so that the additional costs do not need to be entered each time
the item is purchased. Landed Cost adjustment types must be set up before
adding them to an inventory item. Review Cost
Adjustment Types section for more details on type setup.
Complete the steps to assign the landed cost adjustment to an inventory
item.
- Open an inventory item from the EBMS menu by selecting
Inventory > Product Catalog
from the main EBMS Menu.
- Open the desired inventory item and click on the Purchasing tab as show below:
- The Per Unit Adjustment
is set for individual Vendors.
Select the proper vendor line and click the Edit
Landed Costs button to open the following dialog:
- Complete the following landed cost adjustments for the selected
inventory item and vendor record:
- Select the Cost
Type ID from the available adjustment list. Review
the Cost Adjustment Types
section for instructions on changing this list.
- The Description
will be copied from the cost adjustment type list.
- The default landed cost adjustment amount can be set
based on a dollar value or a percentage. The Per
Main Unit Adjustment value shown above will add $2.25
for each Duct Tape unit purchased from
Vendor - BUSAME.
- The Per Main
Unit Adjustment can be calculated using a percentage
(%) by enabling
the % option.
- Repeat these steps for any additional landed cost adjustments.
Click OK to
return to the Vendor
purchasing list.
- Repeat the steps listed above for each additional vendor.
The Landed Cost adjustment costs
can be set for an entire group of items by filtering down the settings.
Complete the following steps to filter down the landed cost adjustments:
- Open the inventory item list by selecting Inventory
> Product Catalog from the EBMS Menu as shown below:
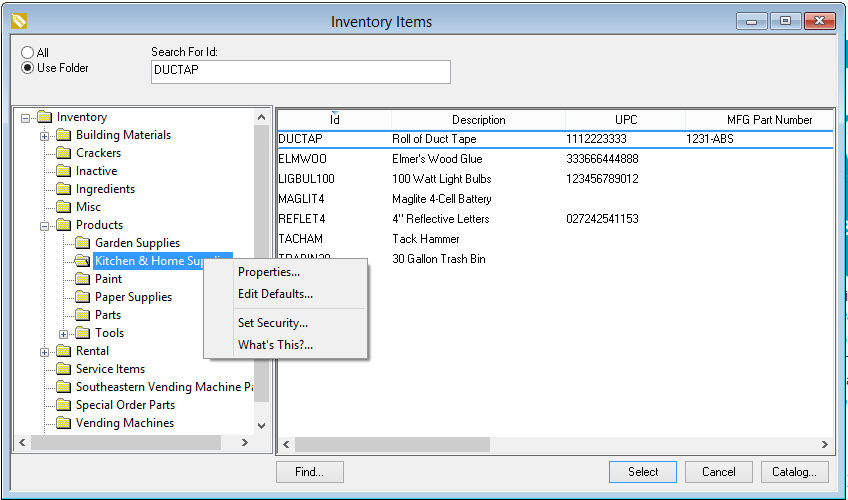
- Right click on the folder group to globally set the landed cost
adjustments for all the items.
- Click on the Edit
Defaults.. option from the context menu.
- Click on the Purchasing
tab as shown below to filter down the Vendor
ID to all items by completing the following steps:
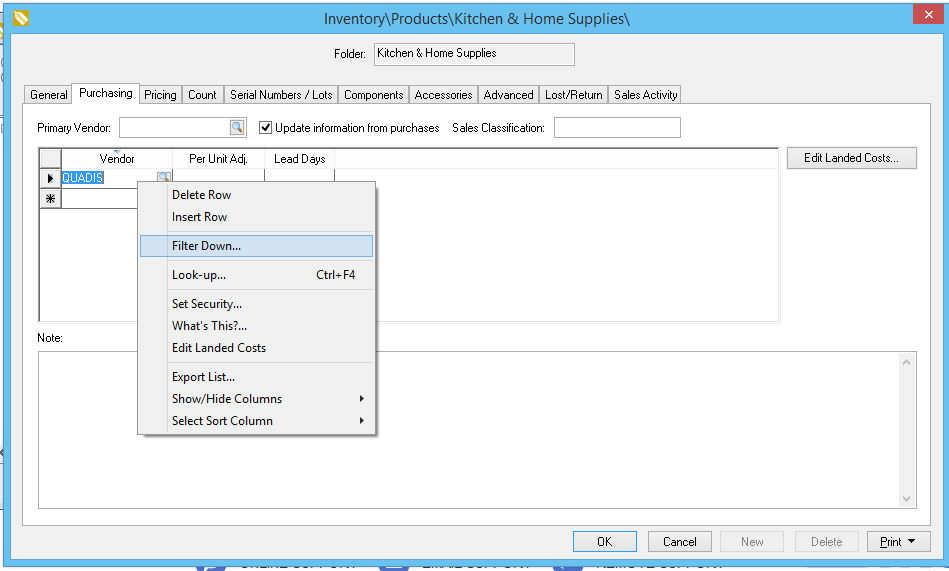
- Enter the Vendor
ID and then right click on the Vendor
ID record to filter down the Vendor
to all items within the folder. Note that this utility should
be used with caution.
- Click on the Filer
Down option on the context menu as shown above to
open the following dialog:
- Enable the first check box to add the Vendor
to the purchasing tab of all items within the folder and
click OK.
- Review the Filter
Down documentation within the main manual for more details
on the filter down feature.
- Filter down the landed cost adjustments for the selected
Vendor for all items
within the folder by completing the following steps:
- Select the Vendor
ID that was entered and filtered down in step #4
- Click on the Edit
Landed Costs button and enter the landed cost adjustment
details explained in the previous steps at the beginning of this
section.
- Right click on the landed cost adjustment section and
select Filter Down
from the context menu as shown below:
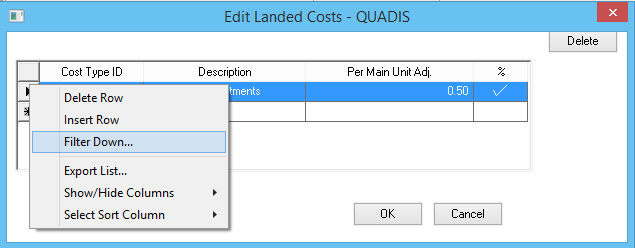
- The following dialog will appear:
- Verify that all settings are properly set. This utility should
be used with extreme caution.
- The first option should be enabled to filter down the landed
cost types to all existing inventory items within the selected
folder.
- The 2nd option on only be enabled if you wish to filter
down the landed cost types to all items within sub-folders.
This option should be disabled to only set the items within
the current folder.
- Enable the 3rd option to replace the existing cost types
with the new cost type list. This option has no effect if
no prior landed cost types were entered for any of the items
within the selected folder.
- Repeat steps 4 & 5 for each vendor.
Review the Adjusting
Landed Costs within a Purchase Order section to use the cost type
settings.