It is recommended that the EBMS software be installed on each workstation for performance reasons. Each workstation installation should be configured so the data path is directed toward a central data store. Complete the following steps to install EBMS on a local area network.
Complete a standard installation on a single workstation or windows server by following the instructions within the Installation Instructions section.
Before installing the software on additional workstations, complete the steps in the Creating a New Company section and enter a Data Path that is shared to the entire network. The Report Path should be stored in a central location as well so that all workstations have access to the same reports.
After the software has been installed and the new company data has been created, complete the following steps for each additional workstation.
Complete all the steps within Installation Instructions section.
Install the software on the local drive of each workstation.
Restart the computer and launch the EBMS software
Enter the administrator's name and password that was created at the initial installation. Set the Company option to New Company and press the OK button and the following dialog will appear:
If the following dialog does not match the user's screen, EBMS server has been installed. Review the Using the EBMS Server section for more details on the EBMS Server setup.
Switch the I want to connect to an existing company option ON and click the Next button.
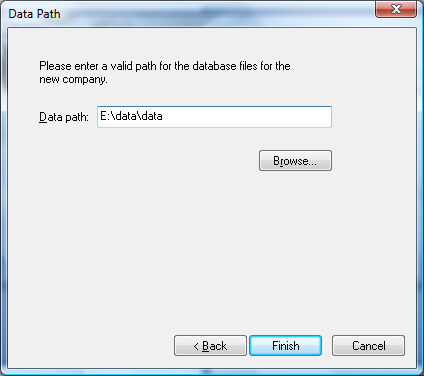
Click on the Browse button to select the Data Path of the data directory that was created on the initial install. This entry should contain a networked directory. Click Finish to complete the installation.
Repeat the workstation installation step for each workstation.