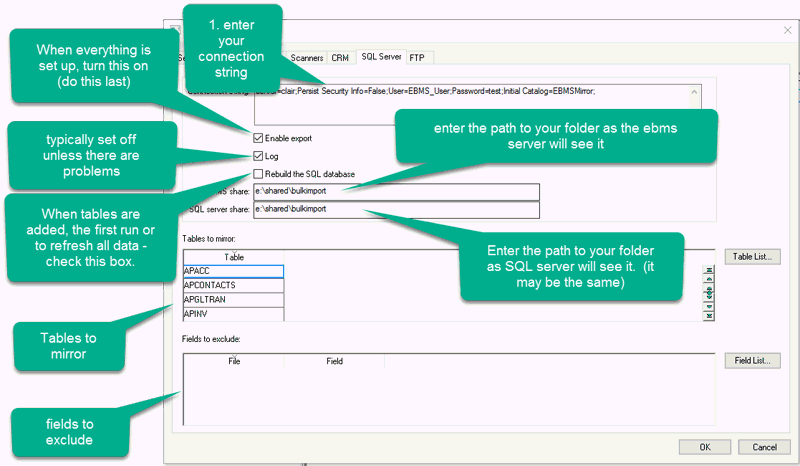
A setting within the EBMS Server Manager program, External Services, must be turned on for the SQL Mirror updates to the flow. Turn on External Services for the company or companies for which there is an SQL mirror.

EBMS needs to access the SQL database to perform both the Complete Upload and the continuous export. This SQL Server Connection string consists of the user and database information as created in the Configuring the SQL Server section.
Open and enter the following into the Connection String field:
server=[SQL Server Name];Persist Security Info=False;User=[Username];Password=[User password];Initial Catalog=[database name];
Replace the text in [ ] with the appropriate values. A string may look like the following when complete:
server=<SQLServer>;Persist Security Info=False;User=<ebms_user>;Password=<ebms>;Initial Catalog=<EBMSMirror>;

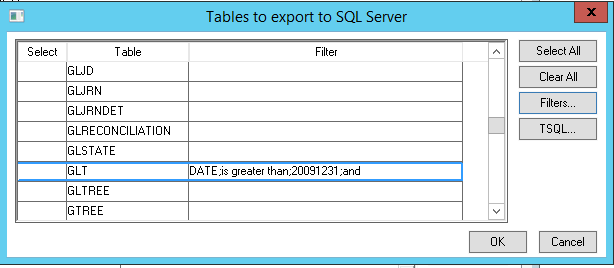
EBMS data tables must be individually selected as tables to mirror. Select by choosing Table List on the File > System Options > SQL Mirror dialog. In the Tables to export to SQL Server dialog, select those tables that are to be mirrored.

Each table can be filtered to reduce size using an Advanced Query. Visit the Standard Technical > Advanced Query Options section for instructions on these settings.

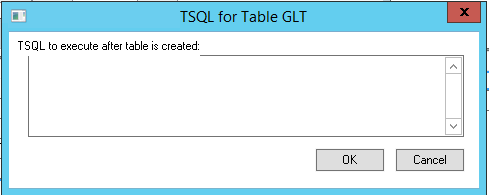
T-SQL statements may be configured in EBMS, if desired, and executed within the SQL database after the table has been created there. This is an advanced feature for which an understanding of SQL is critical.
Note: A Complete Upload is required after each change to the table list.
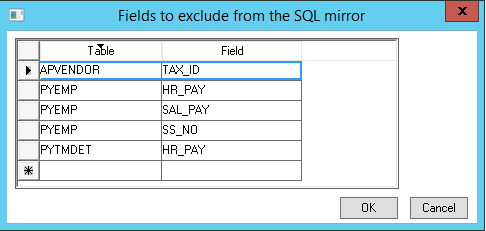
Certain tables may have sensitive information that should not be exported. Choose the table and fields to exclude in the Fields to exclude from the SQL Mirror dialog. Access this dialog by choosing Field List on the File > System Options > SQL Mirror dialog.

Note: A Complete Upload is required after each change to the field list.
After configuration, a bulk upload of data to the SQL Server is required. Turn on the Complete Upload option and close the dialog to initiate. EBMS will make copies of the tables selected for mirroring, convert them to .txt files, transfer those files to the shared folder on the SQL Server, and then convert them into SQL tables. Depending on data size this process may take several hours.
It is recommended that a Complete Upload be completed each time data structure changes, such as when adding or deleting a table or changing field exclusions.
EBMS will push any database changes to the SQL database every few seconds. Turn on the Enable Export option to start this process. It can be left on always for those companies for which an SQL database is configured and a mirror is desired.
Notes:
After changing the table list or the fields list, a Complete Upload is recommended.
Performing a Complete Upload will delete the SQL database tables and re-add them in SQL
If the system finds fields have been added or dropped in EBMS, it will drop and re-add the table in the SQL Mirror
If the system finds data problems in the mirror process, it will drop and re-add the table in the SQL mirror
Enable export will work as soon as it is checked and saved. It is advisable to double check the setup before turning it on.
Technical Information: Administrators may access the DBEXCHG.dbf EBMS database table to observe the SQL export files waiting to be exported. The SQL Mirror keeps track of the last record successfully sent and checks every few seconds to see if any new ones have been added.
Only use the Log option when troubleshooting. This will write a log to the Logs.dbf EBMS database table every time the export event is triggered, as well as increase the detail that is written to the Diagnostic logs accessible from the EBMS Server Manager.
Every time EBMS sends information to SQL a log of the event is written
to a text file. Administrators may monitor this detail by opening the
EBMS Server Manager program and choosing the View
Logs  option. The log
files found here are very helpful in determining the status of complete
uploads and export status.
Table: INWH bulk import to SQL failed. Cannot bulk load because the file "E:\Temp\bulkexport\INWH.txt" could not be opened. Operating system error code 5(Access is denied.).
Resolution: check folder security
Table does not exist
Resolution: check connection string in EBMS, check SQL server user permissions.