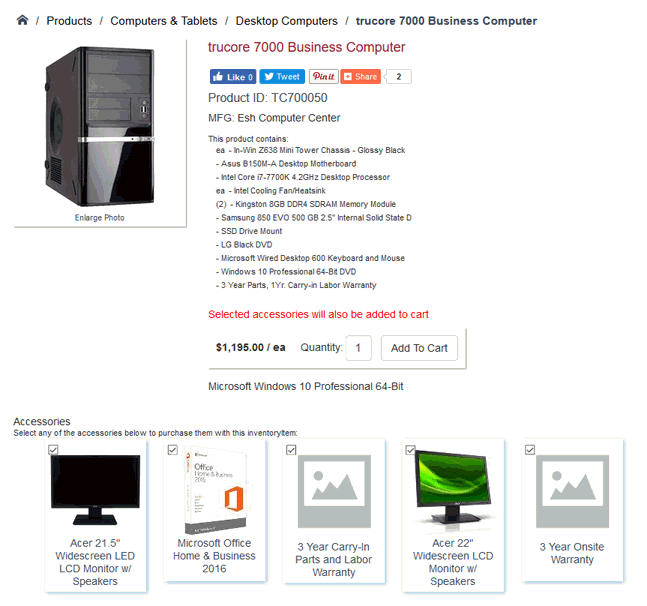
The components option within an ecommerce website is an excellent way to list assemblies, sets, and kits. An assembly kit is defined within EBMS as an inventory item that includes inventory components but the group is priced as a unit rather than as individual components.
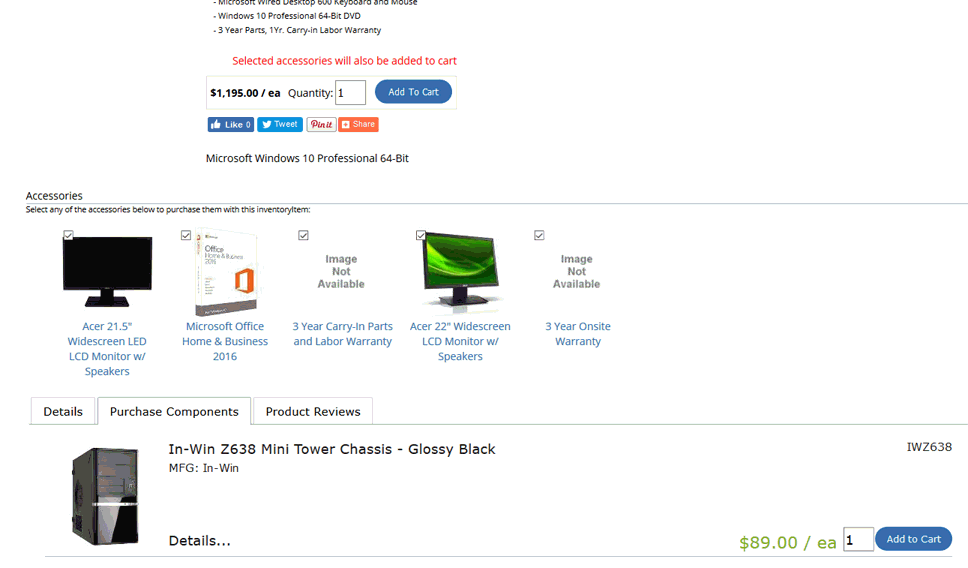
For example, in the following page a user can purchase an item with components:

Components are configured within a single inventory item.
Select Inventory > Product Catalog from the EBMS menu, and open an inventory item record. The main item in which the components are placed must be a non-track inventory item classified as No Count or Service.
Click on the Components tab. Enable the Assembly Kit option.
Review the Components and Accessories section within the Inventory manual for an overview on the component options.
Review the Components and Accessories > Adding Components to Create an Assembly Kit section within the Inventory manual for details on adding components to an item.
Review the Components and Accessories > Optional Components or Accessories section within the Inventory manual for details on adding optional component lists.
Component detail can be shown or hidden on the website.
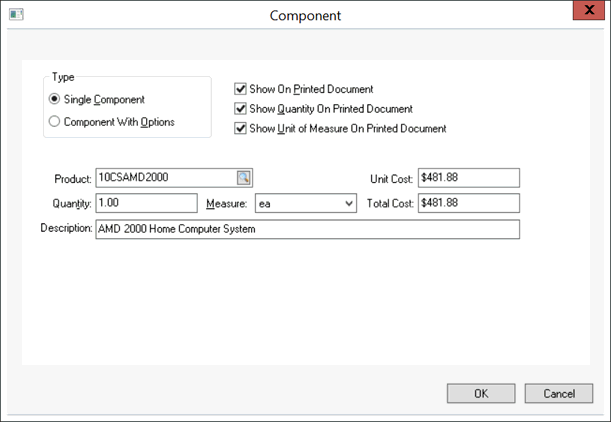
Select a component and click Properties.
Enable Show on Printed
Document, Show Quantity on Printed Document, and Show Unit of Measure on Printed Document
to display the Description, Quantity,
and Measure on the website.
Note: Enabling these options also shows the description on all
printed documents including invoices.
Repeat for each individual component in the item.
The last step is to enable the item to show on the website. Go to the Website tab of the item.
Enable Show on Website and enter additional details
The default /standard/admin
template is used unless components can also be purchased separately.
See the following section.
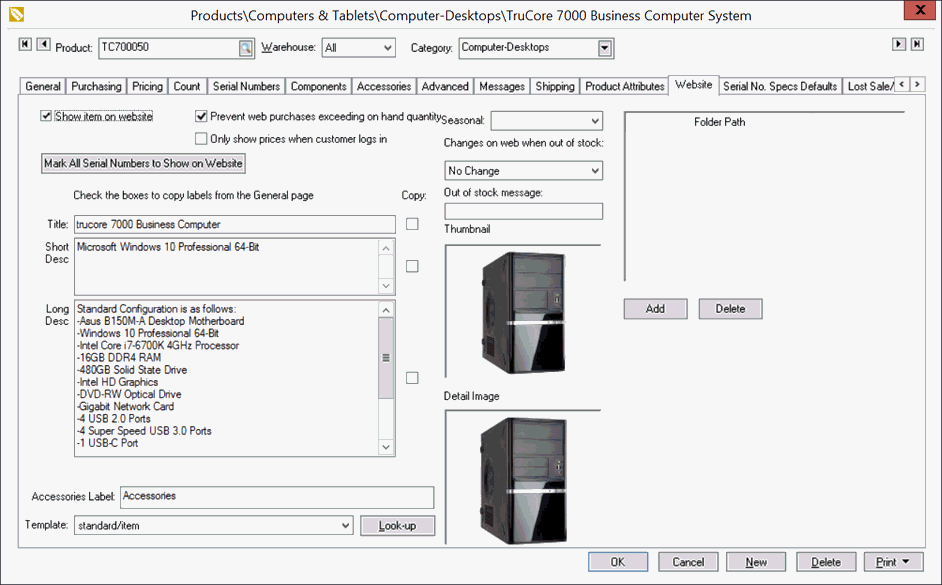
Review the Creating Website Content > Listing Products section for more details on adding detail and images to the item.
Individual components can also be listed to be purchased separately. For example: In a furniture set, a chair and table may also be able to be purchased individually. This is done by enabling all components to show on website and changing the item template.
Click on the Components tab as shown below. Each Component must be set to Show on Website.
Right click on each component and select Look Up.
Go to the Website tab
and enable Show on Website.
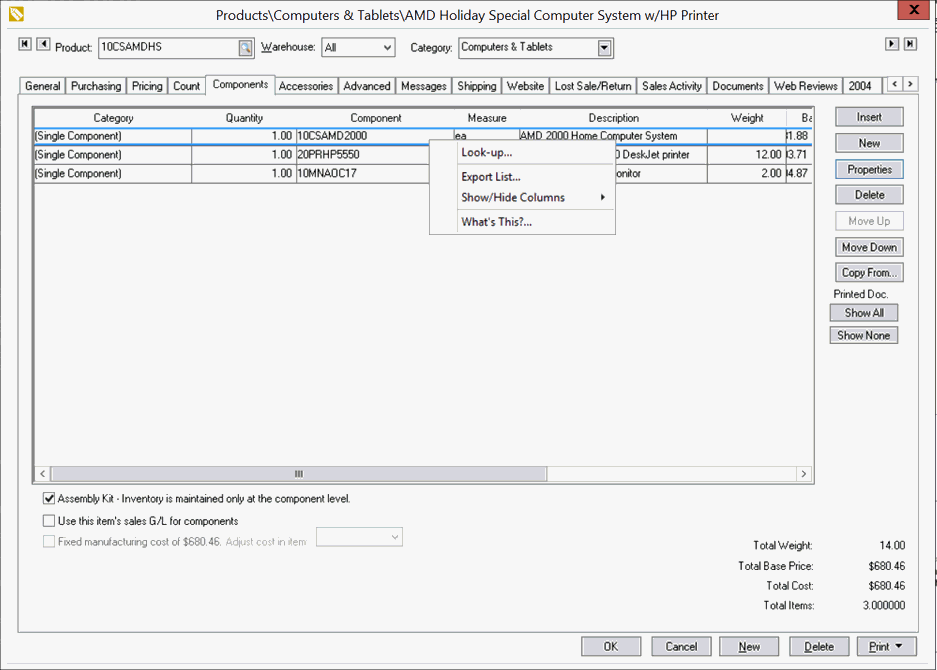
Repeat for each component that can be purchased separately.
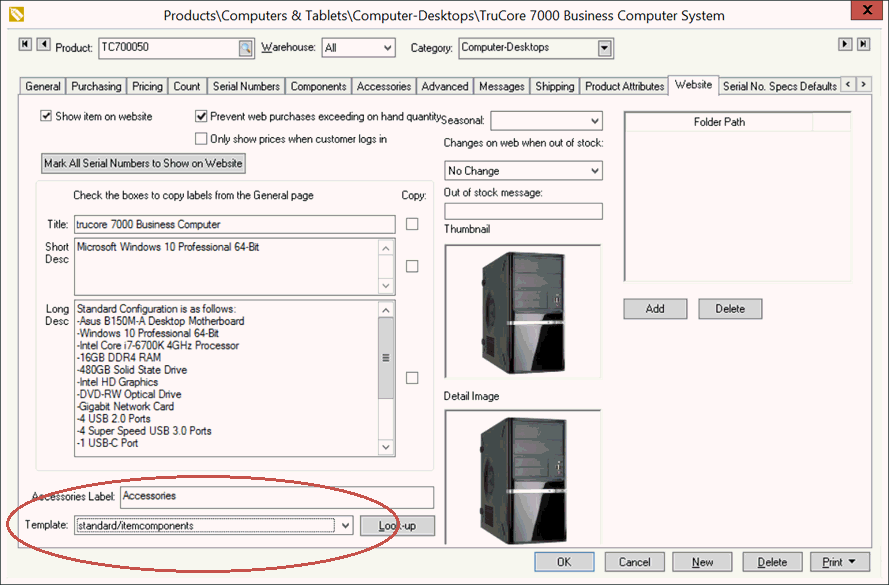
Go to the website tab of the item and select standard/itemcomponents
from the Template list. This
will allow the user to purchase components in the set as well as individually.
Each component set to show on website
will then be listed on a Purchase
Components tab of the item as shown below:
Review the Creating Website Content > Listing Products section for more details on adding detail and images to each component.