Opening New Pay Period
The first thing that is needed to process payroll is to establish Pay
Periods. Pay periods are an important part of organizing payroll within
EBMS. A pay period consists of both the pay period’s ending date and the
pay date. The pay period ending date is the last day of the pay period
while the pay date is the day that the paychecks are printed.
EXAMPLE: If the
last day of the pay week is on Saturday and the paychecks are printed
on the following Wednesday, the ending pay date for each pay period would
be Saturday’s date and the pay date would be the following Wednesday’s
date.
Unlike the checks within accounts payable where the checks can be processed
with any date within the fiscal year, the paychecks must be dated with
the pay period’s pay date. A pay period MUST be created before any timecards
can be entered.
A pay period should be opened before the first day of the pay period
to allow users to clock in using various time collection tools. A
pay period can be opened weeks or even months in advanced within the same
pay year.
EBMS allows many payroll periods to be opened at the same time. Only
one payroll period can be active at one time, however. To choose which
one is currently active, and therefore is the default for timecard entry,
take the following steps:
Go
to Labor > Set Pay Period,
and the following window will appear:
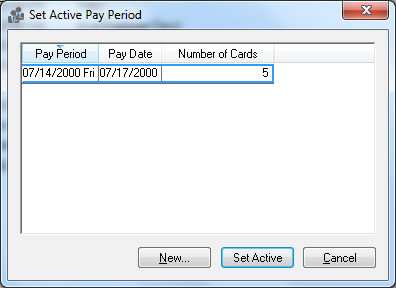
If
the desired pay period has already been created, highlight the pay
period and click the Set Active
button. Otherwise, click the New
button to create a new pay period. The following dialog will appear
if you click New.

Enter
a new Pay Period date. This date must be
unique. This is the ending date of the pay period. If you wish to
run two payrolls within the same week for bonus pay purposes or some
other reason, the pay period date must be two different dates within
the same week.
Enter
the Pay Date that the paychecks will be printed.
If you print a paycheck or group of paychecks before the pay date,
which is possible, the checks will be post dated with this date.
Only
enable the Bonus Pay Period
option for bonus payrolls. Review the Processing
Payroll - Advanced > Separate Bonus Pay Periods section for
more details on bonus pay periods.
Copying Timecards from Previous Pay
Periods
To Copy Timecards from Previous Pay
Period click on the check box and the dialog will expand with the
following fields:
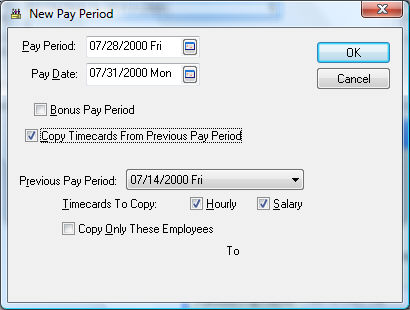
Set
the Previous Pay Period from which the
timecards are to be copied.
Check
the Hourly check box to copy all timecards
except for salaried employees or select Salary
to copy timecards of salaried employees. To copy all the timecards,
click both check boxes.
To
only copy the timecards from a range of employees click the Copy only these Employees check box and
enter the range of employees.
Click the OK
button to create the new pay period or to save the new active setting
or click Cancel to abort any changes.